Phone number authentication is an excellent way to allow users to sign in without remembering passwords. It also enhances security by ensuring that users have access to a real, active phone number.
In this guide, we'll break down every piece of code, making it super easy for beginners to understand.
Why Phone Authentication Over Email/Password?
-
More Secure: A phone number is harder to hack than a simple email/password combination.
-
User Convenience: Users don’t have to remember passwords.
-
Better Accessibility: Many users prefer phone authentication, especially in regions where emails are less commonly used.
-
Reduces Fake Accounts: Phone authentication ensures each user has a real, unique number.
Why Use FirebaseUI?
FirebaseUI simplifies authentication by handling UI rendering, user sign-in flows, and error handling. Instead of writing complex logic for handling OTPs, FirebaseUI does it all with minimal setup. It supports multiple sign-in providers and ensures a smooth user experience.
Step 1: Setting Up Firebase in Your React App
Before we jump into authentication, we need to set up Firebase.
Getting Your Firebase Credentials
- Go to Firebase Console.
- Create a new project or select an existing one.
- Navigate to Project Settings → General.
- Scroll down to Your Apps and register a new app (choose Web).
- Copy your Firebase configuration and replace it in the code below.
Installing Firebase
Make sure you have Firebase installed in your project. If not, run:
npm install firebase
The utils/firebase.js file
This file is responsible for initializing Firebase and making its services accessible throughout our app.
Code:
Breaking it Down:
- Imports Firebase: We import Firebase and the necessary modules like authentication, Firestore, storage, and functions.
- Firebase Configuration: Replace placeholders with your actual Firebase credentials.
- Initialize Firebase: firebase.initializeApp(firebaseConfig); sets up Firebase with our config.
- Export Firebase Services:
- auth: Used for authentication.
- db: Firestore database for storing data.
- storage: For handling file uploads.
- functions: Cloud functions for serverless operations.
- For the purpose of this article, we‘ll only be making use of the
authandfirebaseobjects.
Step 2: Setting Up FirebaseUI for Phone Authentication
To make phone authentication easier, we’ll use FirebaseUI.
Installing FirebaseUI
npm install firebaseui
Importing and Configuring FirebaseUI
Code:
Breaking it Down:
- Imports FirebaseUI: import * as firebaseui from 'firebaseui';
- Imports Firebase Auth: import { auth } from './utils/services';
- Defines uiConfig:
- signInOptions: Specifies phone authentication as a sign-in method.
- recaptchaParameters: Adds reCAPTCHA verification for security.
- defaultCountry: Sets the default country for phone authentication.
- Callback Function: Runs after a successful login.
- Creates FirebaseUI Instance: const ui = new firebaseui.auth.AuthUI(auth); // creates a new instance of FirebaseUI if does not already exist.
Step 3: Integrating FirebaseUI into a React Component
Code:
Breaking it Down:
- Imports Dependencies
- Uses useRef: This ensures we only initialize FirebaseUI once.
- useEffect Hook:
- Initializes FirebaseUI.
- Starts the authentication UI inside #firebaseui-auth-container.
- Renders FirebaseUI Container
Step 4: Using the PhoneAuth Component
Now, we can use the PhoneAuth component in our app:
Step 5: Deploying and Testing
- Run Your App
npm start
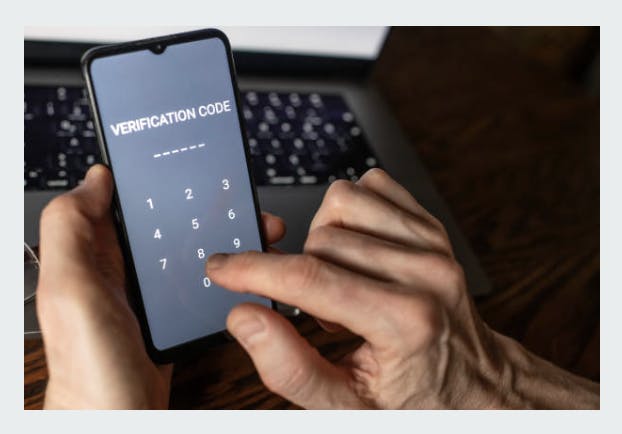
- Test with Your Phone Number
You should see outputs similar to the below screenshots:
Conclusion
We've successfully implemented phone authentication in React using Firebase and FirebaseUI. Now, users can sign in using their phone numbers without passwords. 🚀
Need more improvements? Let me know in the comments! 🎉
Additional Improvements
-
More Sign-in Options: Besides phone authentication, FirebaseUI also supports email-password authentication, Google sign-in, Facebook login, and more. You can enable them by adding:
signInOptions: [
  firebase.auth.EmailAuthProvider.PROVIDER_ID,
  firebase.auth.GoogleAuthProvider.PROVIDER_ID,
  firebase.auth.PhoneAuthProvider.PROVIDER_ID, // Phone authentication
  // sign in options
]
I'll be covering these in future articles, so stay tuned! 🚀
-
Invisible reCAPTCHA: If you don’t want users to manually resolve captchas, set:
recaptchaParameters: { size: 'invisible', } -
Customizing Button Texts: Want to rename the "Continue" button to "Login" or something else? Use the
uiShowncallback:uiShown: () => { const observer = new MutationObserver(() => { document.querySelectorAll('.firebaseui-id-submit').forEach((button) => { if (button.textContent.trim() === 'Continue') { button.textContent = 'Login'; observer.disconnect(); } }); }); const container = document.getElementById('firebaseui-auth-container'); if (container) { observer.observe(container, { childList: true, subtree: true }); } }, -
What Does
import 'firebaseui/dist/firebaseui.css';Do? This imports FirebaseUI’s default styling, making sure the authentication UI is properly formatted. If you want to customize it, you can override these styles in your CSS.Important Notice!
A.
Firebase: Error (auth/billing-not-enabled). DismissThat error means that phone authentication requires billing to be enabled in your Firebase project. Even though Firebase offers a free tier for phone authentication, you must upgrade your Firebase plan to the Blaze (pay-as-you-go) plan to use it.
If you get the above error message when type in your phone number and hit the ‘VERIFY’ button, kindly do these:
How to Fix the "auth/billing-not-enabled" Error
- Go to the Firebase Console → https://console.firebase.google.com/
- Select your project.
- Click on "Billing" from the left sidebar. If you can’t find the billing tab, just click on the plane next to your Firebase project name (e.g., Spark plan).
- Upgrade to the Blaze plan (you won’t be charged unless you exceed the free quota).
- Enable Phone Authentication again:
-
Navigate to Build → Authentication → Sign-in methods
-
Click Phone and enable it.
-
Why Does Firebase Require Billing for Phone Authentication?
Google incurs costs when sending OTPs (SMS messages), so they restrict phone authentication to Blaze users.
After enabling billing, try verifying your phone number again—it should work!
B.
Firebase: The phone verification request contains an invalid application verifier. The reCAPTCHA token response is either invalid or expired. (auth/invalid-app-credential). DismissIf you get the above error message when type in your phone number and hit the ‘VERIFY’ button, kindly do these:
How to Fix the "The reCAPTCHA token response is either invalid or expired. (auth/invalid-app-credential)" Error
-
First, cross-check your Firebase UI config object - uiConfig.
-
Ensure you resolve the capture manually if the value of your recaptcha param’s size is normal.
-
Ensure your domain is authorized. Go to the Firebase console, select your project, click on Authentication, click on Settings, and click on ‘Authorized domains’. Now, add your domain if it’s not on the list. If you’re running on localhost, http://127.0.0.1, and then navigate your app via http://127.0.0.1:3000/
You can always reach me via:
- Email: [email protected]
- LinkedIn: https://www.linkedin.com/in/jamesgozieodufu/