OFX, aka OFX Image Processing API, is an open standard for creating 2D visual effects and video compositing. It operates in a plugin-like application development model. Essentially, it serves as both a Host - an application providing a set of methods, and a Plug-in - an application or module implementing this set.
This configuration offers the potential for unlimited expansion of the host application's functionality.
DaVinci Resolve and Metal
Applications such as Final Cut X and DaVinci Resolve Studio, starting from version 16, fully support Apple Metal pipelines. Similar to OpenCL and Cuda, in the case of OFX, you can obtain a descriptor or handler of a platform-specific command queue. The host system also takes responsibility for allocating a pool of such queues and balancing calculations on them.
Moreover, it places the source and target image clip data in GPU memory, significantly simplifying the development of extensible functionality.
OFX Version Support in Resolve
With Resolve, things are slightly more complicated. DaVinci announces support for OFX v1.4, albeit with some limitations. Specifically, some methods for working with interface functions are not available for use. To determine which method is available, OFX allows you to examine the supported suite through key/value queries.
Publishing methods in the plugin code are based on C calls. But we will use the OpenFXS C++ shell adapted for C++17. For convenience, I've compiled everything into one repository: dehancer-external taken from the open-source Dehancer project.
OFXS Concept
In this project, I will be using OpenFXS, a C++ extension to OpenFX that was originally written by Bruno Nicoletti and has become popular over time in commercial and open-source video processing projects.
The original OpenFXS was not adapted to modern C++ dialects, so I updated it to make it compatible with C++17.
OFX, and consequently OFXS, is a standalone software module that is dynamically loaded by the host program. Essentially, it is a dynamic library that is loaded when the main application starts. OpenFXS, like OFX, must publish method signatures. Hence, we use one C method from the code.
To start developing in OpenFXS, you need to agree to a few common sets of classes that are used to create new functionality in your application. Typically, in a new project, you need to inherit from these classes and implement or override some virtual methods.
To create your own plugin on the host system, let's start by familiarizing ourselves with the following public classes and the same method:
- OFX::PluginFactoryHelper is a basic template for creating a plugin's data structure suite and control panel (although it can be left empty). The inherited class creates a singleton object that registers a set of parameters and presets in the host system, with which the developer registers his module;
- OFX::ParamSetDescriptor - base container class for creating and storing structure properties;
- OFX::ImageEffectDescriptor - a container of properties used when manipulating graphic data when calling data processing procedures. Used by the host application to save the context of processing parameters in the internal database and work with plugin properties defined for each of its instances;
- OFX::ParamSet - a set of settings that allows you to manipulate the registered data structure;
- OFX::ImageEffect - a set of settings for effects on graphical data, inherited from OFX::ParamSet;
- OFX::MultiThread::Processor - in the child class, it is necessary to implement data stream processing: images or videos;
- OFX::Plugin::getPluginIDs - method of registering a plugin (factory) in the host application;
False Color
One feature that distinguishes the process of shooting video from simply capturing an image in a photo is the dynamic change of scenes and lighting of both scenes as a whole and areas in the image. This determines the way exposure is controlled during the shooting process.
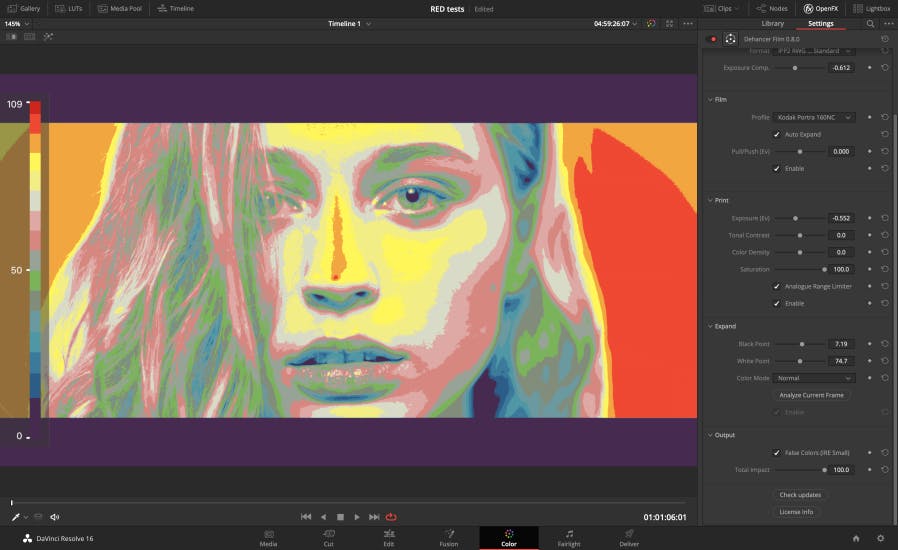
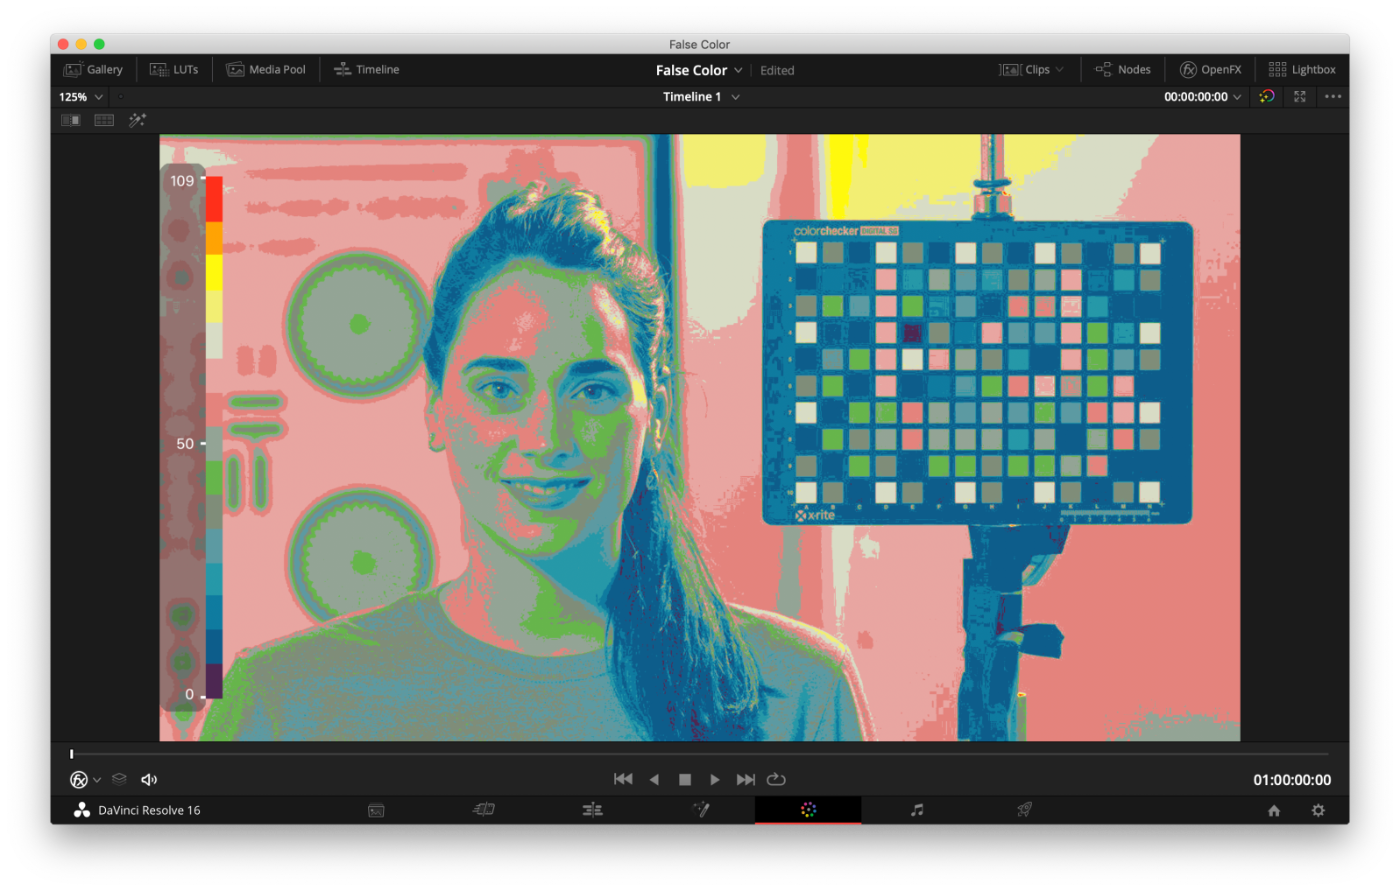
In digital video, there is a control monitor mode for operators in which the exposure level of areas is mapped into a limited set of zones, each tinted with its own color.
This mode is sometimes called "predator" or False Color mode. The scales are usually referenced to the IRE scale.
Such a monitor allows you to see the exposure zones and avoid significant mistakes when setting camera shooting parameters. Something similar in meaning is used when exposing in photography - zoning according to Adams, for example.
You can measure a specific target with an exposure meter and see in which zone it is located, and in real-time we see the zones, neatly tinted for ease of perception.
The number of zones is determined by the objectives and capabilities of the control monitor. For instance, a monitor used with Arri Alexa cameras can incorporate up to 6 zones.
Adding Extensions
Before proceeding with the example, we need to add some simple proxy classes to implement OpenFXS as a platform for processing source data, such as Metal textures. These classes include:
- imetalling::Image: A proxy class for OFX clip data.
-
imetalling::Image2Texture: A functor for transferring data from the clip buffer into a Metal texture. From DaVinci, you can extract a buffer of any structure and packaging of image channel values into the plugin, and it should be returned in a similar form.
To make working with the stream format in OFX easier, you can request the host to prepare data of a specific type in advance. I will use floats packed in RGBA - red/green/blue/alpha.
- imetalling::ImageFromTexture: A reverse functor for transforming a stream into a host system buffer. As you can see, there is potential for significant optimization of calculations if you teach the Metal computing cores to work not with the texture, but directly with the buffer.
We inherit the OFXS base classes and write our functionality without going into the details of how the Metal core works:
- imetalling::falsecolor::Processor: Here, we implement the stream transformation and initiate the processing.
- imetalling::falsecolor::Factory: This will be our specific part of the suite description for the plugin. We need to implement several mandatory calls related to setting up the structure and create an instance of the OFX::ImageEffect class with specific functionality, which we divide into two subclasses in the implementation: Interaction and Plugin.
- imetalling::falsecolor::Interaction: Implementation of the interactive part of working with effects. Essentially, this is the implementation of only virtual methods from OFX::ImageEffect related to processing changes in plugin parameters.
- imetalling::falsecolor::Plugin: Implementation of thread rendering, that is, launching imetalling::Processor.
Additionally, we will need several utility classes built on top of Metal to logically separate the host code and the kernel code on MSL. These include:
- imetalling::Function: A base class that obscures work with the Metal command queue. The main parameter will be the name of the kernel in the MSL code, and the executor of the kernel call.
- imetalling:Kernel: A general class for transforming a source texture into a target texture, extending Function to simply set the parameters for calling the MSL kernel.
- imetalling::PassKernel: Bypass kernel.
-
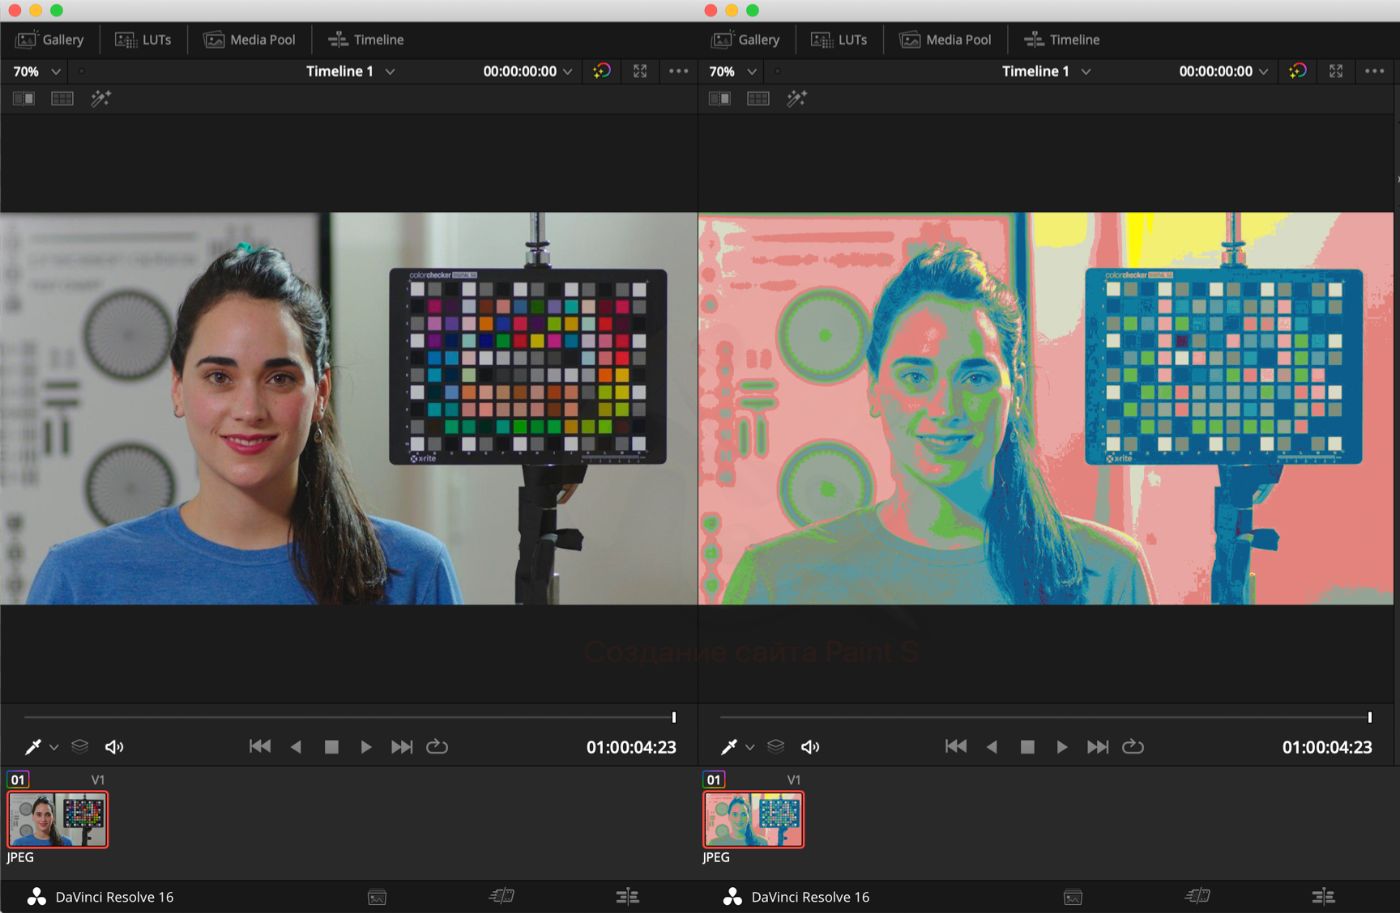
imetalling::FalseColorKernel: Our main functional class, a "predator" emulator that posterizes (downsamples) to a specified number of colors.
The kernel code for the "predator" mode could look like this:
static constant float3 kIMP_Y_YUV_factor = {0.2125, 0.7154, 0.0721};
constexpr sampler baseSampler(address::clamp_to_edge, filter::linear, coord::normalized);

inline float when_eq(float x, float y) {
  return 1.0 - abs(sign(x - y));
}

static inline float4 sampledColor(
        texture2d<float, access::sample> inTexture,
        texture2d<float, access::write> outTexture,
        uint2 gid
){
  float w = outTexture.get_width();
  return mix(inTexture.sample(baseSampler, float2(gid) * float2(1.0/(w-1.0), 1.0/float(outTexture.get_height()-1))),
             inTexture.read(gid),
             when_eq(inTexture.get_width(), w) // whe equal read exact texture color
  );
}

kernel void kernel_falseColor(
        texture2d<float, access::sample> inTexture [[texture(0)]],
        texture2d<float, access::write> outTexture [[texture(1)]],
        device float3* color_map [[ buffer(0) ]],
        constant uint& level [[ buffer(1) ]],
        uint2 gid [[thread_position_in_grid]])
{
  float4  inColor = sampledColor(inTexture,outTexture,gid);
  float luminance = dot(inColor.rgb, kIMP_Y_YUV_factor);
  uint      index = clamp(uint(luminance*(level-1)),uint(0),uint(level-1));
  float4    color = float4(1);

  if (index<level)
    color.rgb = color_map[index];

  outTexture.write(color,gid);
}
Initialization of the OFX Plugin
We will begin by defining the class imetalling::falsecolor::Factory. In this class, we will set a single parameter - the status of the monitor (either on or off). This is necessary for our example.
We will inherit from OFX::PluginFactoryHelper and overload five methods:
- load(): This method is invoked to globally configure the instance when the plugin is first loaded. Overloading this method is optional.
- unload(): This method is invoked when an instance is unloaded, for instance, to clear memory. Overloading this method is also optional.
- describe(ImageEffectDescriptor&): This is the second method that the OFX host calls when the plugin is loaded. It is virtual and must be defined in our class. In this method, we need to set all the properties of the plugin, regardless of its context type. For more details about the properties, refer to the
ImageEffectDescriptorcode.
-
describeInContext(ImageEffectDescriptor&,ContextEnum): Similar to the
describemethod, this method is also called when the plugin is loaded and must be defined in our class. It should define properties associated with the current context.The context determines the type of operations the application works with, such as filter, paint, transition effect, or frame retimer in a clip.
- createInstance(OfxImageEffectHandle, ContextEnum): This is the most crucial method that we overload. We return a pointer to an object of type
ImageEffect. In other words, ourimetalling::falsecolor::Pluginin which we have defined all the functionalities, both with regard to user events in the host program and rendering (transforming) the source frame into the target one:
OFX::ImageEffect *Factory::createInstance(OfxImageEffectHandle handle,OFX::ContextEnum) {
     return new Plugin(handle);
   }
Handling Events
At this stage, if you compile a bundle with the OFX module, the plugin will already be available in the host application, and in DaVinci, it can be loaded onto the correction node.
However, to work fully with a plugin instance, you need to define at least the interactive part and the part associated with processing the incoming video stream.
To do this, we inherit from the OFX::ImageEffect class and overload virtual methods:
-
changedParam(const OFX::InstanceChangedArgs&, const std::string&) - This method allows us to define the logic for handling the event. The event type is determined by the value of OFX::InstanceChangedArgs::reason and can be: eChangeUserEdit, eChangePluginEdit, eChangeTime - the event occurred as a result of a property being edited by the user, changed in a plugin or host application, or as a result of a change in the timeline.
The second parameter specifies the string name that we defined at the plugin initialization stage, in our case, it is one parameter: false_color_enabled_check_box.
- isIdentity(...) - This method allows us to define the logic for reacting to an event, and return a state that determines whether something has changed and whether rendering makes sense. The method must return false or true. This is a way to optimize and reduce the number of unnecessary calculations.
You can read the implementation of interactive interaction with OFX in the Interaction.cpp code. As you can see, we receive pointers to the clips: the source one and the memory area in which we will put the target transformation.
Implementation of Rendering Launch
We will add another logical layer on which we will define all the logic for launching the transformation. In our case, this is the only method for overriding so far:
- render(const OFX::RenderArguments& args) - Here, you can find out the properties of the clips and decide how to render them. Also, at this stage, the Metal command queue and some useful attributes associated with the current timeline properties become available to us.
Processing
At the launch stage, an object with useful properties became available to us: we have at least a pointer to the video stream (more precisely, a memory area with frame image data), and, most importantly, a queue of Metal commands.
Now, we can construct a generic class that will bring us closer to a simple form of reusing kernel code. The OpenFXS extension already has such a class: OFX::ImageProcessor; we just need to overload it.
In the constructor, it has the OFX::ImageEffect parameter, i.e., in it, we will receive not only the current state of the plugin parameters but everything necessary for working with the GPU.
At this stage, we just need to overload the processImagesMetal() method and initiate the processing of kernels already implemented on Metal.
Processor::Processor(
            OFX::ImageEffect *instance,
            OFX::Clip *source,
            OFX::Clip *destination,
            const OFX::RenderArguments &args,
            bool enabled
    ) :
            OFX::ImageProcessor(*instance),
            enabled_(enabled),
            interaction_(instance),
            wait_command_queue_(false),
            /// grab the current frame of a clip from OFX host memory
            source_(source->fetchImage(args.time)),
            /// create a target frame of a clip with the memory area already specified in OFX
            destination_(destination->fetchImage(args.time)),
            source_container_(nullptr),
            destination_container_(nullptr)
    {

      /// Set OFX rendering arguments to GPU
      setGPURenderArgs(args);

      /// Set render window
      setRenderWindow(args.renderWindow);

      /// Place source frame data in Metal texture
      source_container_ = std::make_unique<imetalling::Image2Texture>(_pMetalCmdQ, source_);

      /// Create empty target frame texture in Metal
      destination_container_ = std::make_unique<imetalling::Image2Texture>(_pMetalCmdQ, destination_);

      /// Get parameters for packing data in the memory area of the target frame
      OFX::BitDepthEnum dstBitDepth = destination->getPixelDepth();
      OFX::PixelComponentEnum dstComponents = destination->getPixelComponents();

      /// and original
      OFX::BitDepthEnum srcBitDepth = source->getPixelDepth();
      OFX::PixelComponentEnum srcComponents = source->getPixelComponents();

      /// show a message to the host system that something went wrong
      /// and cancel rendering of the current frame
      if ((srcBitDepth != dstBitDepth) || (srcComponents != dstComponents)) {
        OFX::throwSuiteStatusException(kOfxStatErrValue);
      }

      /// set in the current processor context a pointer to the memory area of the target frame
      setDstImg(destination_.get_ofx_image());
    }

    void Processor::processImagesMetal() {

      try {

        if (enabled_)
          FalseColorKernel(_pMetalCmdQ,
                           source_container_->get_texture(),
                           destination_container_->get_texture()).process();
        else
          PassKernel(_pMetalCmdQ,
                           source_container_->get_texture(),
                           destination_container_->get_texture()).process();

        ImageFromTexture(_pMetalCmdQ,
                         destination_,
                         destination_container_->get_texture(),
                         wait_command_queue_);

      }
      catch (std::exception &e) {
        interaction_->sendMessage(OFX::Message::eMessageError, "#message0", e.what());
      }
    }
Building the Project
To build the project, you will need CMake, and it must be at least version 3.15. Additionally, you will require Qt5.13, which aids in the easy and convenient assembly of the bundle with the plugin installer in the system directory. To initiate cmake, you must first create a build directory.
After creating the build directory, you can execute the following command:
cmake -DPRINT_DEBUG=ON -DQT_INSTALLER_PREFIX=/Users/<user>/Develop/QtInstaller -DCMAKE_PREFIX_PATH=/Users/<user>/Develop/Qt/5.13.0/clang_64/lib/cmake -DPLUGIN_INSTALLER_DIR=/Users/<user>/Desktop -DCMAKE_INSTALL_PREFIX=/Library/OFX/Plugins .. && make install
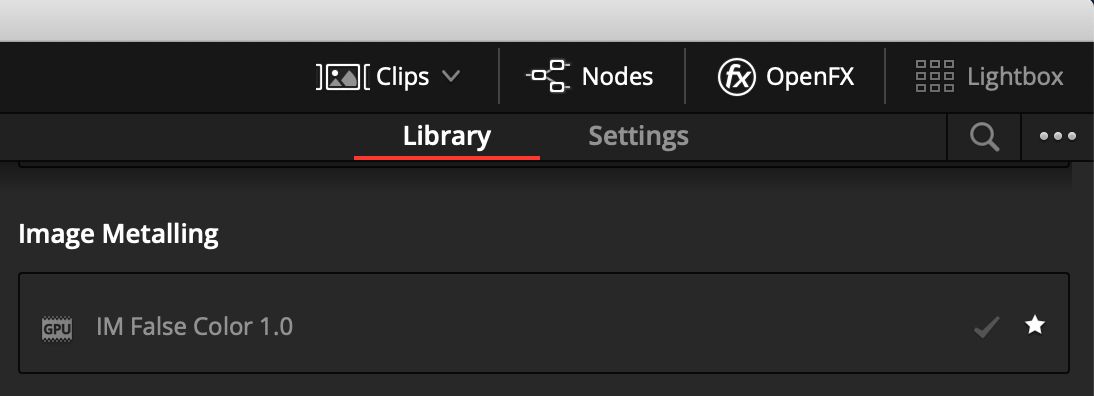
Afterward, the installer, called IMFalseColorOfxInstaller.app, will appear in the directory that you specified in the PLUGIN_INSTALLER_DIR parameter. Let's go ahead and launch it! Once the installation is successful, you can start DaVinci Resolve and begin using our new plugin.
You can find and select it in the OpenFX panel on the color correction page, and add it as a node.
External links
- False Color OFX Plugin Code
- The Open Effects Association
- Download DaVinci Resolve - OFX header file version and OFXS library code under Resolve + examples
[story continues]
tags