A small starter app built with MEAN2 and socket.io

This article was originally posted here
The source code has been updated to use Angular 5.
Summary
Build a simple real-time application that you can use as a starter to do what you want with MEAN2(MongoDB, Express, Angular2 & NodeJS), within the project will also be Socket.io, Typescript and Angular-material2.
After having worked with Angular2 and socket.io I faced some challenges that motivated me to build a simple starter project that I will reuse every times if need be.
I suppose that you already know the power of Ajax to build SPA application. But now there is a new protocol, not attached to the browser and it’s called socket.
Notes
- This is a starter project for those who need real time in a MEAN2 app.
- This is not a tutorial to teach you the MEAN2 stack or Socket, but to show you a way to build a working realtime app with ease
- CRUD requests are made with rest
- For the moment, only notifications happen with socket.io
- Source code: https://github.com/dassiorleando/gistology
Let’s call it gistology: https://gistology.herokuapp.com :)
Recommandations
→ Have NodeJs and npm on your system
→ To use this article I recommend you to follow Readme instructions
Demo

What is used
- NodeJS: Open-source JavaScript runtime environment built on Chrome’s V8 JavaScript engine
- MongoDB: Database Management System
- Express: Web framework used in nodes app for rest requests
- Angular2: The successor of Angular1 that makes the code more easier to understand, brings a lot of good functionalities in Angular apps, simplified DI, component driven apps, enriched the interaction with the DOM and benefit of Typescript. Then Angular2 is not an MVC framework, but a component-based framework(@Component).
- Angular CLI: Command line tool that helps to create an Angular2 project with a well structured architecture.
- Angular Material 2: Use Angular-material in Angular2 application.
- Typescript: is a superset of Javascript that allows us to define new types, declaring typed variables.
- Angular2-toster: For toast messages(info, success, warning and error notifications).
- angular-flex-layout: Better design the layouts(row and column) of our pages.
- Socket.io(client & server): Js lib used to make sockets connections, send and receive messages via events with a simple syntaxe. We use it to connect multiple clients together and let them exchange messages(events are created and handled).
- Webpack: A module bundler for modern javascript application, this means webpack takes modules with dependencies and emits static assets representing those modules. Here it builds all into the directory dist as defined by angular-cli defaults options.
Client Side

→ Start App Architecture: Angular CLI
First you will need to install AngularCLI, to get started here is the link.
- Install the tool: npm install -g @angular/cli
- Create the project: ng new gistology
- Serve the app: _ng serve (_within the root folder), this command also watches your files for any change to reload the browser.
- More commands: ng build, ng test, ng lint and ng e2e.
Now via your browser access the app here: http://localhost:4200
→ Generate client side components to manage gists:
Now we will still use the power of angular-cli to come out with a new component that will help us to manage gists, with this command:
ng g component gist
Output:

→ Include Angular-material2
Click here to get all steps.
- npm install — save @angular/material
- Imports and install
Don’t forget to also install and load @angular/animation to enable some material components to work normally.
→ Include Angular-flexLayout
- npm install — save @angular/flex-layout
- import {FlexLayoutModule} from “@angular/flex-layout”; in the app.module.ts
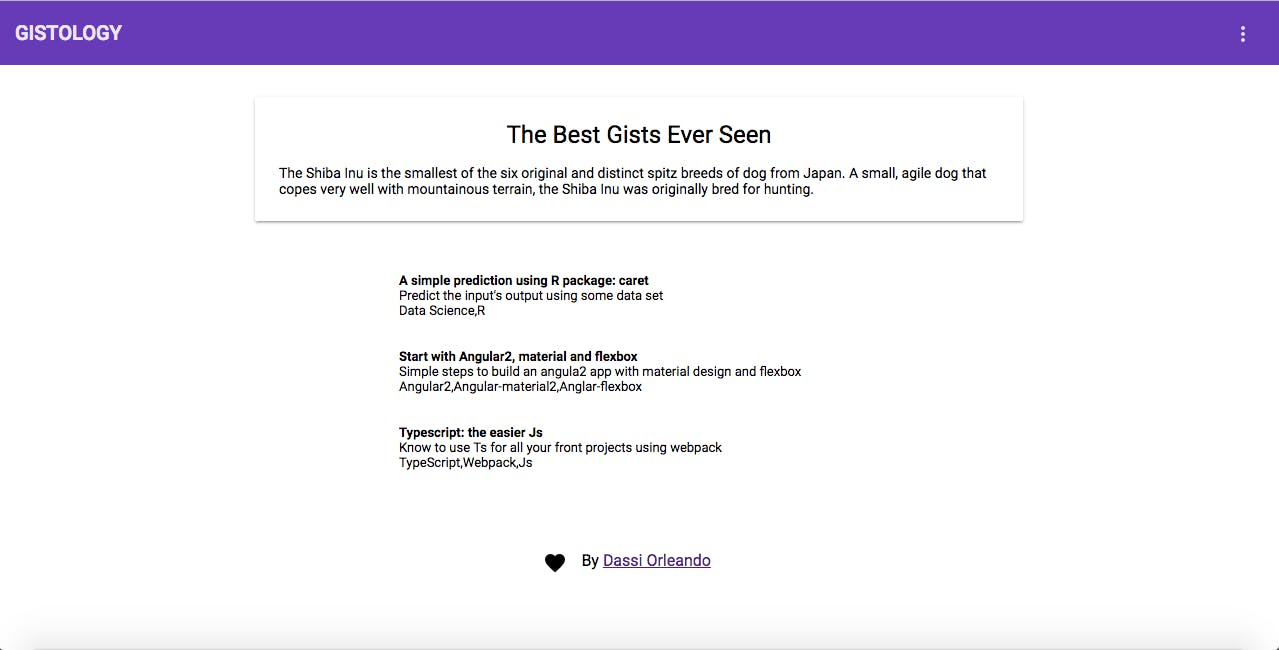
→ Design the home page: angular material card and list
-
app.component.css
-
app.component.html
→ Include Angular2-toaster for notifications
- Install it via npm:
npm install — save angular2-toaster
- Include his css too in the main css file(style.css):
@import ‘~angular2-toaster/toaster.css’;
- Import and Register ToasterModule from “angular2-toaster” in the app module
- Define the Toast container(<toaster-container></toaster-container>) in app.component.html
- Finally import the ToastService and you will be allowed to toast with success, info, warning and error functions.
- Create Gist client model: ./src/app/gist/gist.model.ts
/*** Model for gist*/export class Gist{
**constructor(public title, public description, public technologies, public link){
}**
}
→ Include socket.io-client
- npm install socket.io-client — save
- npm install — save-dev @types/socket.io-client
- npm install — save @types/socket.io-client — only=dev (the typings of the client socket.io)
Now we need to add this @types in ./src/tsconfig.app.json and ./src/tsconfig.spec.json in the array types.
FILE tsconfig.app.json
{“extends”: “../tsconfig.json”,“compilerOptions”: {“outDir”: “../out-tsc/app”,“module”: “es2015”,“baseUrl”: “”,“types”: [“socket.io-client”]},“exclude”: [“test.ts”,“**/*.spec.ts”]}
Install it is very easy, we just have a simple command to type. Now we can create a simple service to emit and handle socket events, lets call it app.socketIo.service.ts in folder ./src/app:
Server Side
→ Install packages
- Express: to serve Web App
- body-parser: to parse post requests and get data from html form
- http-status: to explicitly describe status of requests
- Mongoose: to connect to a mongo database
- Socket.io-server: Server side lib of socket.io
npm install --save express body-parser http-status mongoose socket.io
- Update Architecture
Update file architecture for the server side code to add model and api.
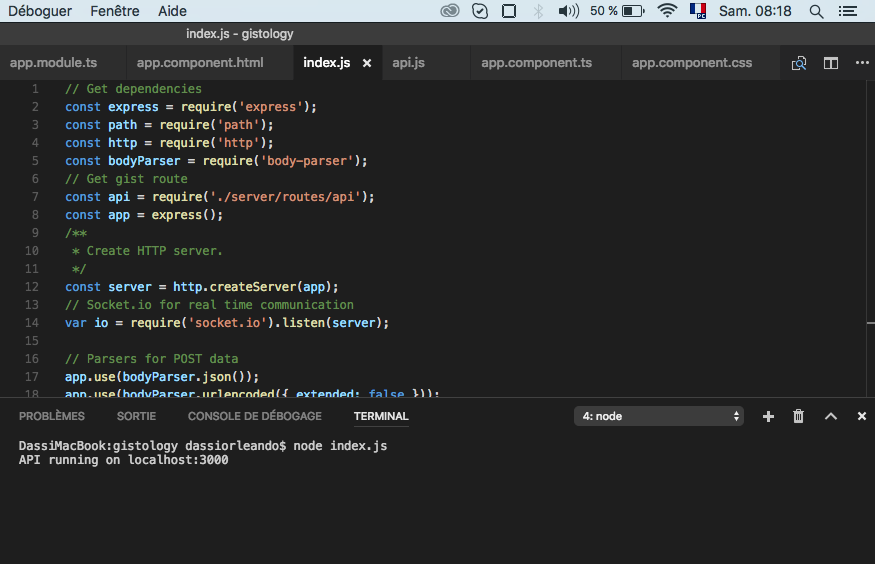
Create a file we will use to run our application, we can call it index.js on the root folder. The trick here is to serve statics files as expected, let the /api root path for our api and all others request will be redirect to the index file present in dist folder when running the app; without forgetting to instantiate the socket.io server and handle some events to make sure all clients get them. The mongoose lib here will connect us to a mongo DB and allows us to define the server model.
In the index.js file we have:
→ Gist model: ./server/models/gist.js
Let’s do something really simple, all gists with a model with follow properties: title, description, technologies and the link.
→ To import mongoose and pass the db name to connect
var mongoose = require(‘mongoose’);
mongoose.connect(‘mongodb://localhost/gistology’); // A local db is used(gistology)
→ Build a little rest api for gists:
-
File api.js presents in folder ./server/routes
-
Import the api file
// Get gist routeconst api = require(‘./server/routes/api’);
- Defined /api as root path for all our api and match with the api.js file
Note: in the index.js file up there we done something like that.
→ Test the project:
- Start mongo: for me it is sudo mongod
- ng build: to build the app(Take a look at angular-cli wiki)
- node index.js: to run the app
- Now open this on your browser: http://localhost:3000/
Test the API: curl http://localhost:3000/api/gist returns an empty array([]) as I don’t yet create any gist(Yes the db is still empty)
Setup and run Socket.io Server:
File: ./index.js
- Instantiate the Socket.io server
const express = require(‘express’);const http = require(‘http’);const app = express();
/*** Create HTTP server and start the connect the socket*/
const server = http.createServer(app);// Socket.io for real time communication
var io = require(‘socket.io’).listen(server);
- Emit & Handle events
/*** Socket events*/
io.sockets.on(‘connection’, function(socket){console.log(‘Socket connected’);// Socket event for gist createdsocket.on(‘gistSaved’, function(gistSaved){io.emit(‘gistSaved’, gistSaved);});
// Socket event for gist updatedsocket.on(‘gistUpdated’, function(gistUpdated){io.emit(‘gistUpdated’, gistUpdated);});});
Handle gist rest requests with @angular/http & rxjs
File: ./src/app/gist/gist.service.ts
- Source code
import { Gist } from ‘./gist.model’;import { Injectable } from ‘@angular/core’;import { Http } from ‘@angular/http’;import ‘rxjs/add/operator/map’;
@Injectable()export class GistService {constructor(private http: Http) {}
// Get all saved gistsgetAllGists(){return this.http.get(‘/api/gist’).map(res => res.json());}
// Get a gist by IdgetGistById(gistId){return this.http.get(‘/api/gist/’ + gistId).map(res => res.json());}
// register a new gistpostGist(gist: Gist){return this.http.post(‘/api/gist’, gist).map(res => res.json());}
// update a gistupdateGist(gist: Gist){return this.http.put(‘/api/gist’, gist).map(res => res.json());}
}
- Register the service in the AppModule
// Some imports …import { GistService } from ‘./gist/gist.service’;
@NgModule({declarations: […],imports: […],providers: [GistService],bootstrap: [AppComponent]})export class AppModule { }
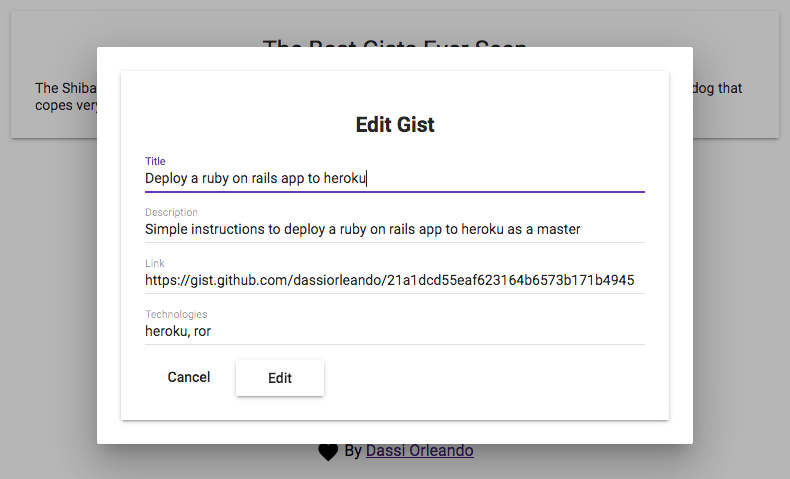
Ui to manage Gist: list, create, show and delete
- https://github.com/dassiorleando/gistology/blob/master/src/app/gist/show/gist.show.component.html
- https://github.com/dassiorleando/gistology/blob/master/src/app/gist/edit/gist.edit.component.html
- https://github.com/dassiorleando/gistology/blob/master/src/app/gist/list/gist.list.component.html
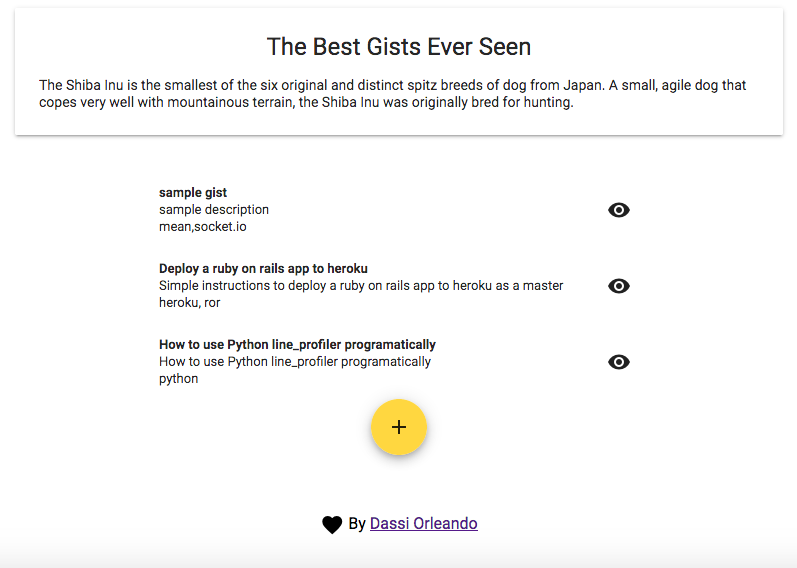
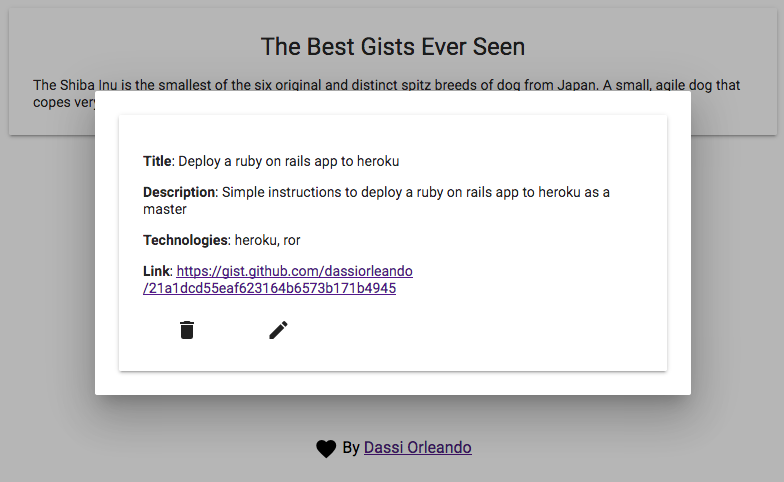
UI to CRUD gists
Resources
- https://scotch.io/tutorials/mean-app-with-angular-2-and-the-angular-cli
- https://scotch.io/tutorials/using-mongoosejs-in-node-js-and-mongodb-applications
- https://www.tutorialspoint.com/unix_sockets/what_is_socket.htm
- https://www.infoq.com/articles/Angular2-TypeScript-High-Level-Overview
- https://v2.angular.io/docs/ts/latest
- https://material.angular.io/guide/getting-started
- https://material.io/icons
- https://github.com/angular/flex-layout/wiki/Responsive-API
- https://github.com/Stabzs/Angular2-Toaster
Thanks for reading this post, recommend and share if you enjoyed it.
Follow me on Facebook, Twitter, LinkedIn and visit my blog.
Cheers!
[story continues]
tags