If you manage multiple websites for different clients, you know the infrastructure headache all too well. Ten clients usually mean ten web applications, ten databases, ten SSL certificates to provision, and ten separate instances to patch when a vulnerability drops. But what if you could host all of them on a single installation, sharing one codebase and one database, while still giving each client their own unique domain name and isolated environment?
DNN Platform
Built on the .NET framework, DNN Platform has had multi-tenancy baked into its core for over two decades. By leveraging its "Portals" architecture, you can run an unlimited number of distinct websites from a single Internet Information Services (IIS) application.
In this guide, we will break down how to harness DNN’s multi-tenant capabilities using a modern stack: Windows Server 2022 and SQL Server 2022.
The Magic of DNN Portals
In DNN terminology, a Portal is a tenant. When you install DNN, you automatically create the Host (Superuser) account and the default portal.
Because DNN is a deeply dynamic Content Management System (CMS), the entire site structure, content, and user base are stored in the SQL Server database rather than as static files. When an HTTP request hits the IIS server, DNN intercepts it, checks the incoming domain name against its PortalAlias table in the database, and serves the specific content for that tenant.
The clients never know they are sharing a server. To them, client-a.com and client-b.com are completely separate entities with their own logins, themes, and content. To you, it’s one folder to update.
The Environment: Windows Server 2022 & SQL Server 2022
Before you can spin up your tenants, you need a robust foundation.
1. SQL Server 2022
DNN requires an SQL database to store the configurations for all your portals.
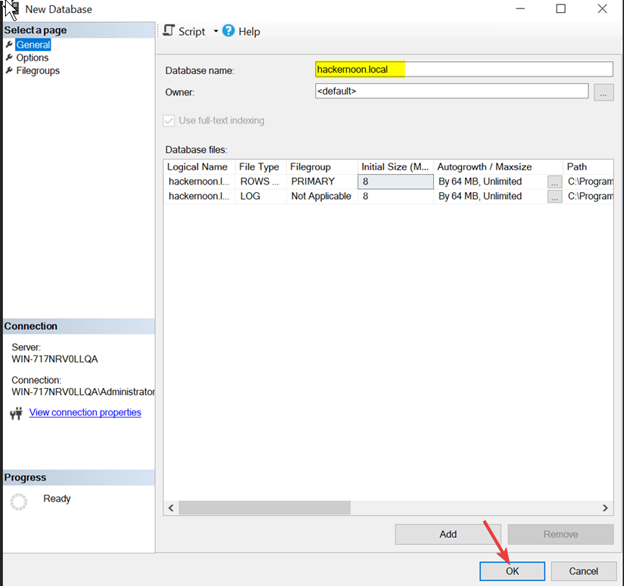
Provisioning: Create a single, blank database in SQL Server 2022 (e.g., hackernoon.local) by using SQL Server Management Studio. You may get the latest version of SQL Server Management Studio by visiting the link below:
Install SQL Server Management Studio
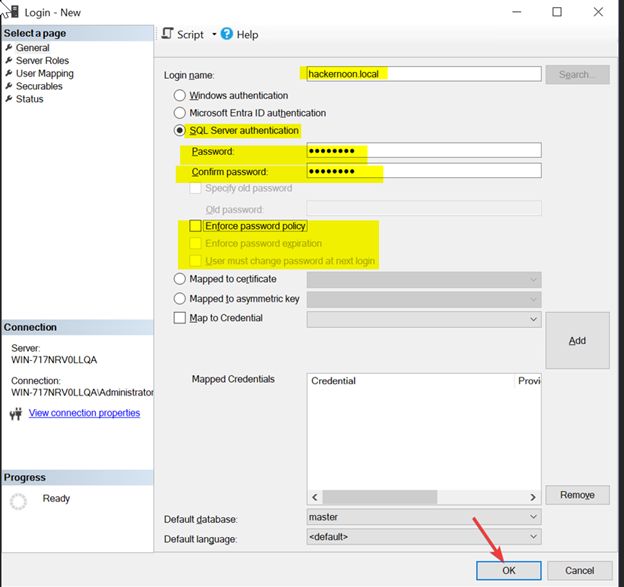
Security: Create a dedicated SQL login named hackernoon.local with db_owner mapping to this database.
Since this one database will hold the data for all your tenants, securing it with a strong, dedicated service account is critical. In this tutorial, we will use SQL Server authentication, but you may use other authentication options below if needed:
- Microsoft Entra ID authentication
- Windows authentication (default option in SQL Server Management Studio)
By default, the following password policies are checked, but for the demonstration purposes I will uncheck them.
- Enforce password policy
- Enforce password expiration
- User must change password at next login
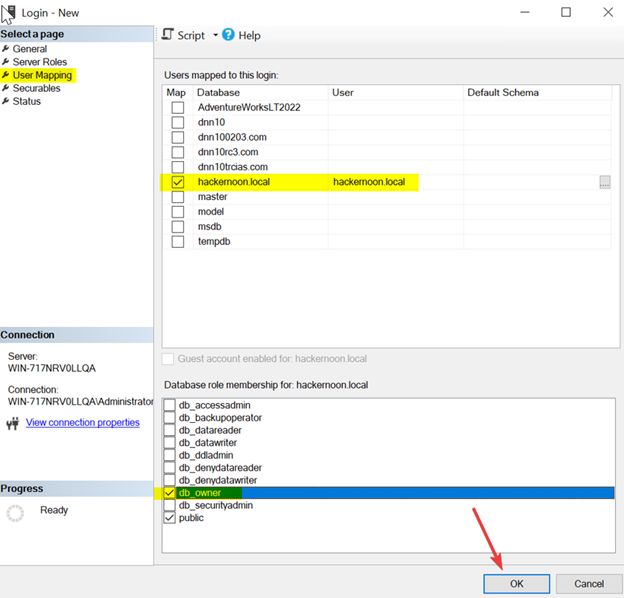
User Mapping: Make sure that the database has the db_owner mapping.
2. Windows Server 2022 (IIS)
On your Windows Server 2022 machine, ensure the Web Server (IIS) role is installed with ASP.NET 4.8 (or the specific version required by your target DNN release).
- Website Directory: Create a directory to host web app data. This will be a different directory than the database directory. e.g. C:\Websites\hackernoon.local.
- File System: Extract the DNN Platform installation files from the Install package (e.g. DNN_Platform_10.2.3_Install.zip) into a single directory (e.g., C:\Websites\hackernoon.local).

-
Permissions: Grant the IIS AppPool\hackernoon.local Full control (or modify if you prefer a stricter environment) permission to the target folder. DNN needs to write files (like logs and portal-specific assets) to the file system.

-
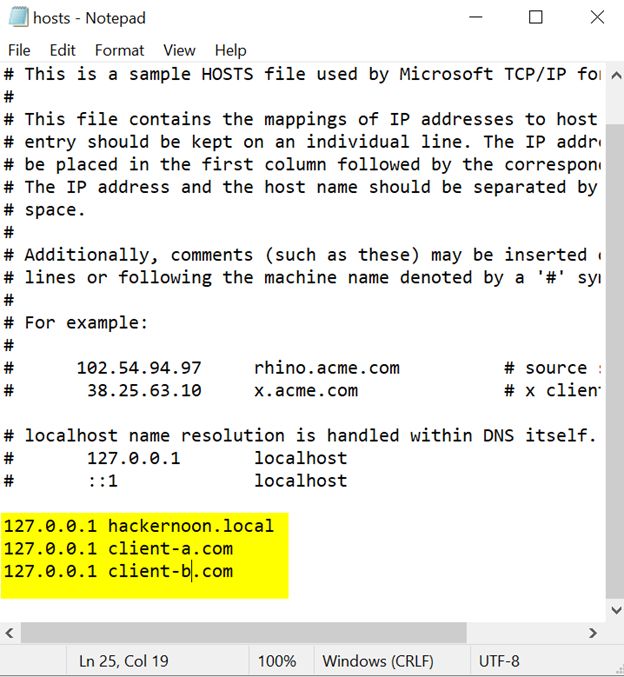
Host file mapping: On the Search menu, type Notepad. In the search results, right-click Notepad and select Run as Administrator. Make sure that All Files is selected in the bottom right corner of Notepad.
Navigate to the following path: c:\Windows\System32\Drivers\etc
Select hosts file.
Add the following lines:
127.0.0.1 hackernoon.local
127.0.0.1 client-a.com
127.0.0.1 client-b.com
Step-by-Step: Installation of Master Instance
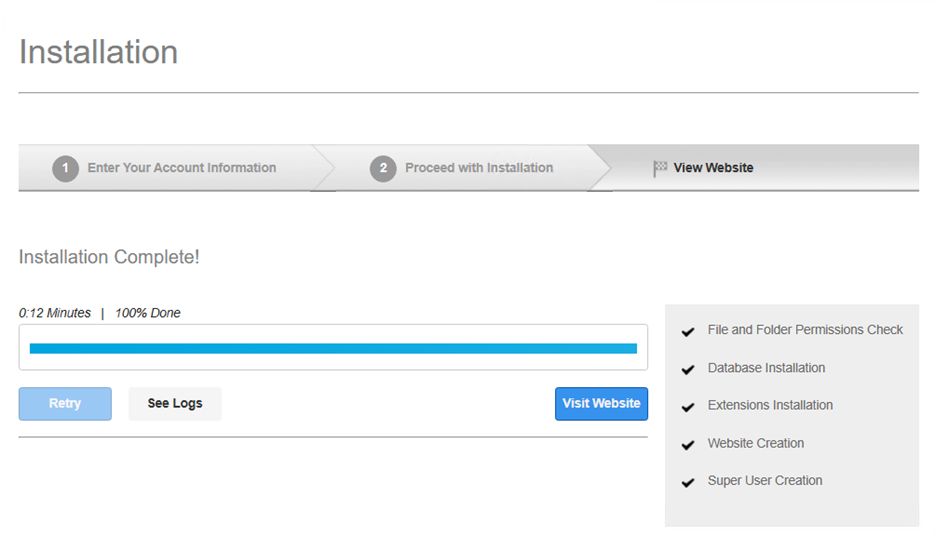
Assuming you have made the correct configurations, you can call the installation wizard by visiting http://hackernoon.local/Install/InstallWizard.aspx.

It is important that no errors have been logged during the installation.
Step-by-Step: Configuring Multi-Tenancy
Assuming you have run the initial DNN installation wizard for your primary domain (e.g., hackernoon.local), here is how you start adding tenants.
Step 1: Add the New Domain Binding in IIS
IIS needs to know to route the new client's domain to your single DNN instance.
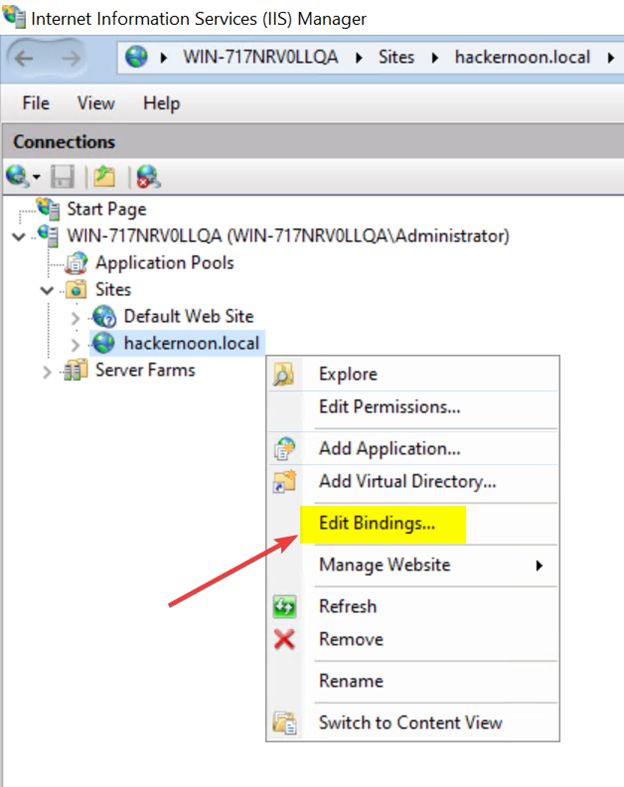
- Open Internet Information Services (IIS) Manager on your Windows Server 2022 instance.
- Right-click your master DNN website and select Edit Bindings...
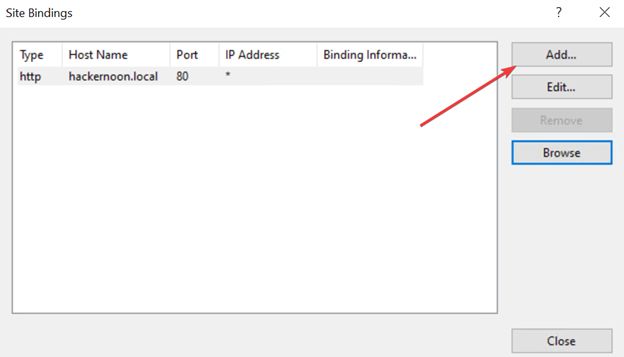
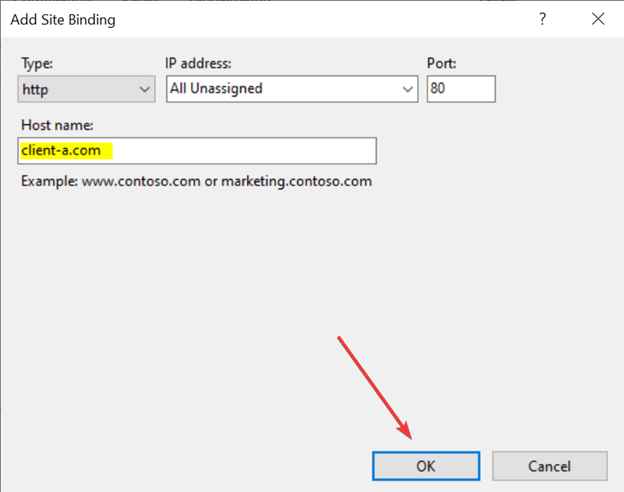
- Click Add.
- Set the Type to http or https, enter your new tenant's domain in the Host name field (e.g., client-a.com), and click OK.
Note: Both hackernoon.local and client-a.com are now pointing to the exact same physical folder on the server.
Step 2: Create the New Portal in DNN
Now, you must tell DNN what to do when a user arrives via that new domain.
Log into your primary DNN site (hackernoon.local) using your Host (Superuser) account.
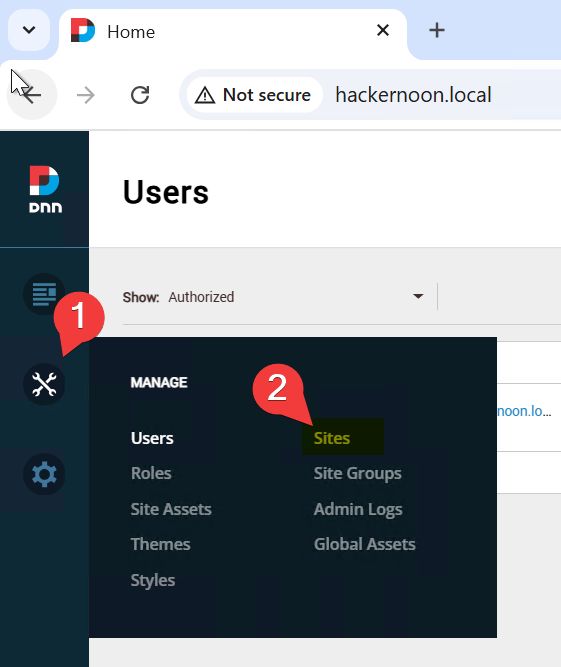
Navigate to the Persona Bar (the admin menu) and go to Manage > Sites.
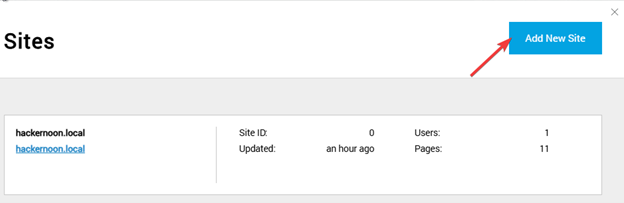
Click Add New Site.
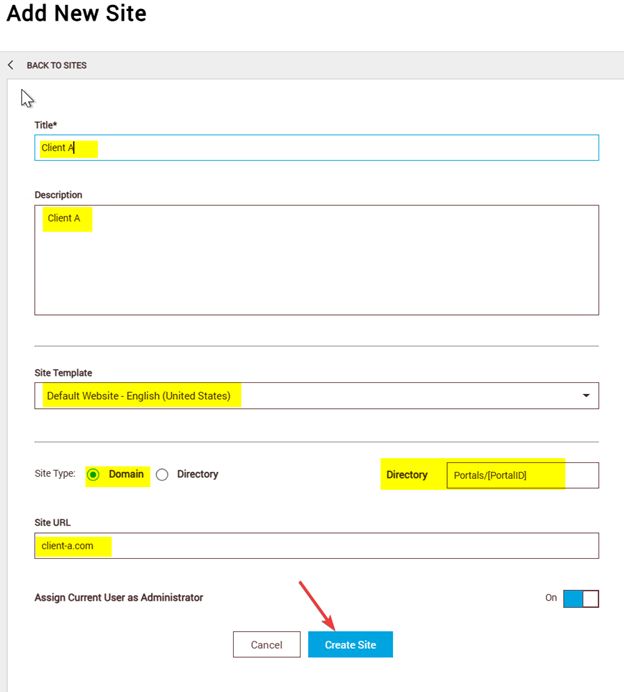
Fill in the site details:
Site URL: This is the most crucial step. Enter client-a.com here. This tells DNN to map incoming requests from this domain to this specific new portal.
Title / Description: Specific to the client.
Template: Choose a starting template (Default or a custom one).
Click Create.
Step 3: DNS Configuration
Finally, ensure the DNS A-Record for the websites you manage are pointing to the public IP address of your Windows Server 2022 machine. In this tutorial, I used local hosts file and mapped all hostnames to the localhost ip address (127.0.0.1)
What Happens Under the Hood?
When a visitor navigates to client-a.com, the following sequence occurs:
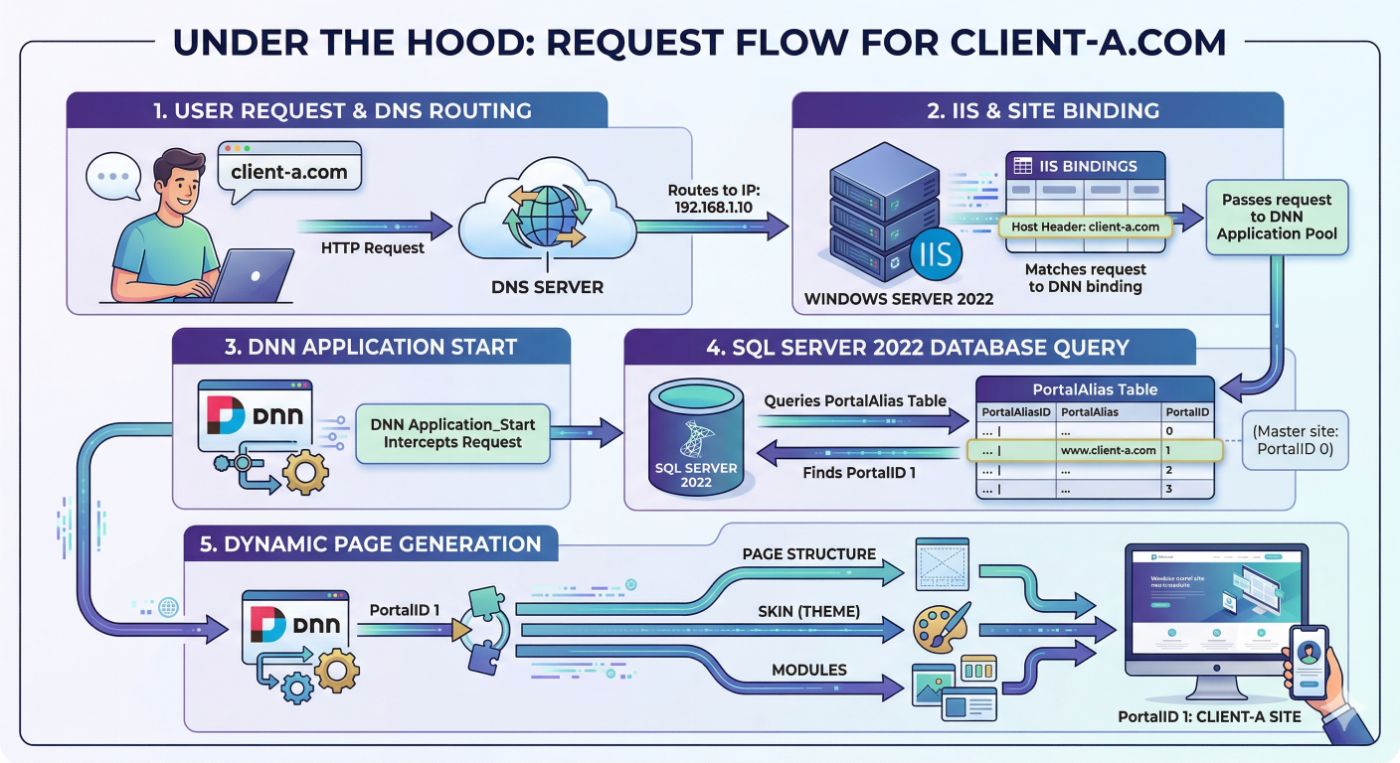
- DNS routes the user to your Windows Server 2022 IP.
- IIS sees the host header client-a.com, matches it to your DNN site binding, and passes the request to the DNN application pool.
- DNN's Application Start intercepts the request. It queries the SQL Server 2022 database, specifically the PortalAlias table.
- It finds client-a.com mapped to PortalID 1 (where your master site might be PortalID 0).
DNN dynamically generates the page structure, skin (theme), and modules associated only with PortalID 1.
The Business Case for DNN Multi-Tenancy
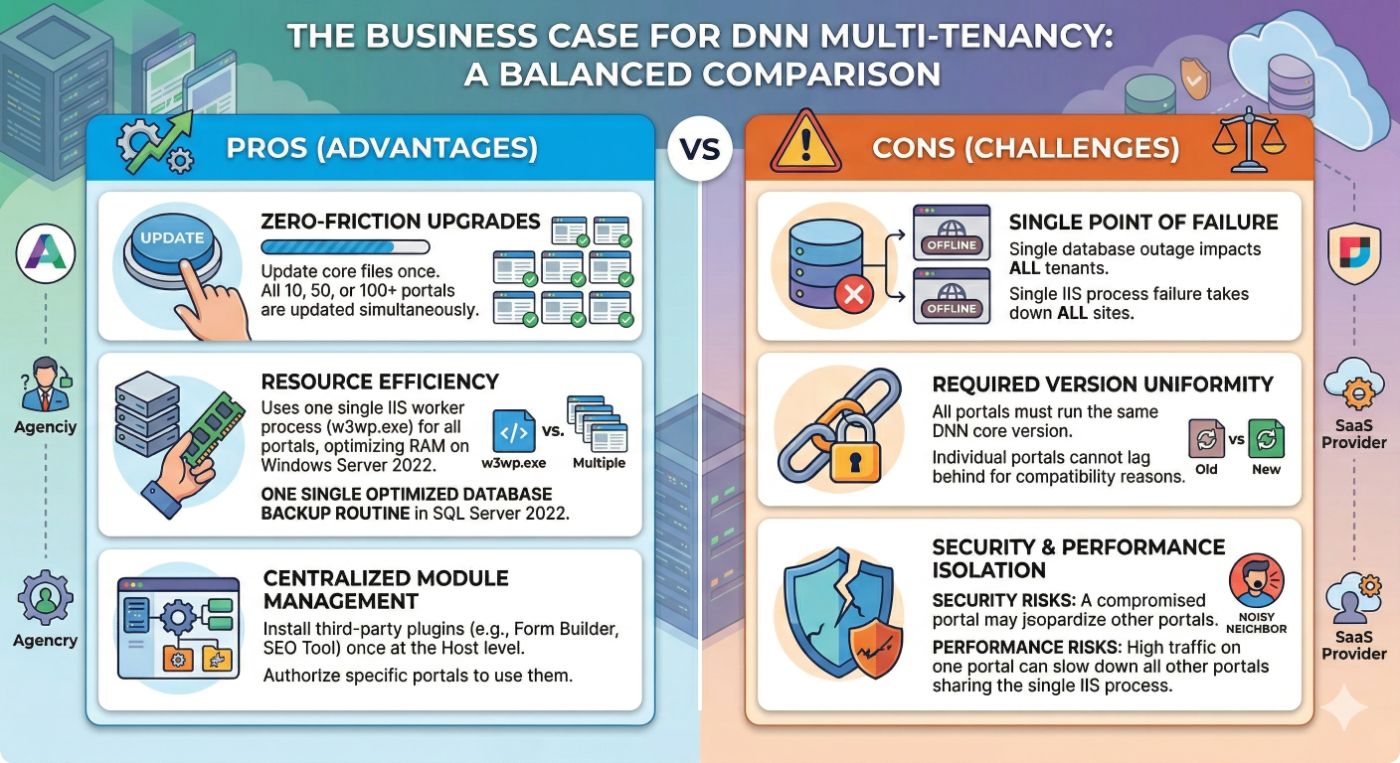
Hosting multiple tenants via DNN Portals on a modern Windows/SQL Server stack offers massive advantages for agencies and SaaS providers:
- Zero-Friction Upgrades: When a new version of DNN drops, you update the core files once. All 10, 50, or 100 portals are updated simultaneously.
- Resource Efficiency: Instead of 50 IIS worker processes eating up your Windows Server 2022 RAM, you have one. Instead of 50 databases to backup in SQL Server 2022, you have one single, highly optimized backup routine.
- Centralized Module Management: If you buy a third-party plugin (like a Form builder or SEO tool), you install it once at the Host level, and you can authorize specific portals to use it.
Conclusion
Multi-tenancy doesn't have to mean building a complex, custom-routing architecture from scratch. By combining the enterprise-grade stability of Windows Server 2022 and SQL Server 2022 with the mature Portal architecture of the DNN Platform, you can build a highly scalable, easy-to-maintain hosting environment for your clients.
Stop managing servers, and start managing sites.
[story continues]
tags