If you are a software developer or you are linked to software development you might know what is Git and GitHub.
For those who don’t know what is GitHub, GitHub is a web service based on the software Git (which is a versioning software written by Linus Torvald, creator of Linux). Git allows you to store the history of your software code base and easily control versioning. GitHub host all those Git repositories and also provides many other features like bug tracking, milestone creation and also the creation of Wiki for your project.
In this article, you will learn how to host your own git server like GitHub on your raspberry pi using GitLab.
Why do your want to host your local Git server?
GitHub is pretty amazing. It may satisfy all your code hosting requirements. But there are three main reasons to host your own git server.
- GitHub is free only for the public projects only. If you don’t want to make your software open source then you have to buy the GitHub subscription plans. Now you may make project for hobby or you have a start-up company with the relatively small team. In that case of you don’t want to buy those expensive subscription plans, you have to host your git server.
- If you want to use GitHub or any other git servers, you have to trust the third party for hosting your data. If you want to keep your data/source code secure and also want to control over where your data is being host, you have to host a local Git server.
- It’s really fun. Really!!!
The easiest and the cheapest way to create these type of Git server is by using the most versatile and cheap Raspberry Pi.
What do you need for this project?
- A Raspberry Pi 3. (Raspberry Pi 3 is recommended as it has 64 bit CPU and GitLab requires a 64-bit architecture.)
- Power supply to feed your raspberry pi.
- 16 or 32GB microSD card to store the Git reposetory. (Make you have the latest version of Rasbpian Jessie flashed on the SD card and your SSH is enabled.)
How to install GitLab on Pi?
Installing GitLab on the Raspberry Pi is very simple. It’s just 4 simple steps and that’s it! You are all done. Let’s get started.
First, login to your raspberry pi terminal using SSH and flow below steps.
1. Install required dependencies.
- Run the fllowing command in your SSH terminal to install and configure the necessary dependencies.
This command will install postfix on your raspberry pi. If you want to send emails from your GitLab server please select ‘Internet Site’ during setup.
- Once it is done, run below command to add GPG keys. This will allow us ti easily update our GitLab server.
2. Install GitLab CE (Community Edition) server.
- Run below command one by one to download and install GitLab. This may take time based on your internet speed.
3. Configure and start GitLab.
-
Run below command to configure your gitlab server for the first time. This command will take couple of minutes to execute.
-
That’s it. Congratulations!!! You sucessfully installed GitLab server on your Raspberry Pi. Now one final step is remaining.
4. Set up your GitLab account.
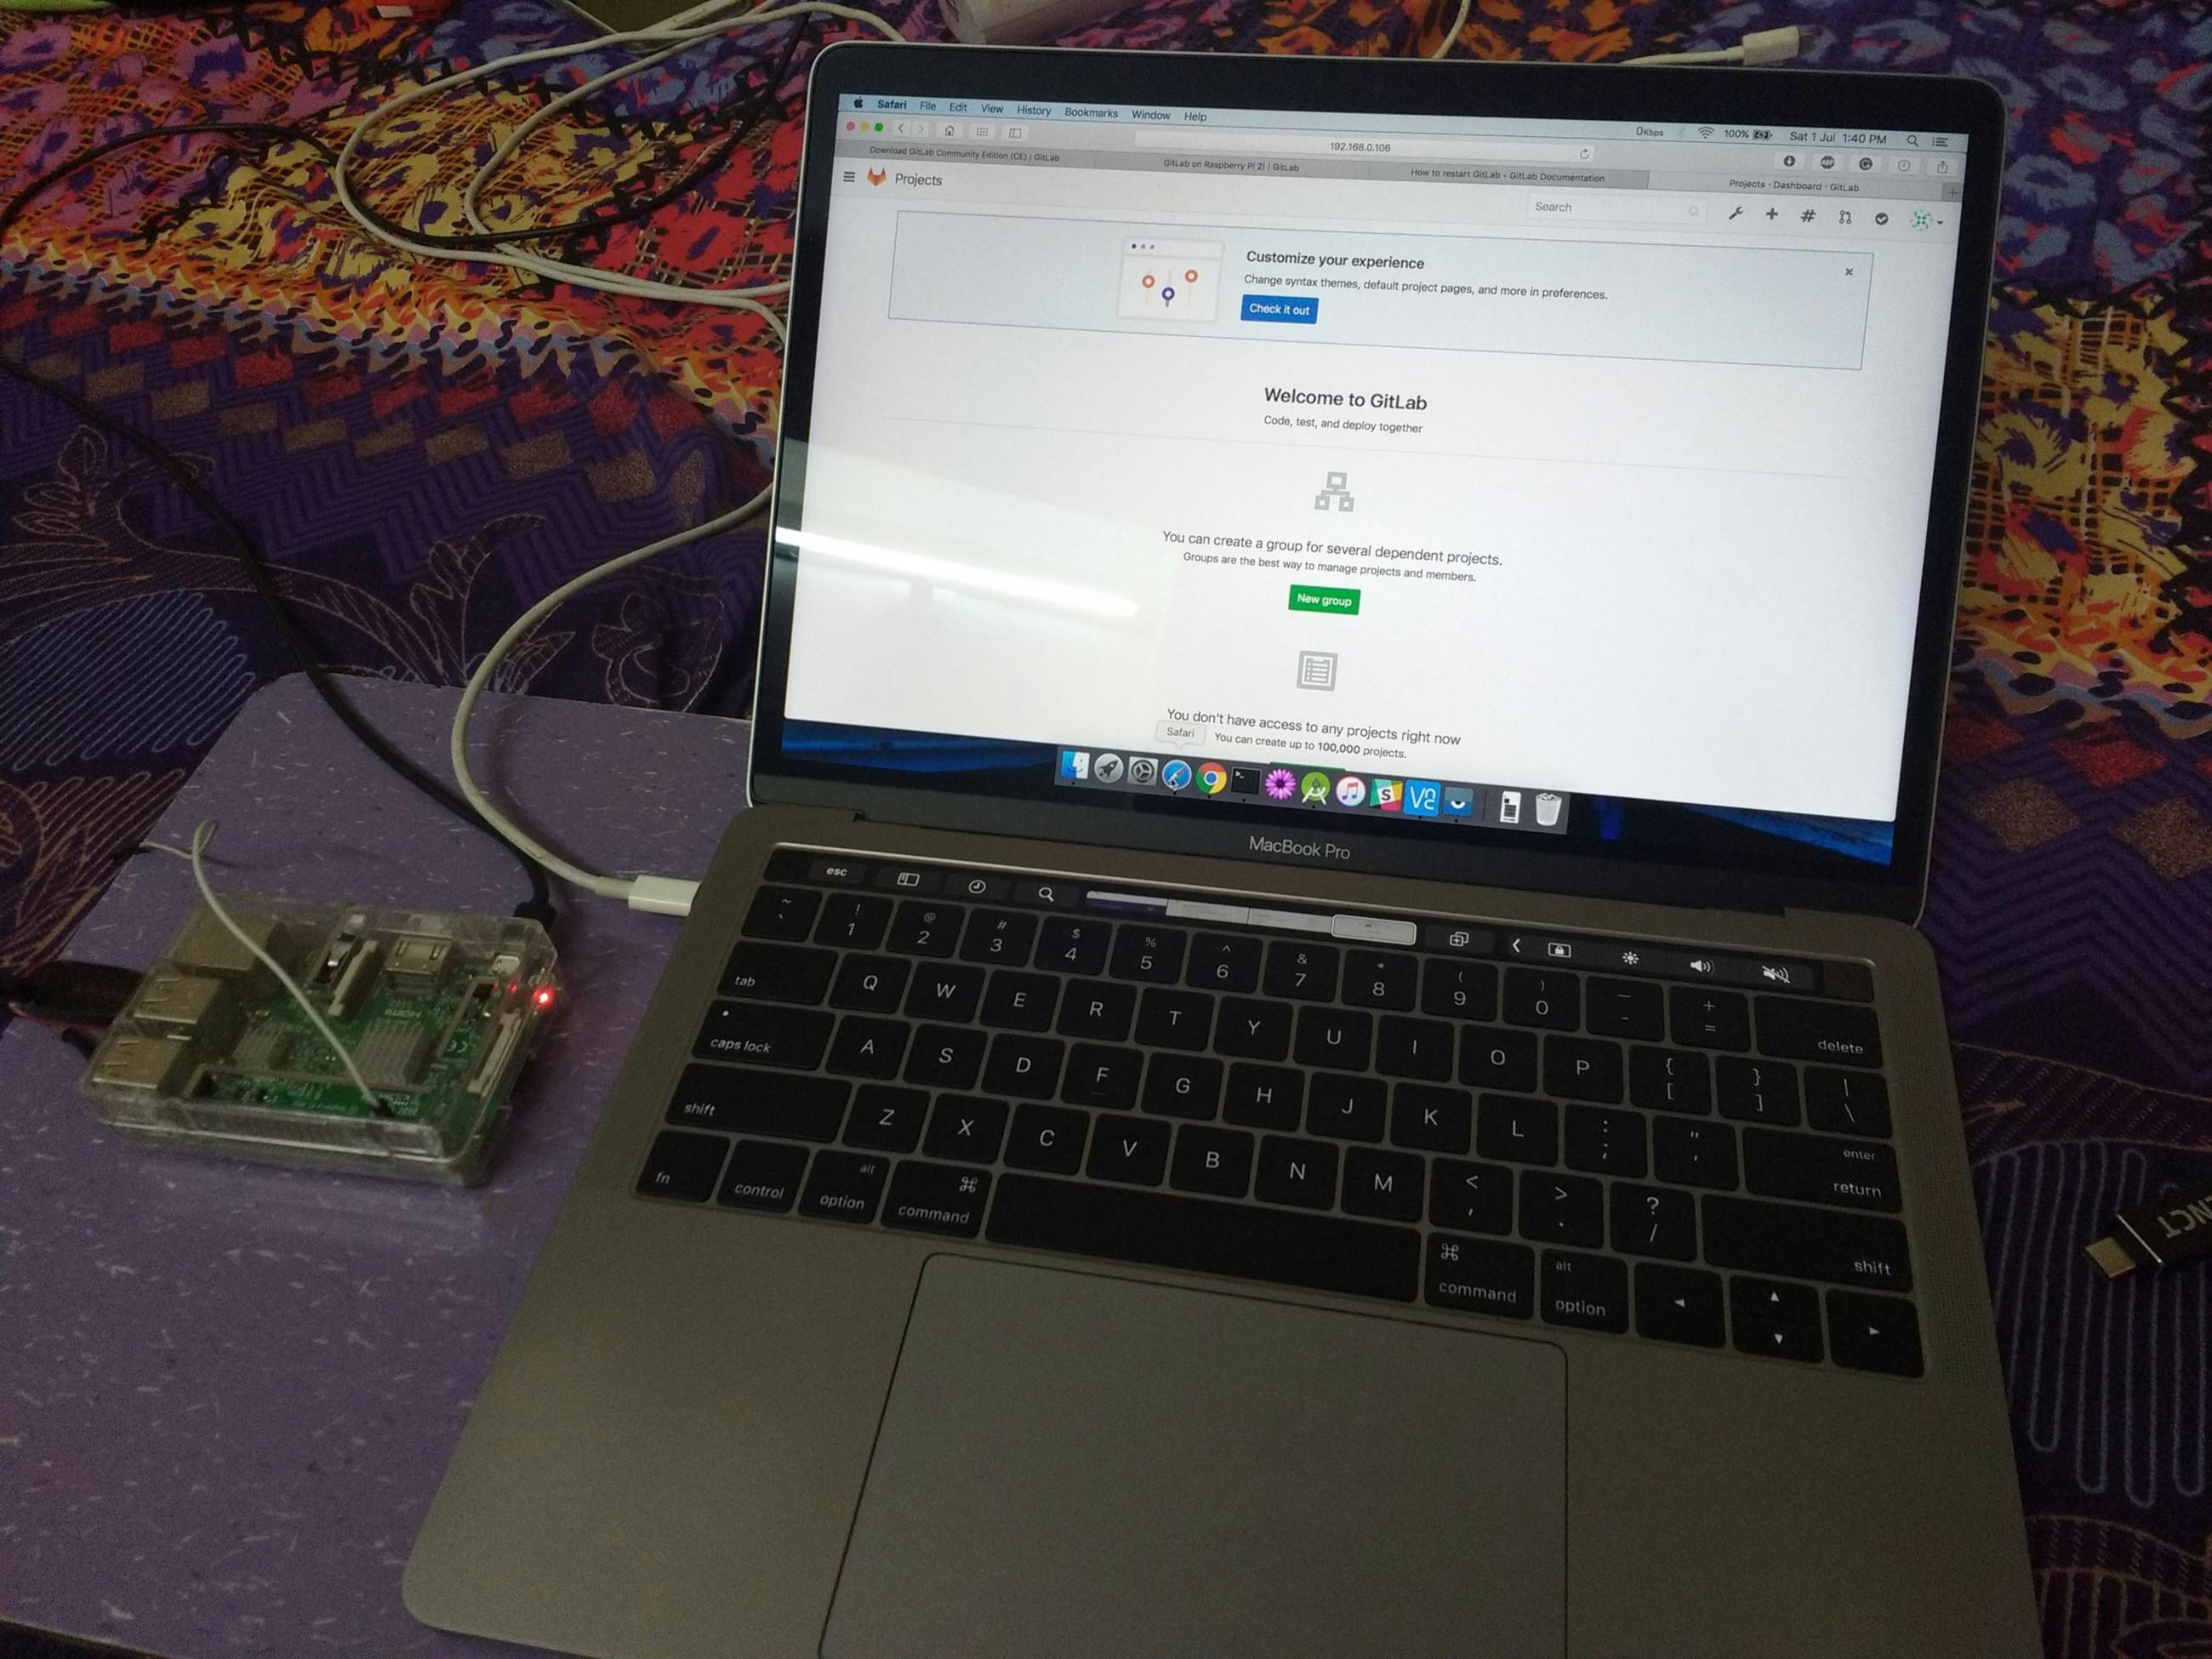
- Get the IP of your raspberry pi using ifconfig command.
- Now on your computer, go to the browser. Open the IP you get from the previous step in your browser. Volla!!! You will have the GitLab server page on your computer screen right from the tiny raspberry pi.
- On your first visit, you’ll be redirected to a password reset screen to provide the password for the initial administrator account. Enter your desired password and you’ll be redirected back to the login screen.
Keep in mind that your default account’s username is root.
- Log in with your username (that is root by default) and the password you set in the previous step. You will have the home page of your GitLab server, where all your future projects will be listed.
Conclusion:
So, now you learned how you can host your own Git server at your home. This will cost you less than $50. But, it will provide you complete control over your codebase.
Later if you want to migrate to any of online git server, you can easily change your Git hosting by easily adding a remote pointing to the online repository.
~If you liked the article, click the 💚 below so more people can see it! Also, you can follow me on Medium or on My Blog, so you get updates regarding my future articles!!~