Deploying a robust and scalable REST API is fundamental in building modern web applications. Ensuring the security of your API is equally crucial to protect sensitive data and maintaining user trust. This tutorial will guide you through deploying a scalable and secure Node.js REST API with MongoDB on Aptible.
This powerful deployment platform offers robust application hosting, scaling, and security solutions.
Content Overview
-
Importance of Deploying Scalable and Secure REST APIs
-
Prerequisites
-
Setting Up the Development Environment
-
Connecting to MongoDB
-
Building the Node.js REST API
-
Deploying on the Aptible Platform
- Why use aptible for containerization and orchestration
-
Conclusion
Importance of Deploying Scalable and Secure REST APIs
REST (Representational State Transfer) APIs have become the cornerstone of web applications, enabling seamless communication between the front and back end.
As your application gains traction, the demand for your API will inevitably increase.
-
Scalability:
A scalable API can handle higher traffic loads without compromising performance, ensuring a smooth user experience even during peak usage.
-
Security:
Handling user data and sensitive information requires airtight security measures to prevent data breaches and unauthorized access. Secure APIs employ encryption, authentication, and authorization mechanisms to safeguard user data and the overall system.
If you are looking for a PaaS to help you build and deploy your applications quickly and easily, then Aptible's PaaS is a great option.
Prerequisites
Before you begin, ensure you have the following prerequisites:
- Install Git
- Create an Aptible account
- Install the Aptible CLI
- Add an SSH public key to your Aptible user account
- Install and setup MongoDB
- Install Nodejs and Express
Setting Up the Development Environment
Now that you’ve completed the prerequisites and created your Aptible project set up your development environment.
1. Create a New Project Directory
Navigate to a directory where you'd like to create your project. In the terminal, create a new directory and navigate into it:
mkdir multitenant
cd multitenant
2. Initialize Your Project with NPM
You will use npm (Node Package Manager) to manage your project's dependencies and configurations. Run the following command to initialize your project:
npm init -y
This command generates a package.json file that will store information about your project and its dependencies.
3. Install the Express Framework
Express is a minimal and flexible Node.js web application framework you will use to build your REST API. Install Express using npm:
npm install express
Your project directory structure should now look something like this:
multitenant/
├── node_modules/
├── package.json
└── package-lock.json
Connecting to MongoDB
1. Create a database.js File
- Inside your project directory, create a new file called
database.js. This file will set up the connection to your MongoDB database.
2. Import the MongoDB Module and Set Up a Connection
Open database.js in your preferred code editor and add the following code:
const MongoClient = require('mongodb').MongoClient;

const uri = 'mongodb://your-mongodb-uri'; // Replace with your actual MongoDB URI
const client = new MongoClient(uri, { useNewUrlParser: true, useUnifiedTopology: true });

client.connect(err => {
  if (err) {
    console.error('Error connecting to MongoDB:', err);
    return;
  }
  console.log('Connected to MongoDB');

  // You can now use the 'client' object to interact with the database
});
Replace 'your-mongodb-uri' with the actual connection string for your MongoDB database.
The above code establishes a connection to the MongoDB database using the MongoDB driver's MongoClient. You handle any connection errors and, if successful, log a confirmation message.
Building the Node.js REST API
With your development environment and the MongoDB connection established, Its time to start building our Node.js REST API using Express.
1. Create a server.js File
In your project directory, create a new file called server.js and add the following code:
const express = require('express');
const bodyParser = require('body-parser');
const mongoose = require('mongoose');

const app = express();
const PORT = process.env.PORT || 3000;

app.use(bodyParser.json());

mongoose.connect('mongodb://localhost/organization-app', {
  useNewUrlParser: true,
  useUnifiedTopology: true,
});

const Organization = require('./models/Organization');
const User = require('./models/User');
const Store = require('./models/Store');

// Define your endpoints here

app.listen(PORT, () => {
  console.log(`Server is running on port ${PORT}`);
});
2. Define your MongoDB models:
Create separate files for each model in a models directory:
-
models/Organization.js:
const mongoose = require('mongoose');

const organizationSchema = new mongoose.Schema({
  name: String,
  email: String,
  department: String,
  password: String,
  isAdmin: Boolean,
  users: [{ type: mongoose.Schema.Types.ObjectId, ref: 'User' }],
});

module.exports = mongoose.model('Organization', organizationSchema);
-
models/User.js:
const mongoose = require('mongoose');

const userSchema = new mongoose.Schema({
  name: String,
  email: String,
  password: String,
  role: String,
  organization: { type: mongoose.Schema.Types.ObjectId, ref: 'Organization' },
  stores: [{ type: mongoose.Schema.Types.ObjectId, ref: 'Store' }],
});

module.exports = mongoose.model('User', userSchema);
-
models/Store.js:
const mongoose = require('mongoose');

const storeSchema = new mongoose.Schema({
  name: String,
  description: String,
  link: String,
  user: { type: mongoose.Schema.Types.ObjectId, ref: 'User' },
  isPrivate: Boolean,
});

module.exports = mongoose.model('Store', storeSchema);
-
Define your REST endpoints in the
server.jsfile:
// Create a new organization
app.post('/organizations', async (req, res) => {
  try {
    const organization = await Organization.create(req.body);
    res.status(201).json(organization);
  } catch (error) {
    res.status(500).json({ error: 'Internal server error' });
  }
});

// Get all organizations
app.get('/organizations', async (req, res) => {
  try {
    const organizations = await Organization.find().populate('users');
    res.json(organizations);
  } catch (error) {
    res.status(500).json({ error: 'Internal server error' });
  }
});

// Get a specific organization
app.get('/organizations/:id', async (req, res) => {
  try {
    const organization = await Organization.findById(req.params.id).populate('users');
    res.json(organization);
  } catch (error) {
    res.status(500).json({ error: 'Internal server error' });
  }
});

// Update an organization
app.put('/organizations/:id', async (req, res) => {
  try {
    const updatedOrganization = await Organization.findByIdAndUpdate(
      req.params.id,
      req.body,
      { new: true }
    );
    res.json(updatedOrganization);
  } catch (error) {
    res.status(500).json({ error: 'Internal server error' });
  }
});

// Create a new user
app.post('/organizations/:orgId/users', async (req, res) => {
  try {
    const user = await User.create({ ...req.body, organization: req.params.orgId });
    const organization = await Organization.findByIdAndUpdate(
      req.params.orgId,
      { $push: { users: user._id } },
      { new: true }
    );
    res.status(201).json(user);
  } catch (error) {
    res.status(500).json({ error: 'Internal server error' });
  }
});

// Get all users for an organization
app.get('/organizations/:orgId/users', async (req, res) => {
  try {
    const users = await User.find({ organization: req.params.orgId }).populate('stores');
    res.json(users);
  } catch (error) {
    res.status(500).json({ error: 'Internal server error' });
  }
});

// Update a user
app.put('/users/:id', async (req, res) => {
  try {
    const updatedUser = await User.findByIdAndUpdate(req.params.id, req.body, { new: true });
    res.json(updatedUser);
  } catch (error) {
    res.status(500).json({ error: 'Internal server error' });
  }
});

// Create a new store for a user
app.post('/users/:userId/stores', async (req, res) => {
  try {
    const store = await Store.create({ ...req.body, user: req.params.userId });
    const user = await User.findByIdAndUpdate(
      req.params.userId,
      { $push: { stores: store._id } },
      { new: true }
    );
    res.status(201).json(store);
  } catch (error) {
    res.status(500).json({ error: 'Internal server error' });
  }
});

// Get all stores for a user
app.get('/users/:userId/stores', async (req, res) => {
  try {
    const stores = await Store.find({ user: req.params.userId });
    res.json(stores);
  } catch (error) {
    res.status(500).json({ error: 'Internal server error' });
  }
});
4. Create a Dockerfile for Your Application
In your project directory, create a file named Dockerfile. This file will contain instructions for building your Docker image.
Open Dockerfile and add the following code:
# Use the official Node.js image as the base image
FROM node:16

# Set the working directory inside the container
WORKDIR /app

# Copy package.json and package-lock.json to the working directory
COPY package*.json ./

# Install project dependencies
RUN npm install

# Copy the application code to the container
COPY . .

# Expose the port that the app will run on
EXPOSE 3000

# Start the application
CMD ["node", "server.js"]
This Dockerfile sets up a Node.js runtime, installs dependencies, copies your application code and specifies the command to start the application.
- Push your project to GitHub.
Docker allows us to package our application and its dependencies and configurations into a single container that can easily deploy across different environments.
Deploying on the Aptible Platform
Congratulations! Your Node.js REST API is now containerized using Docker. You can now deploy it on the Aptible platform, providing a streamlined application deployment process focusing on security, compliance, and scalability.
To get started, you will need to create an Aptible project. This can be done by following the step-by-step guide below:
- Login to Aptible via the CLI using the below command.
aptible login
Follow the instruction to login into your Aptible account.
- Create an Environment by running the below command.
Syntax:
aptible apps:create <App name> --environment=<environment name>
Command:
aptible apps:create multitenant --environment=env-prodz
You will see something similar to this:
App multitenanst created!

Git Remote: git@beta.aptible.com:env-prodz/multitenanst.git
- Add the Aptible Git remote for this app, then push to the remote to begin deployment:
Syntax:
git remote add aptible <Git Remote>

      git push aptible main
Command:
git remote add aptible git@beta.aptible.com:env-prodz/multitenanst.git

      git push aptible main
You will be presented with a prompt similar to this.
This key is not known by any other names

Are you sure you want to continue connecting (yes/no/[fingerprint])?
After typing yes, you will see something similar to this.
remote: INFO -- : COMPLETED (after 0.06s): Commit service cmd in API

remote: INFO -- : STARTING: Cache maintenance page

remote: INFO -- : COMPLETED (after 0.05s): Cache maintenance page

remote: INFO -- : STARTING: Commit app in API

remote: INFO -- : COMPLETED (after 0.2s): Commit app in API

remote: INFO -- : App deploy successful.

remote: (8ミ | INFO: Deploy succeeded.

To beta.aptible.com:env-prodz/multitenanst.git

 * [new branch] main -> main
Congratulations! Your app is deployed!
- Add an Endpoint
Endpoints are used to terminate SSL/TLS and expose your application's services to the outside internet. Traffic received by the Endpoint will be load-balanced across all the Containers for the service, allowing for highly-available and horizontally-scalable architectures.
a. In your dashboard, click on your app name multitenast
b. Click on Endpoint
c. To create your first endpoint, click the Save Endpoint button. The default settings will route traffic to your application using the *.on-aptible.com domain. You can always create a custom endpoint with your domain later.
You can create an Endpoint via the CLI https://www.aptible.com/docs/cli-endpoints-https-create
Note: If you encounter an error run this command
aptible restart
- Create a database
Aptible makes it easy to connect your Apps and Databases. Databases are automatically connected to provisioned Apps within the same Stack. Supported database types include PostgreSQL, MongoDB, Redis, MySQL, CouchDB, Elasticsearch, RabbitMQ, and InfluxDB.
a. In your environment dashboard, click on the database tab
b. To create your first database endpoint, follow these steps:
-
Choose a name for your handle. This name will be used to identify your database in the Aptible console. It should be a unique and descriptive name.
-
Choose a database provider. Aptible supports a variety of database providers, including MySQL, PostgreSQL, and MongoDB. Choose the database provider that best suits your needs.
-
Select a version. Aptible offers different versions of each database provider, each with its features and capabilities. Choose the version that best meets your needs.
-
Choose a container size. The container size determines the amount of memory and CPU that your database will have. Choose a container size that is large enough to meet your needs but not so large that you are wasting resources.
-
Choose a disk size. The disk size determines the amount of storage space that your database will have. Choose a disk size that is large enough to store your data but not so large that you are wasting money.
-
Click Save Database. This will create your database endpoint.
Now, update your MongoDB URL with your Aptible credentials. You can find your credentials by visiting your database dashboard and clicking "Reveal Credentials."
To access your backend endpoints, go to "Endpoints" and copy your HOSTNAME.
You can then test your endpoints on any API testing platform, such as POSTMAN. To see the complete multitenant project and the API documentation, please refer to my GitHub repository here: https://github.com/wise4rmgod/Multitenant
Continue deploying!
Edit your codebase, commit changes, and push to Aptible to see them go live instantly.
git commit -a -m "Commit changes to view on Aptible"
      git push aptible main
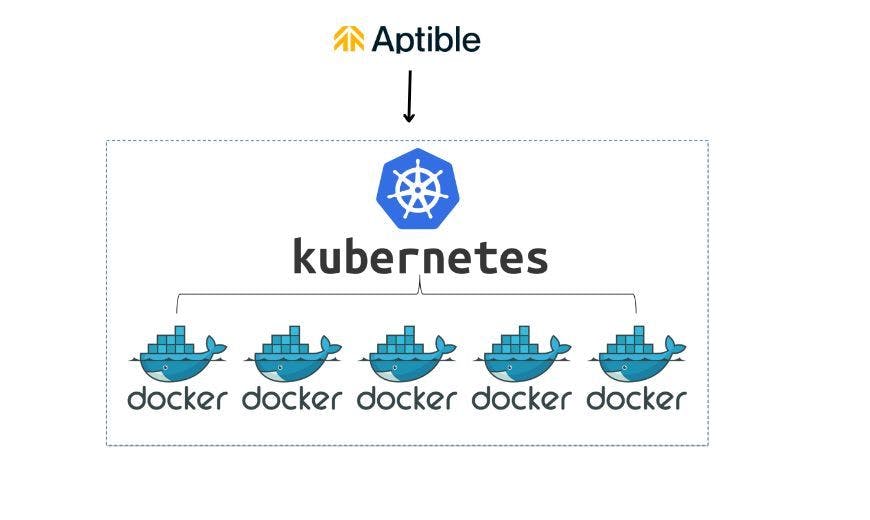
Why use Aptible for containerization and orchestration?
Aptible's PaaS (Platform as a Service) is a fully managed platform that makes deploying, managing, and scaling containerized applications easy.
With Aptible's PaaS, you don't need to worry about the underlying infrastructure, so you can focus on building your applications.
It offers several features that make it ideal for containerization and orchestration, including:
- Managed infrastructure. Aptible's PaaS takes care of all the underlying infrastructure so you can focus on building your applications.
-
Security:
Aptible provides several security features to help you keep your applications safe, such as role-based access control (RBAC), intrusion detection and prevention (IDS/IPS), and automatic security updates.
-
Compliance:
Aptible complies with several industry regulations, such as HIPAA, PCI DSS, and SOC 2. This makes it a good choice for applications that comply with these regulations.
-
Scalability:
Aptible is designed to automatically scale your applications up or down based on demand. This can help you save money on your cloud costs.
-
Monitoring:
Aptible provides several monitoring tools to help you track the performance and health of your applications. This can help you identify and fix problems before they impact your users.
-
Ease of use:
Aptible is a very easy-to-use platform. You can start with just a few clicks; no complex configuration steps are required.
-
Cost-effectiveness: Aptible is very cost-effective. You only pay for the resources that you use, and there are no hidden fees.
-
Support: Aptible offers excellent support. You can get help from their team of experts 24/7.
If you are looking for a platform to help you with containerization and orchestration, I highly recommend Aptible. It is a secure, compliant, scalable, and easy-to-use platform that can help you save money and improve the performance of your applications.
Conclusion
In this guide, You successfully deployed a secure Node.js REST API with MongoDB on Aptible's platform. By following these steps, you've learned to create a robust and scalable environment for your app.
Docker containers and Aptible orchestration ensure scalability as your user base grows. With this deployment, you can confidently expand your app's features. This guide equips you to create, secure, and scale modern web applications on Aptible.