DxDiag Windows 11: DxDiag is the short form of the DirectX Diagnostic Tool, introduced in Windows 95. This diagnostic tool has been long-running across various Windows operating systems. It plays a crucial role in diagnosing and displaying information related to system hardware, DirectX components, and drivers. This post covers all the essential topics related to the DxDiag Diagnostic Tool on Windows 11. Let’s get started.
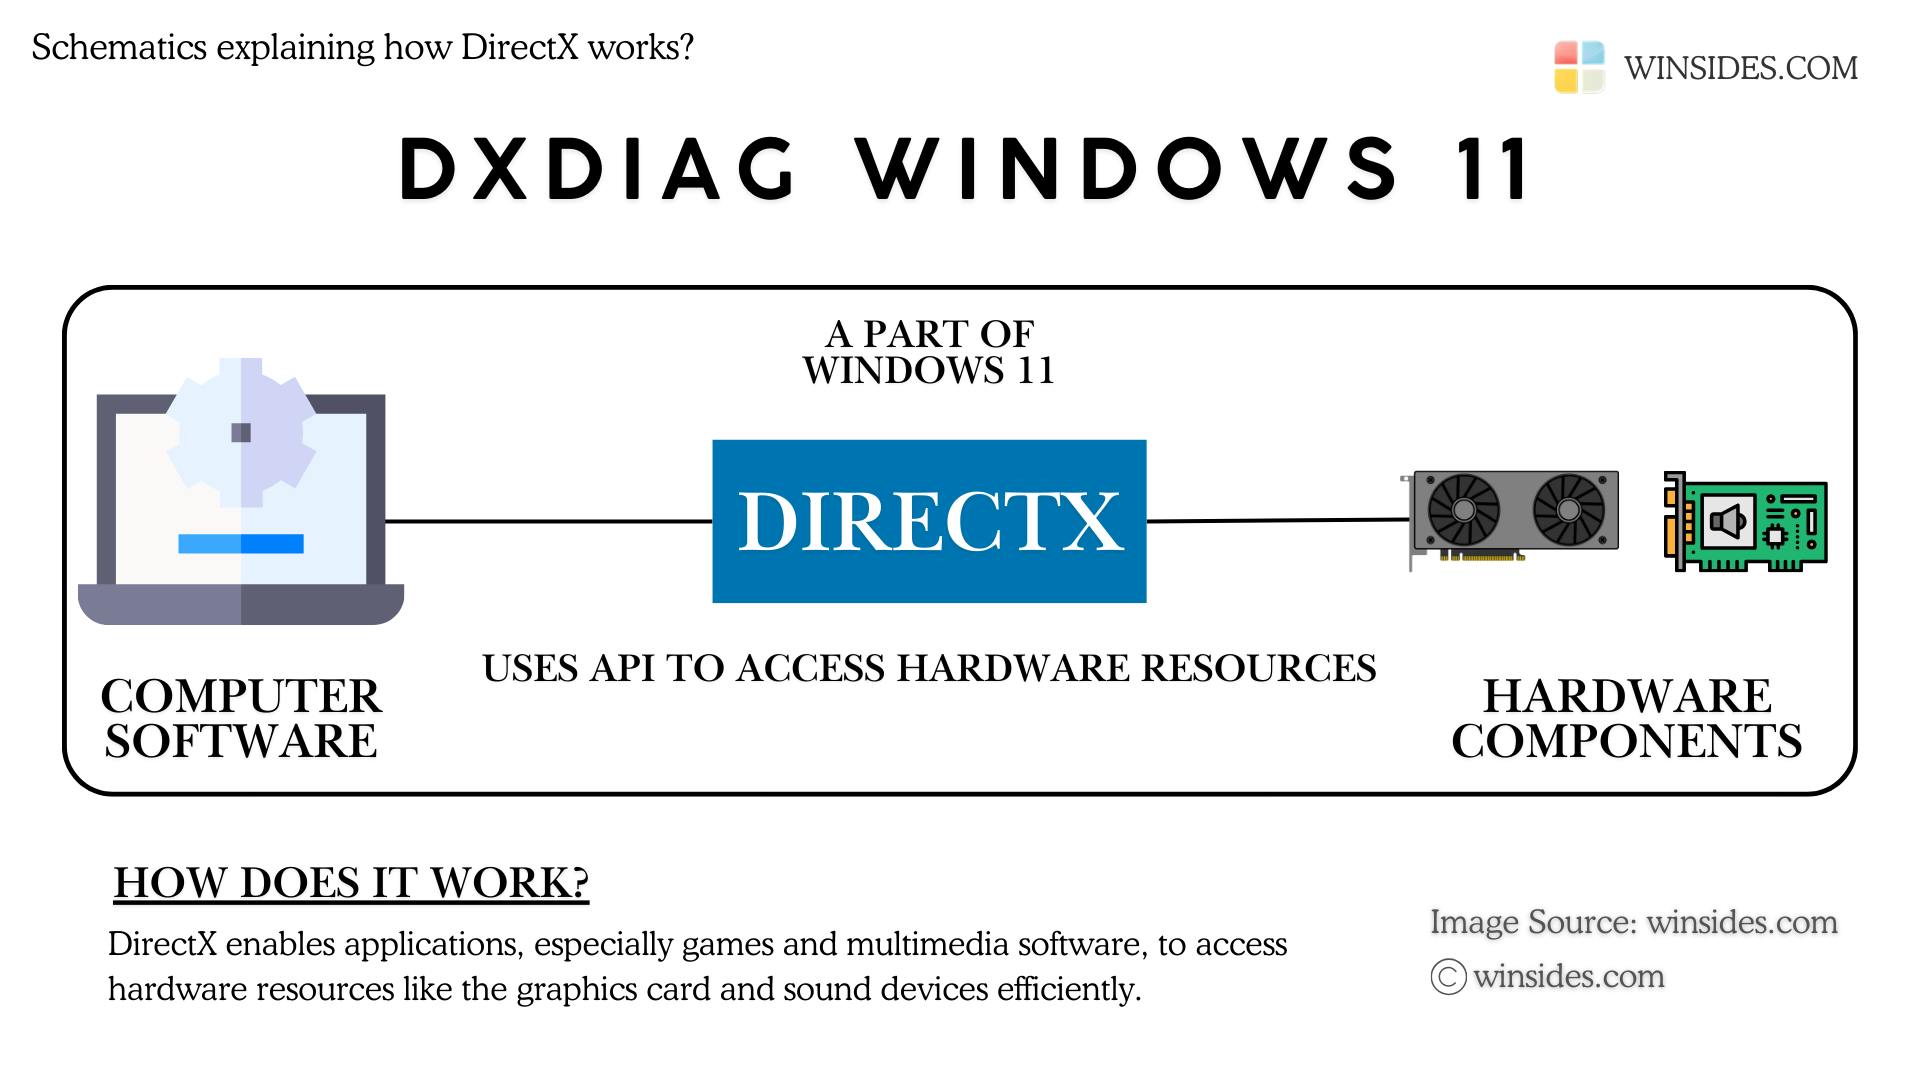
What is DirectX?
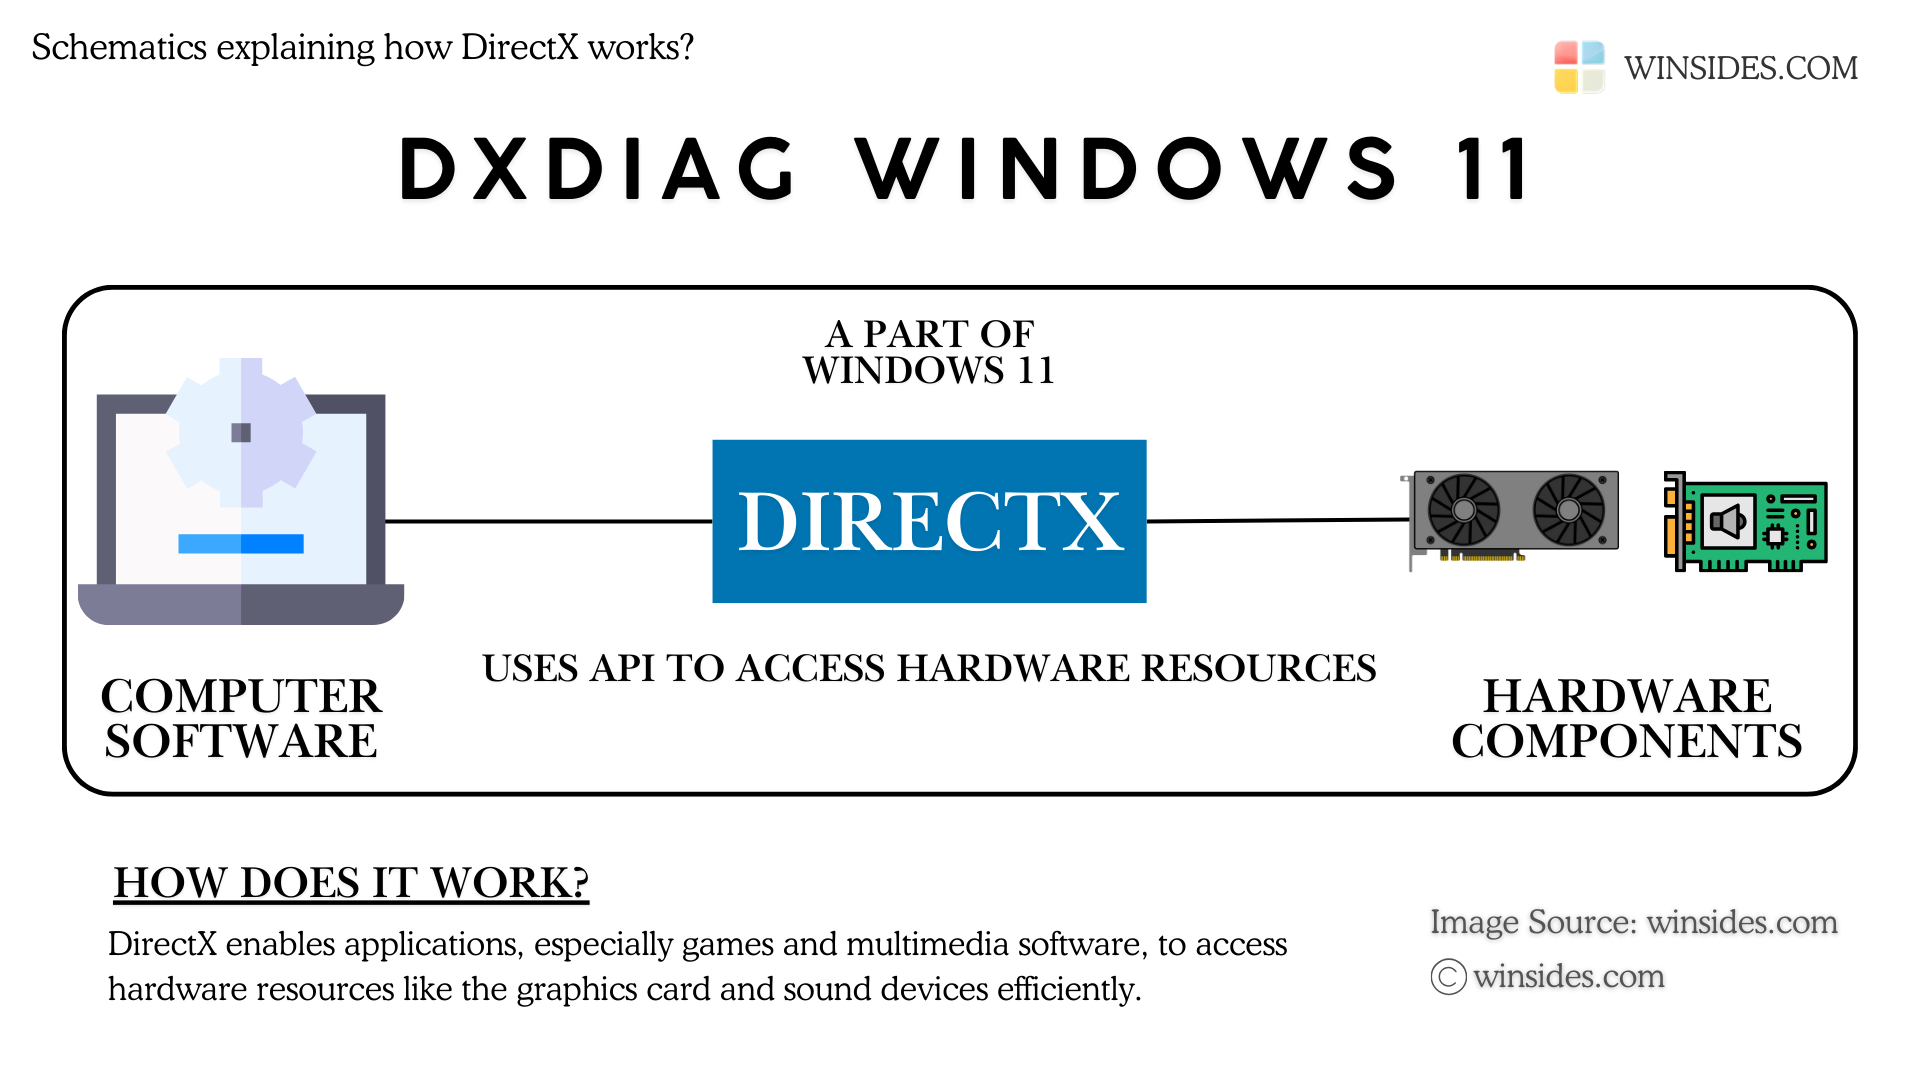
DxDiag on Windows 11 helps bridge software and hardware by providing access to system components such as graphics cards, sound devices, and more, offering a standardized way to access and optimize system resources. Technically speaking, DirectX is a collection of Application Programming Interfaces developed by Microsoft to handle multimedia tasks, especially game programming and video.
What is DxDiag on Windows 11?
DxDiag is the Diagnostic Tool available on Windows 11 that allows users to diagnose and fix issues related to the DirectX Components. Additionally, DXDiag provides detailed information about the System’s Hardware Components and Driver Details. It includes System Information, Display, Sound, Peripheral Input/Output Devices, Graphics Cards, and more.
I am using the Asus ROG Strix G513H powered by Ryzen 7, 16 GB RAM, and Nividia 1650 Graphics Card, etc, all together running on Windows 11 Home. In the above image, you can find the DxDiag provides all this information and additional key information related to my system.
Different ways to access the DirectX Diagnostic Tool on Windows 11
Accessing DxDiag on Windows 11 is a straightforward option. There are several ways to access this feature on Windows 11.
- Access DxDiag Windows 11 using the Run Command.
- Open DxDiag using the Start menu.
- Access DirectX Diagnostic Tool using the Command Prompt or the Windows PowerShell.
The following are the detailed steps involved in the process of accessing DxDiag on Windows 11.
How to Access the DxDiag Tool using the Run Command
- You can go to the Run Command using the shortcut Win Key + R.
- In the Run, execute the following command.
dxdiag - That is it. The system will now open the Directx Diagnostic Tool.
Open the DxDiag Tool on Windows 11 using the Start menu
This is the simplest way to access this diagnostic tool on Windows 11.
- Go to the Start menu, and search for DxDiag.
- When you find the application, click on that to open it.
How to open DirectX Diagnostic Tool on Windows 11 using CMD / Windows PowerShell?
You can either use the Command Prompt or the Windows PowerShell for this method. Here, I am using the Command Prompt.
- Go to the Command Prompt.
- In the CMD, type
dxdiagand then click Enter. - Now, the system will open the DirectX Diagnostic Tool.
Understanding DirectX Diagnostic Tool Information
In this section, let us decode all the information available in this Diagnostic Tool.
System Tab
In the System tab, you will find all the following essential information.
| Current Date/Time | Computer Name | Operating System & Its Build |
| OS Language | System Manufacturer | BIOS Information |
| Processor Information | Memory Information | Page File Information |
| DirectX Version | DxDiag Version | System Model |
System Information available in the System Tab.
The “Check for WHQL Signature” option in DxDiag verifies whether installed drivers have been certified by Microsoft’s Windows Hardware Quality Labs (WHQL). If you want to ensure that your system is using stable and certified drivers, you can enable this feature.
Display Tabs
If you are wondering why there are two Display Tabs in the above image, in my case, the first one represents the Integrated Graphics, and the second one represents the actual Graphics Card. As I am using Ryzen 7, the Integrated Graphics is AMD Radeon Graphics Processor (0*1636). The following is the information usually available in this tab.
| Graphics Device Name | Graphics Manufacturer Information | Chip Type |
| DAC Type | Device Type | Approximate Total Memory |
| Display Memory | Shared Memory | DirectDraw Acceleration Status |
| Direct3D Acceleration Status | AGP Texture Acceleration Status | DirectX 12 Ultimate |
| Current Display Mode | Monitor Type | HDR Support |
| Main Driver Information | Driver Version | WHQL logo’d |
| Feature Levels | Driver Models | Direct3D DDI |
Information available in the Display 1 Tab.
Let’s move to the Display 2 Tab.
This provides crucial Information about the System Graphics Card. In my case, it is Nvidia GTX 1650.
Here, you will find similar information as mentioned in the Display 1 tab, however, the information is related to the dedicated Graphics Card.
IMPORTANT: In both Display 1 and Display 2 Tab, Under Notes, “No problems found” message ensures that the Integrated Graphics and the Dedicated Graphics Card are working well without any issue.
Sound Tab
Let’s move to the next section, Click on the Next Page on the Display tab. Now, the Sound tab will load and the tool will ensure that it is working fine.
Here, you will find the following information.
| Sound Device Name | Hardware ID | Manufacturer ID |
| Product ID | Product Type | Provider |
| Driver Name | Driver Version | WHQL Logo’d |
As I am using Asus Noise Cancelling Output Utility, Gamecaster Audio Render, I am having additional Sound Tabs (Sound Tab 1, Sound Tab 2, Sound Tab 3, and Sound Tab 5), as each software handle the Sound Hardware differently. Usually, there will be only one Sound Tab (in my case, it is Sound Tab 4).
Input Tab
Finally, the Input Tab. Here you will find all the information related to the peripheral devices.
| Device Name | Device Status | Controller ID |
| Vendor ID | Product ID | Force Feedback Driver |
| Input Related Devices |
How to use the DxDiag Tool for troubleshooting System Issues?
- Go to the DirectX Diagnostic Tool on Windows 11. Click on Next. The tool will switch from the System Tab to the Display Tab.
- If no problems are found, you can click Next and continue the process until you reach the Input Tab which is the last tab. Finally, if no problems are found in all the tabs, you can safely click Exit to close the tool.
- If you want to save the information, click on Save All Information. You can save all this information as a text file.
The Notes under each tab provide clear information on the Hardware functioning status. If each tab provides the message “No problems found“, you can safely click Exit.
Video Walkthrough: How to Use DirectX Diagnostic Tool on Windows 11
Common DxDiag Errors & How to Fix Them?
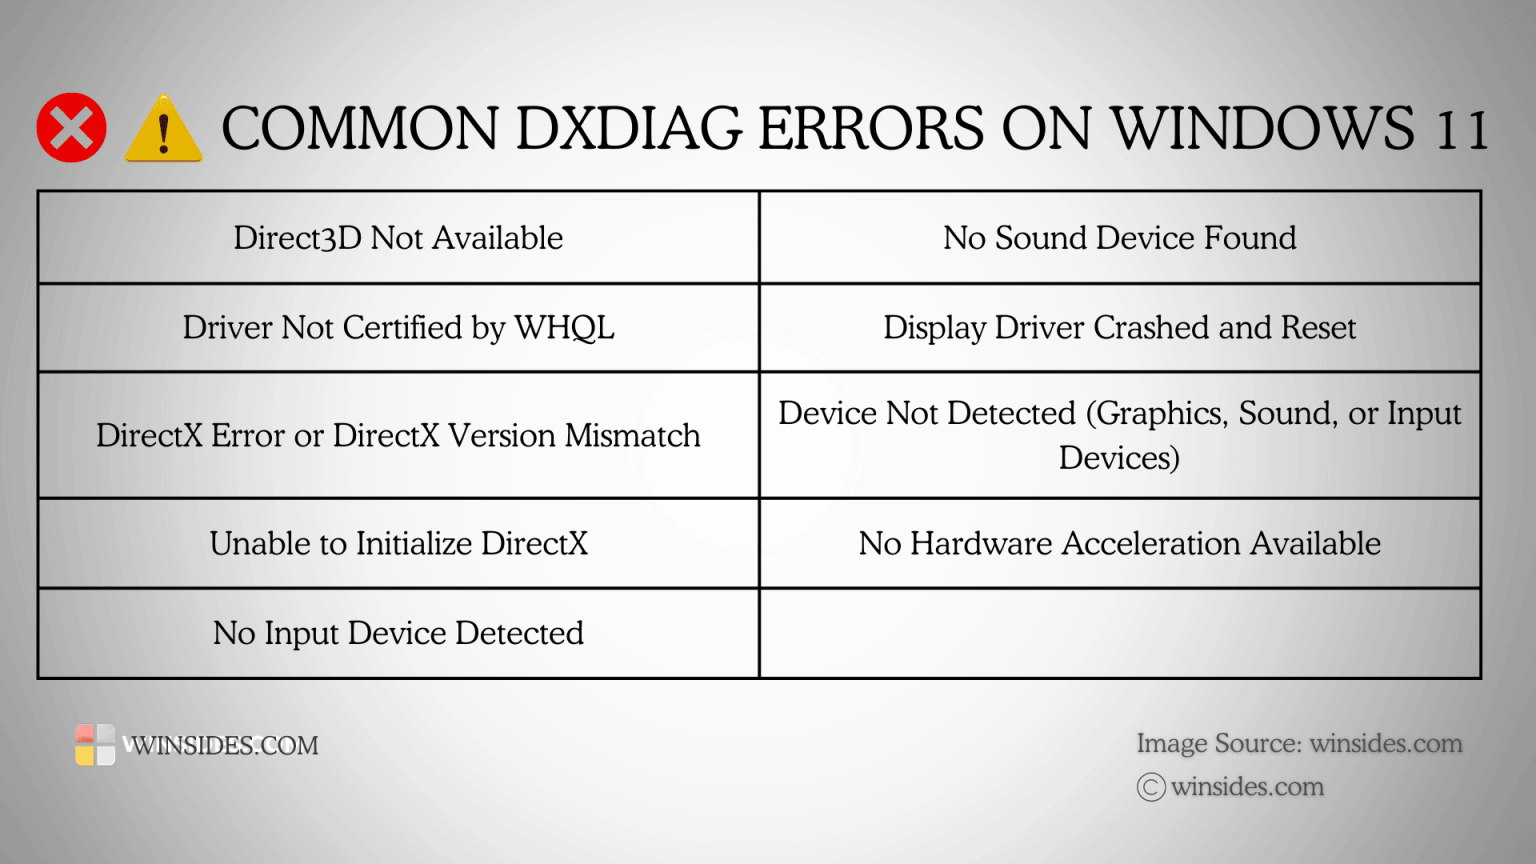
The most common DirectX Diagnostic Tool errors are as follows:
| Direct3D Not Available | No Sound Device Found | Driver Not Certified by WHQL |
| Display Driver Crashed & Reset | DirectX Error or DirectX Version Mismatch | Device Not Detected (Graphics, Sound, or Input Devices) |
| Unable to Initialize DirectX | No Hardware Acceleration Available | No Input Device Detected |
- To fix the Direct3D Not available error, it is suggested to update your Graphics Card Driver, ensure that the GPU is properly connected, and finally, make sure Direct3D is enabled.
- Fixing the No Sound Device Found error involves checking whether the Sound Devices are connected and powered on, and updating the audio drivers via the Device Manager.
- Driver Not Certified by WHQL error occurs when the installed driver is not certified by Microsoft’s Windows Hardware Quality Labs. Hence, it is suggested to Update to the latest WHQL-certified driver from the official manufacturer and make sure you are not running any Beta Drivers.
- Display Driver Crashed and Reset error occurs due to the instability of the Display Driver. To fix it, roll back to the stable version if you are facing this issue after a recent update, and check for overheating issues that may affect the GPU.
- DirectX Error or DirectX Version Mismatch error occurs due to an outdated or incompatible DirectX version. To fix this issue, update DirectX using the DirectX End-User Runtime Web Installer.
- Device not Detected (Graphics, Sound, or Input Devices) error may occur because of a device failure or an improper connection.
- Unable to initialize DirectX error occurs due to system issues with DirectX Installation. Reinstalling DirectX may help fix this issue.
- No Hardware Acceleration Available error happens when this feature is disabled or due to driver issues. Make sure to enable Hardware Acceleration in the Display Settings, and also update the Graphics Driver.
- No Input Device Detected error happens due to a missing or malfunctioning input device. Updating the device drivers in the Device Manager may help fix this issue.
Takeaway
We have explored the essential role of DxDiag Windows 11 in diagnosing and troubleshooting system issues on Windows 11. From its basic functions of checking system, display, and sound components to more advanced features like generating detailed reports and debugging tools, DxDiag offers collective options to ensure optimal system performance. We hope you are satisfied with our article and if you have any queries, kindly let us know in the comment section.
[story continues]
tags