
Hey there! As the CTO at Integra Sources, I get to dive into the ins and outs of electronics and software development every day. My team and I have been building PCBs, crafting firmware, and tackling engineering challenges for over a decade.
In this article, I decided to raise the curtain on our craft to give you a view of what electronics development looks like from the inside. It covers the following topics:
- How we organize the development phases
- What methodologies we use
- How often we report progress and what channels we use
- What we do to minimize risks
- How we handle amendments in project requirements
How a Project Begins
Requirements Gathering, Analysis, and Project Estimation
Every project kicks off with understanding the client and their goals. For example, say a business manager approaches our team to develop an equipment automation system for B2B, involving both a printed circuit board and embedded software for a universal controller.
Naturally, the first questions the client asks are whether we can handle the job, how much it will cost, and how long it will take. To provide solid answers, it’s essential that we have at least a general understanding of the client's idea. So, we start by gathering both functional and non-functional requirements. Our sales team conducts detailed interviews with the client, aiming to uncover all explicit needs and underlying expectations.

It’s just as important to understand the people side of the project as the technical side. Early on, we figure out who on the client’s team actually owns the project, who controls the budget, and who makes the final calls.
The key to a good interview is not being afraid to ask “uncomfortable” questions up front. That’s how you avoid truly uncomfortable surprises at the end. The interview works as a filter for unrealistic expectations and protects both sides from the common pitfalls of contract electronics development.
These interviews give us a formalized description of the client’s concept, which we analyze for completeness and consistency. If everything is good, we make a rough estimate. If not, we go back with questions and keep digging until it becomes clear what the team is actually expected to deliver.
Then the team validates each requirement using a few simple but powerful techniques. Most often, we rely on the simple
Take our project on an

Sometimes asking "why" and "what for" kills the project altogether—in a good way. Once a musician contacted Integra Sources and asked us to design a wearable audio recorder. But it turned out the device already existed: we found it on a popular marketplace. We sent the link to the customer; he thanked us and went on with his life. The project never started, but we slept well that night.
Once we’ve gathered and clarified the requirements, we produce a rough project estimate: ballpark schedule and budget. We base it on similar projects we’ve completed and our knowledge of the specific domain, and we usually attach a mini-portfolio of related solutions, including UI/UX screenshots if it’s an application.
The accuracy of such an estimate is intentionally low, and that’s by design. You might see something like: from three months to a year, from $5,000 to $15,000. Wanna launch it? But don’t worry: this is just a rough range of parameters to help you estimate the budget and prioritize features.
Project Development Specification and Solution Architecture
If a client doesn’t have a project specification, we can make one for an additional fee. This document outlines product requirements: its purpose, functions, use scenarios, and future hardware components. It also formalizes the workflow. You can read more about
With the specification in hand, the team designs a high-level architecture of the solution. The architecture describes the main units it will comprise and how these blocks should interact. For example, a project may include:
- A universal controller managing the client’s equipment
- A server module
- A mobile application
After an analysis, we assign functions to each block and define interfaces between the units. Next, the team decomposes the modules into submodules, creating a more detailed, low-level architecture. This continues until we eliminate all uncertainties about how the solution is supposed to operate.

The resulting documents serve as the foundation for a deep, detailed estimate of the project. It outlines the development phases, frameworks, and technologies and allocates the time required for testing, debugging, and documentation preparation. We often use the
Risk Management
At the next phase, the team estimates risks and develops strategies to address them. Risks can range from an unfamiliar chip not performing as expected, a critical server failure, or losing access to an essential platform.
Each risk is evaluated based on its potential impact on the project and the likelihood of occurrence. For instance, if a chip issue can be quickly fixed with a 15-minute workaround, that risk is low and can be safely ignored.
But if a failure might require redoing large parts of the project, it demands proactive measures such as identifying alternative components early and allocating extra time for testing and validation.
My favorite practice example is our experience with GD32 microcontrollers. While the manufacturer promotes generous flash memory sizes, they omit that the memory is split into fast and slow banks with a significant speed gap. This hidden detail required additional firmware optimization time to maintain device performance.
How Technical Decisions Are Made
For us, the general rule is to stick to standard solutions within our competencies and technology stack—unless the client insists otherwise. Our principle is to do it fast, reliably, and cost-effectively. In such cases, there’s no need to hypothesize or validate concepts since the developers know exactly how to implement familiar features.
If the solution is non-standard, it requires non-standard design. Again, this can be handled by regular developers. Naturally, senior colleagues or the customer review the results and make corrections if required.
When the team hits a tough problem with no obvious solution, we switch to brainstorming mode. Everyone contributes thoughts and ideas. Then the project manager makes the final call after discussing options with the client. Another option is that a team member delves deeply into the issue alone and returns with one or two ideas.
Here’s an example. In one of our projects, we needed to connect an external RAM to a microcontroller. Due to the high frequency and large number of conductors, it was impossible to prototype the layout. So, we decided to verify the solution by manufacturing full-fledged PCBs at the factory. Initial tests looked fine, but memory errors appeared during firmware development. No immediate explanations were found, so the tech lead switched to crazy scientist mode. It turned out the memory required one of the signals to be generated with a slight delay relative to others, yet the microcontroller generated control signals “simultaneously.” Putting a buffer on the line solved the problem.
Task Distribution and Department Synchronization
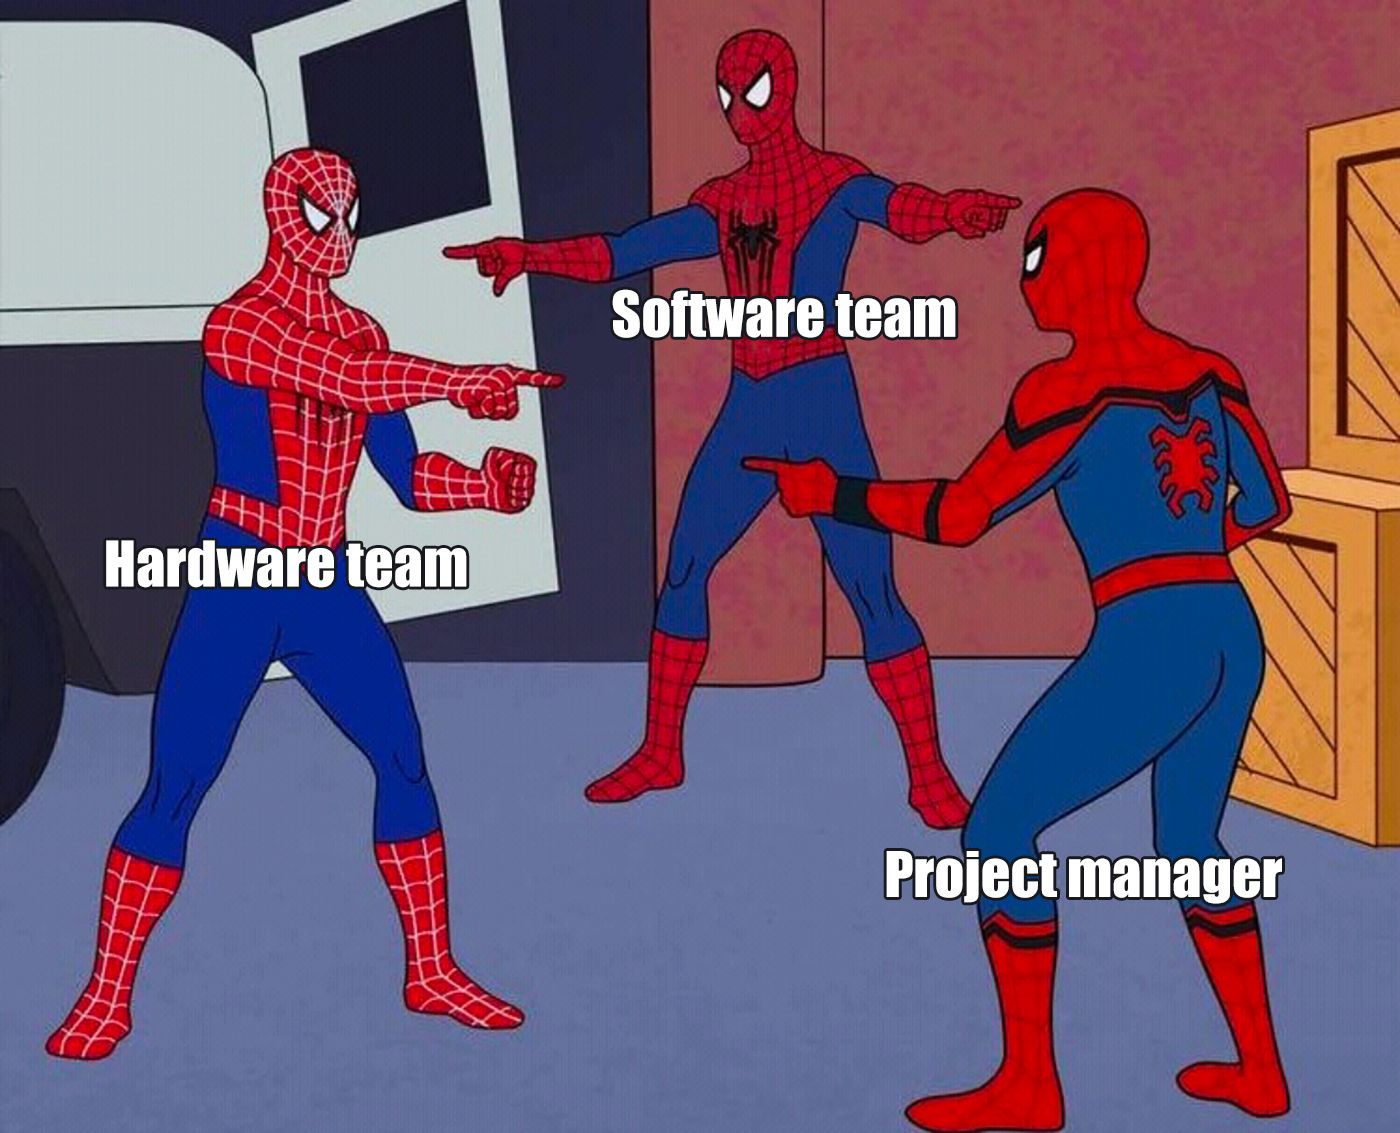
In projects involving both hardware and software teams, it is very important to synchronize their work. In the good old days, we used to divide projects into hardware and software parts. The hardware team designed the PCB, while the coders developed the software, and they interacted only when necessary. However, it quickly became clear that this approach was problematic.
We had the same issue again and again. The hardware team makes the PCB and hands it over to the software team. After some time, the software team comes back saying that the board isn’t working as expected. And then the ping-pong game begins: who is to blame?
One memorable case involved encryption. The hardware and software teams each implemented encryption on their sides. When the testing failed, they spent almost an entire day trying to figure it out. The encryption seemed correct, the connection was there, but nothing worked.

Although we had discussed everything when the project was launched, it turned out that the coders used a high-level library and encrypted only the data. Meanwhile, the hardware team decided to use a low-level library and encrypted both the data and technical information. Well, we had to redo it.
To solve this, we eventually switched to a model where one project is overseen by a single manager. Developers from hardware and software teams work together transparently under one manager, following Agile principles. This results in a seamless communication model and flexible project teams.
How We Work on Hardware
Hardware is developed in several steps. Immediately after receiving the project specification, we compile a list of components to be used in the device. Initially, it only includes large and the most important components but gets more details afterward.
Some projects require building and testing proof-of-concept prototypes at the early phase. Such devices can be built with breadboards representing a small section of the circuit to quickly test an idea before moving on. If it passes the tests, it can be integrated into the larger circuit. If not, we keep looking for other solutions.
Any surprises can happen here. For example, we once had to design a device based on an nRF microcontroller. First, we tested the idea on a PoC prototype. We took the devkit, put everything needed on it, and it worked fine. The team designed the PCB, the factory manufactured it, but when the PCB arrived and we powered it on—nope, not this time... Our engineer spent a lot of time figuring out why. It turned out that the nRF required two crystal oscillators: one runs the clock, while the other one runs everything else. Since the clock was not needed in this project, the developer didn’t put the corresponding oscillator into the circuit. Who could have known this oscillator was mandatory for this particular version of the microcontroller!
Next, an electronics engineer develops the schematic diagram. Then we design the PCB layout. The goal is to put traces in such a way that nothing burns out or explodes, and if it does, at least not in the office. Each PCB type (power electronics, high-speed electronics, etc.) has its own pitfalls and challenges. You can't survive here without automated testing.
Customers always want their products to be special in some way: to be noise resistant, to cause no interference, to be able to operate with low current, or take a beating like Hulk. For especially sophisticated tasks, we enable simulations—let the software tell us in advance where the device might explode.
A special kind of challenge is fitting everything onto the minimum board area. Automation helps, but the real magic happens in the engineer’s head: how to arrange the parts so that it works, fits, and preferably does not look like a postmodern art object.
The next step is making prototypes. We order the first batch, receive, test... and inevitably there’ll be some issues. No worries! That’s normal! Some projects succeed on the first try, but often multiple iterations (sometimes more than five) are needed to perfect the hardware.
To sum up, Integra values not only keyboard skills in developers, but also a deep understanding of physics. We maintain a culture of thoroughness: if an engineer says, “I need time to figure this out,” we let them have it.
How We Work on Software
When delivering software products, speed and reliability play the key role. Our team leverages CI/CD practices to automate integration, testing, and code delivery, making it easier to manage branching and teamwork.
Let’s suppose we have written a code, and now we need to integrate it into the solution. The CI/CD methodology can automatically check whether the code is written correctly, whether it works, and whether it doesn't break the overall program.
The system runs a series of tests (unit tests, integration tests) and stops the project build if any errors are detected.
Automatic Code Review
embarrassing basic coding errors: uninitialized variables, missing semicolons, missing opening or closing brackets, and stuff like that.
In some projects, we also use
Since we mostly develop software on the Qt framework, we design interfaces using QML. And there’s a similar tool for such source files—
Automated Testing
As soon as the code passes all formal reviews, testing begins. We assemble a test application that runs program modules and their interactions. We typically use load, integration, and unit testing. First, we check the work of individual parts and functions of the application responsible for the deepest, most basic logic of the program. Then it’s the turn of larger modules.
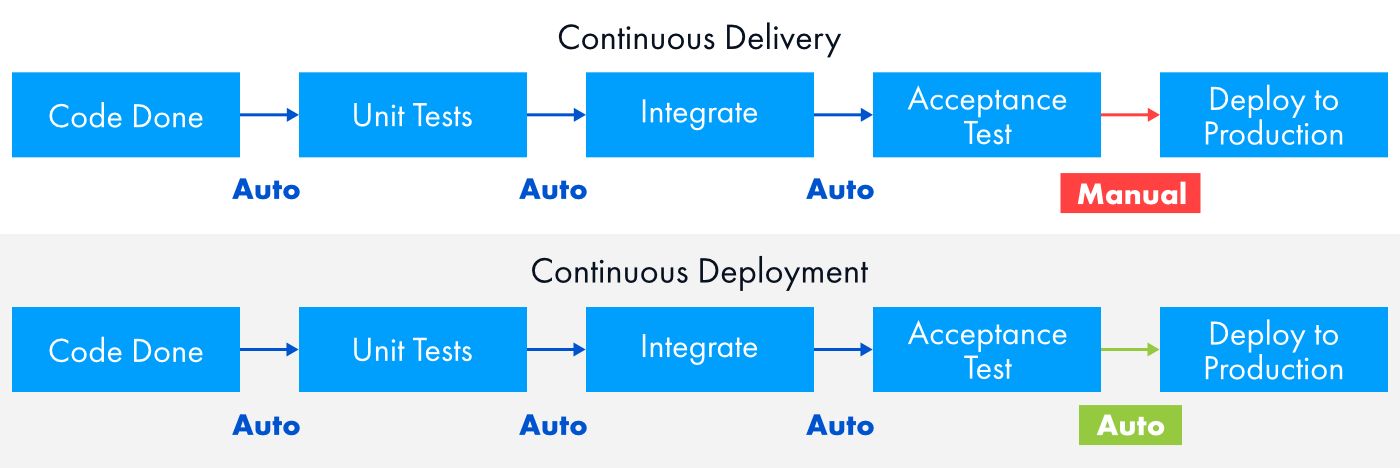
Deployment
Deployment means moving a complete version of a program to a target platform and launching it.
If we develop a program for Windows, we place the source code on our file server—ownCloud. We also send the link to the client so that they can install or update the application.
If the program is built for Linux, it is even easier. The application (deb package) is uploaded to the
And if we need to upload the developed solution to a mobile app store, we use
Suppose we have an iOS application. As soon as the source code is pushed to GitLab, Fastlane downloads it, builds the program, and sends the resulting file to Apple TestFlight. This is the official beta testing service for Apple devices. From there, the account owner (client) can invite testers to try out the new product and leave feedback. If everything is good, the app can be published in the App Store, where it becomes available to all users.
Finally, when working with Raspberry Pi single-board computers, the team uses the
The system image can be configured manually, but it involves booting the OS image on the Raspberry Pi, installing or updating the application manually, cleaning up, and then manually building the image again. Pi-Gen automatically creates an OS image with the required configuration and the latest version of the application (if it’s uploaded to a repository, for example, Nexus). The resulting ISO file can then be uploaded to ownCloud from which the customer can download and deploy it on their devices.
Reports
Electronics and software development takes a lot of time and requires significant investment. At the same time, the team may face unforeseen difficulties that lead to exceeding budget or missing deadlines. Naturally, clients want to see how the work is progressing. That’s why we use several types of reports.
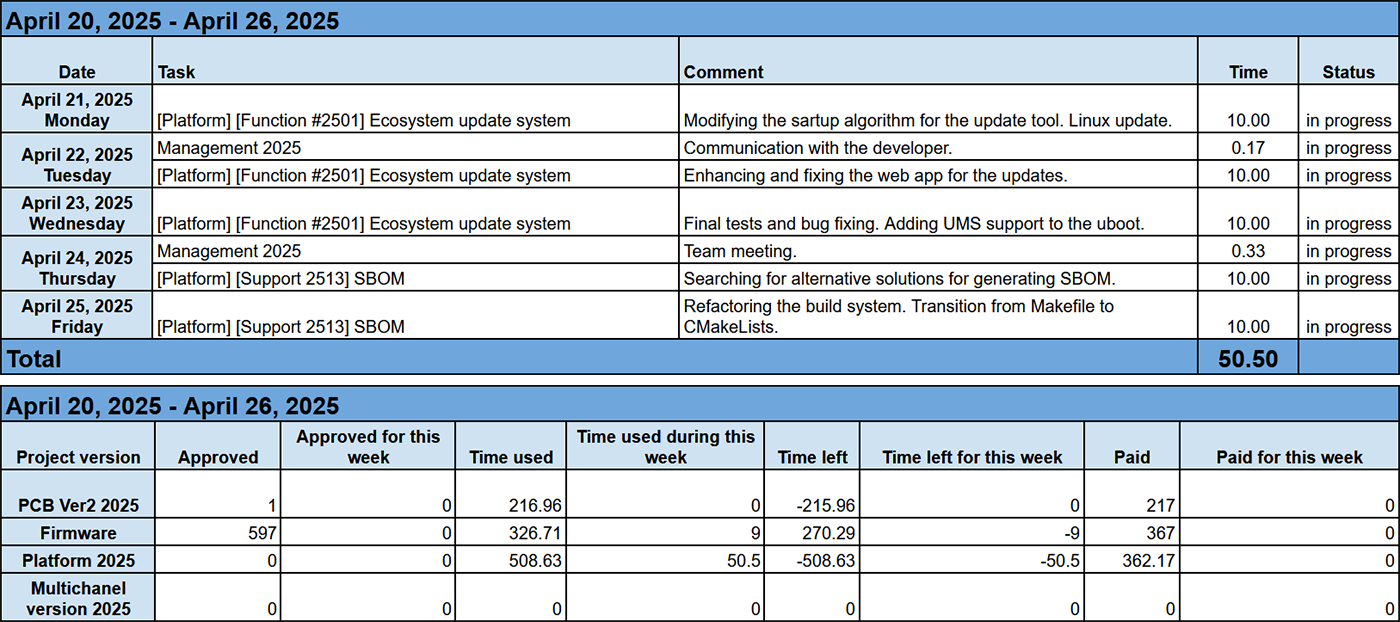
Daily or weekly reports
Generated in written form, these reports detail how many hours the team spends on various tasks. Integra Sources uses a proprietary project management platform that aggregates Jira worklogs and automatically creates tables showing task titles, work descriptions, hours worked, and weekly costs. A summary block highlights total logged hours and remaining budgeted time.
Periodic reports
These updates can be delivered in writing or verbally—by phone or messenger. They summarize completed work since the last contact, outline encountered challenges, and preview upcoming steps. Our project manager may also ask clarifying questions to ensure alignment.
Demos and build deliveries
Finally, when the team reaches a significant milestone in the project, we deliver the completed builds to the client for testing. If necessary, we arrange live demos to showcase new features and functionality.
This approach ensures process transparency, reassures clients that their projects are on schedule, and allows us to communicate promptly if adjustments become necessary.
Dealing with Issues
You might think that after all our years in the business, Integra Sources has every step planned out and can handle any curveball. But honestly? No matter how much you plan, something will almost always go sideways. It’s just part of the game. So yes, sometimes the scope shifts, deadlines slip, or budgets stretch. The real question is: what do we do when that happens?
Customer requests a new feature
You know how it goes—once the project is underway, clients start seeing new possibilities they hadn’t thought of before. For example, we had a project where the client wanted to add differentiated user access rights. Initially, it was in the estimate but felt too pricey, so it got cut. Fast forward a year and a half, the project was almost done, and suddenly the client said, “Hey, we actually do need that feature.”
We rolled up our sleeves, re-estimated the time and cost, and presented it back to the client. They weren’t thrilled about extra expenses, but greenlit the feature anyway. It’s part of the journey—and we’re ready to handle it.

The team makes a mistake in estimation or planning
To err is human. Sometimes we underestimate the complexity of a task or the scale of a problem. When that happens, we reach out to the client with solutions. If they’re on board, we update the plan. If not, we accept the consequences and do our best to follow the original plan.
Misunderstandings
Years of experience have taught us to repeat everything twice—still, mishaps happen.
We did a project for some guys from Argentina. We developed software for their hardware. At some point, the client introduced additional requirements that were not in the technical specification. We said that the task was out-of-scope. “Ok, proceed”, the client said. When the project was finished, the client saw the bill and was very surprised.
Turns out, they hadn’t fully read the contract, which stated that all out-of-scope work is charged separately. And we did not specifically highlight this. Since then, we make sure to spell out all costs, deadlines, and other parameters.
Sometimes clients try mind reading. Our team was tasked with redesigning a device which required a new processor. The device had an analog measurement part on discrete components. The technical specification did not mention it at all. Yet it worked properly. It turned out the client thought we would rework the analog part as well but for some reason did not communicate this requirement neither in writing nor verbally.
How we resolve issues when new requirements arise mid-project:
We try as hard as possible to identify all additional needs at the start of a project. But if a requirement emerges during work:
1. We put everything in writing—labeling it as an additional requirement or an out-of-scope task.
2. We inform the customer right away, and discuss our next move. In about 90% of cases, the client asks us to estimate the new task.
3. We estimate the work in hours including related tasks such as documentation updates, additional testing, and how much the deadlines will shift.
4. We ask for the customer’s approval.
Then one of the following can happen: a) the task is accepted; b) we put it in the backlog; c) the customer refuses the task.
To Summarize
Contract electronics and software development is a long, iterative process full of challenges and pitfalls. Successful product creation requires deep technical expertise combined with strong client collaboration. At Integra Sources, years of experience have shaped our internal working practices, but the learning never stops. We continuously adapt to changing technologies and market demands to stay professional, efficient, and ready for whatever comes next.
[story continues]
tags