In the CI/CD world (short for Continuous Integration and Continuous Deployment), GitHub Actions makes it easy to automate your entire development flow. It handles your builds, tests, and deployments through workflows that live right inside your repository.
In this article, we’ll walk through how to create GitHub Actions workflows and the different ways you can trigger them. It’s a beginner-friendly guide for anyone looking to explore how GitHub Actions can help you build and ship code automatically.
All you’ll need to follow along is a GitHub account and a repository.
1. Creating a GitHub Actions workflow file
Below is a GitHub Repository with the name HelloWorld_Sample with the simple Java HelloWorld code
2. Go to the Actions tab and define a workflow
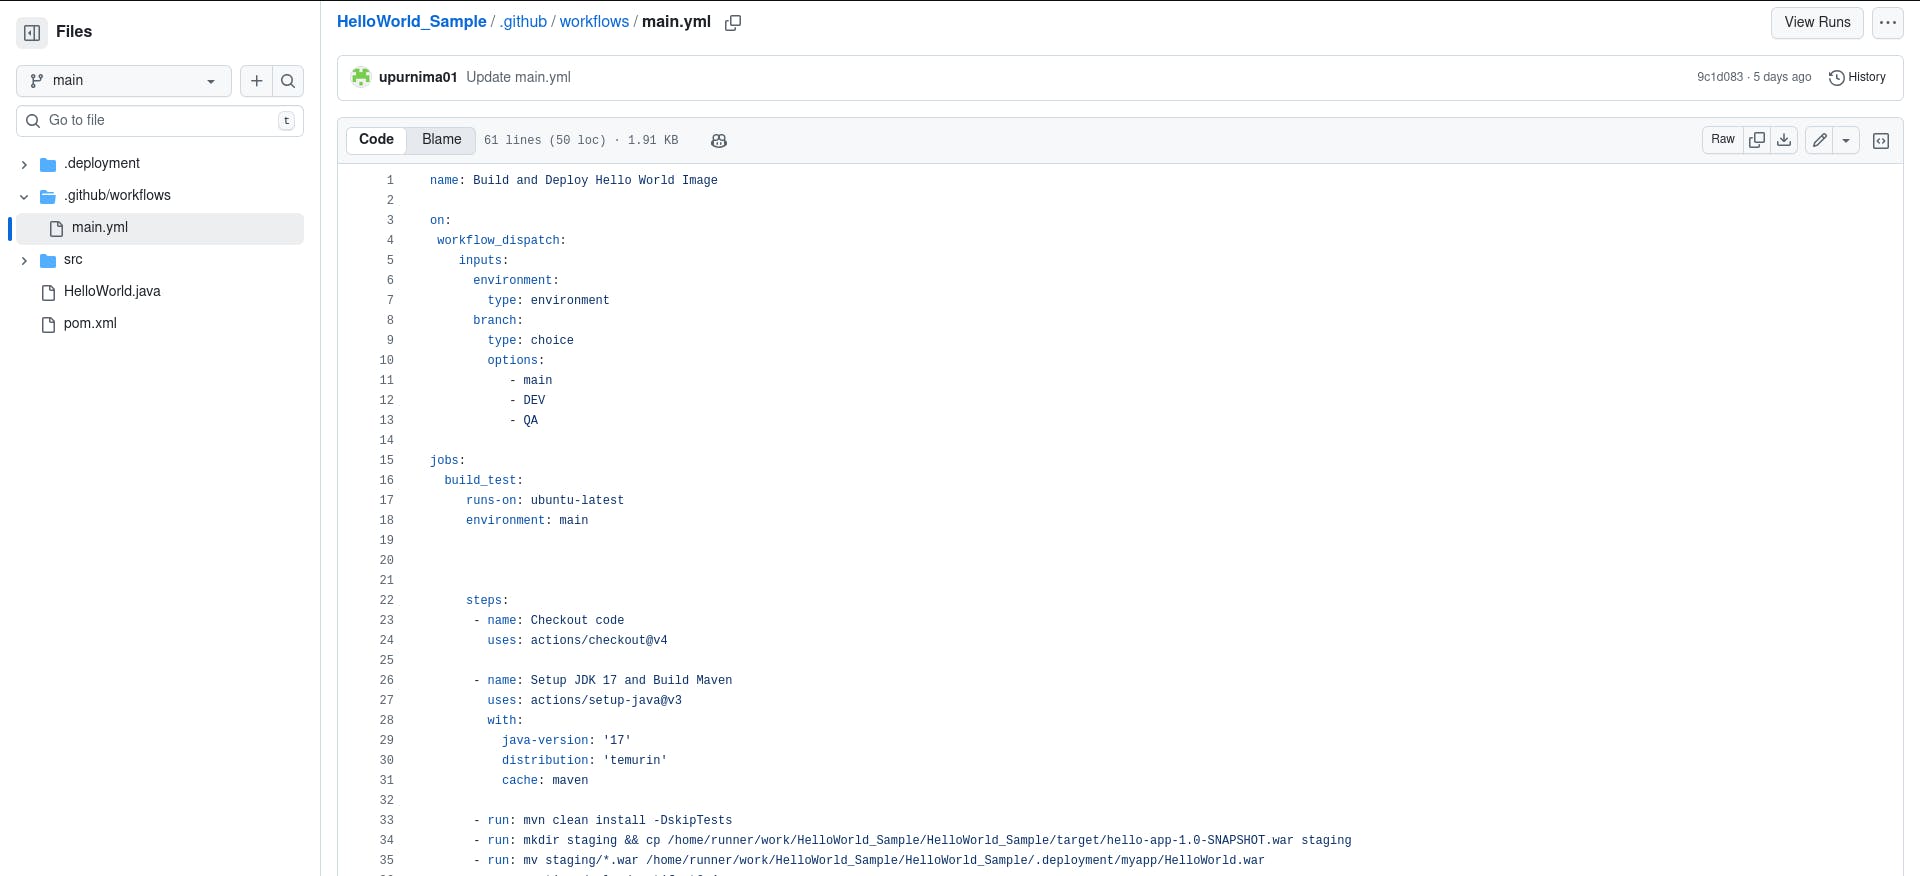
By default, your workflow files should live inside .github/workflows/—just add your own YAML file there. For example, the workflow file shown below is a simple YAML configuration we created to build and deploy the code for our repository.
3. Quick breakdown of what each part of the workflow file does
name:
This simply gives your workflow a descriptive title so you know what it’s meant to do.
on: workflow_dispatch
This lets you trigger the workflow manually and pass in inputs—for example, choosing which environment to deploy to. If your repo has branches like DEV, QA, and PROD, you can select one when running the workflow. In the sample below, we use three branches: main, DEV, and QA.
jobs:
Jobs define what the workflow should run. They can run in parallel or sequentially, and each one runs in its own isolated environment called a “runner.” You can choose Linux, Windows, or macOS runners; in this example, we’re using ubuntu-latest.
steps:
Each job contains a list of steps. Every step runs on the same runner and executes its own action or command. In our case, the steps handle building and deploying the code.
Key actions used in this workflow:
actions/checkout@v4– Pulls the repository’s code into the runner.actions/setup-java@v3– Installs Java and sets up Maven, which we need because this is a Maven-based Java project.actions/upload-artifact@v4– Uploads the generated WAR file to the specified output path.aws-actions/configure-aws-credentials@…– Configures AWS credentials so the workflow can connect to Amazon ECR, build a Docker image, and push it to the repository.
4. Trigger the workflow file
The image below shows how to run the workflow manually by selecting the required branch. In this image, we will select the main branch, and then hit Run workflow
5. Final step
Once the workflow finishes, GitHub will show you whether the job succeeded or failed—and if it failed, you’ll see exactly which step caused the issue. You can fix that step and rerun the workflow. In the example below, we’ve included both a failed build (for troubleshooting) and a successful one so you can compare where things went wrong and how the corrected run looks.
Failed Build: This build failed while building the Docker image. We then corrected it and re-ran the workflow.
Successful Build:
6. Conclusion
From this workflow, you can see how GitHub Actions makes automation straightforward—letting you build and deploy directly from the same repository where your application code lives. There’s no need to plug in extra tools just to handle CI/CD. Hopefully, this walkthrough gives you a clearer path to using GitHub Actions in your own repos for a smooth, integrated CI/CD process.


