
Modern browsers nowadays are more powerful than ever before. We can do all kinds of stuff in the browser with JavaScript now, like motion-sensing, Bluetooth pairing, capturing photos, videos, audio and much more.
We’ll look into how to take pictures in a browser with JavaScript.
A live demo of this project is here.
What Is Navigator Object?
According to MDN Docs,
The Navigator interface represents the state and the identity of the user agent. It allows scripts to query it and to register themselves to carry on some activities.
Simply put, Navigator Object contains data/information about the browser.
The Navigator object is accessed with, window.navigator or just navigator.
With navigator object, you can access information like geolocation of the browser, media devices available to the browser, are cookies enabled or not, etc.
For more info on the navigator object, visit the MDN Docs for Navigator.
For our purpose, we’ll be dealing with mediaDevices property.
mediaDevices Property
mediaDevices is a read-only property that provides access to media input devices like webcams, microphones, etc.
NOTE: We’ll need a secure context (HTTPS), to access these input devices.
So, we’ll start by installing a server for us to test the results.
NOTE: If you’re using a text editor like VS Code, using a live server extension will also work.
Make sure you have Node and NPM installed.
Install serve with the following command,
npm i -g serve
Now, let’s get into some code.
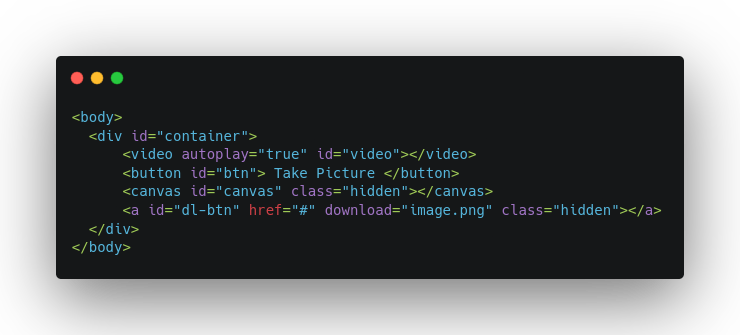
Create an index.html file with the following code.
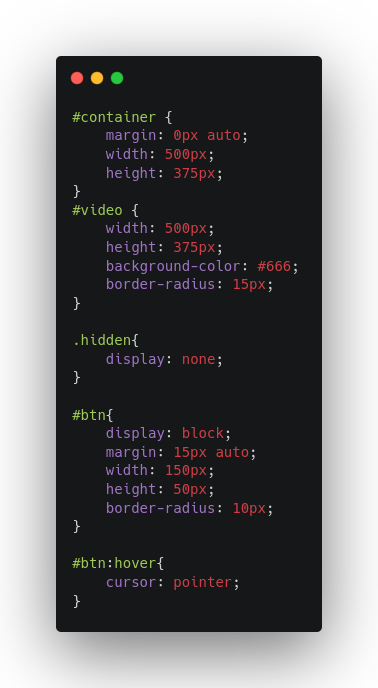
Now, a styles.css with some basic styles.
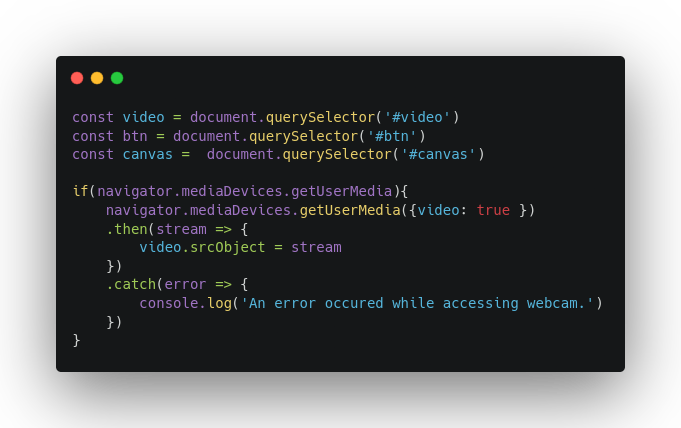
Now, in app.js, first, we’ll capture the media from the webcam, and output the stream via video element.
Enter the following command to start the server.
serve /PATH/TO/YOUR/DIRECTORY
This will give you a working video element.
For taking a picture,
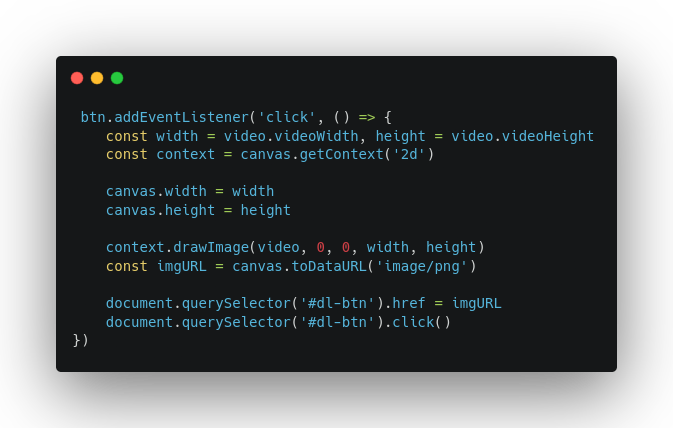
When the Capture photo button is clicked, we:
- Collected video element’s intrinsic width and height.
- made the canvas of the same width and height.
- Drew an image onto the canvas with the video element being the source.
- Encoded the canvas into an image data URL.
- Downloaded the image via a downloadable link.
And so, we successfully captured a picture on a browser with JavaScript.
[story continues]
tags