
File History on Windows 11: Many users rely on cloud storage services such as OneDrive, Google Drive, etc., to safeguard their files, often requiring ongoing subscriptions for expanded storage and advanced features. While these cloud solutions provide accessibility and convenience, some users prefer a cost-free, local alternative that does not depend on internet connectivity.
File History in Windows 11 serves this purpose by automatically backing up personal files to an external drive, another internal partition, or a network location, allowing users to restore deleted items or recover earlier versions of documents.
Is File History Enabled on Windows 11 by default?
The answer is No. By default, File History is not enabled on Windows 11. Technical and Privacy considerations, Microsoft’s strategy to promote cloud-based storage services like OneDrive, and others, may be a reason behind File History not being turned on by default on Windows 11. In this article, let’s check out How to Turn on File History on Windows 11. Let’s get started.
Different Methods to Enable File History on Windows 11
There are various ways to enable File History on Windows 11, from using Windows Settings to the enterprise-level Group Policy Editor, and more. Here are the methods.
- Enable File History on Windows 11 using Control Panel (Simple & Convenient Method for all Users)
- Turn on File History on Windows 11 using Command Line Tools such as Command Prompt and Windows PowerShell (Effective for IT Administrators)
- Enable File History using Group Policy Editor (For Enterprise-Level)
Let’s check out each method in detail.
How to Enable File History on Windows 11 using Control Panel?
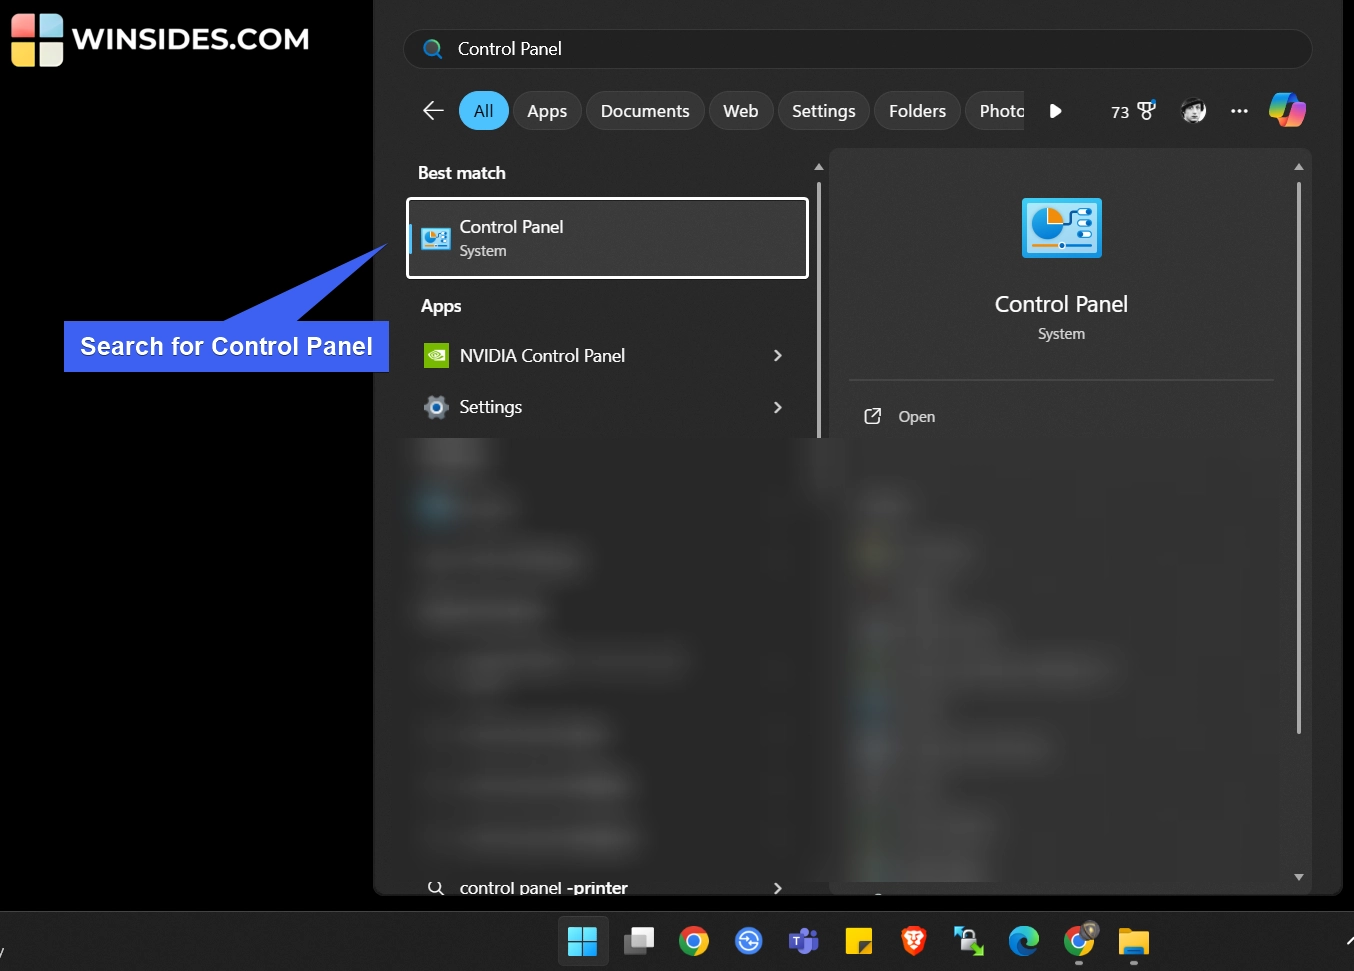
- Go to the Start Menu and search for the Control Panel.
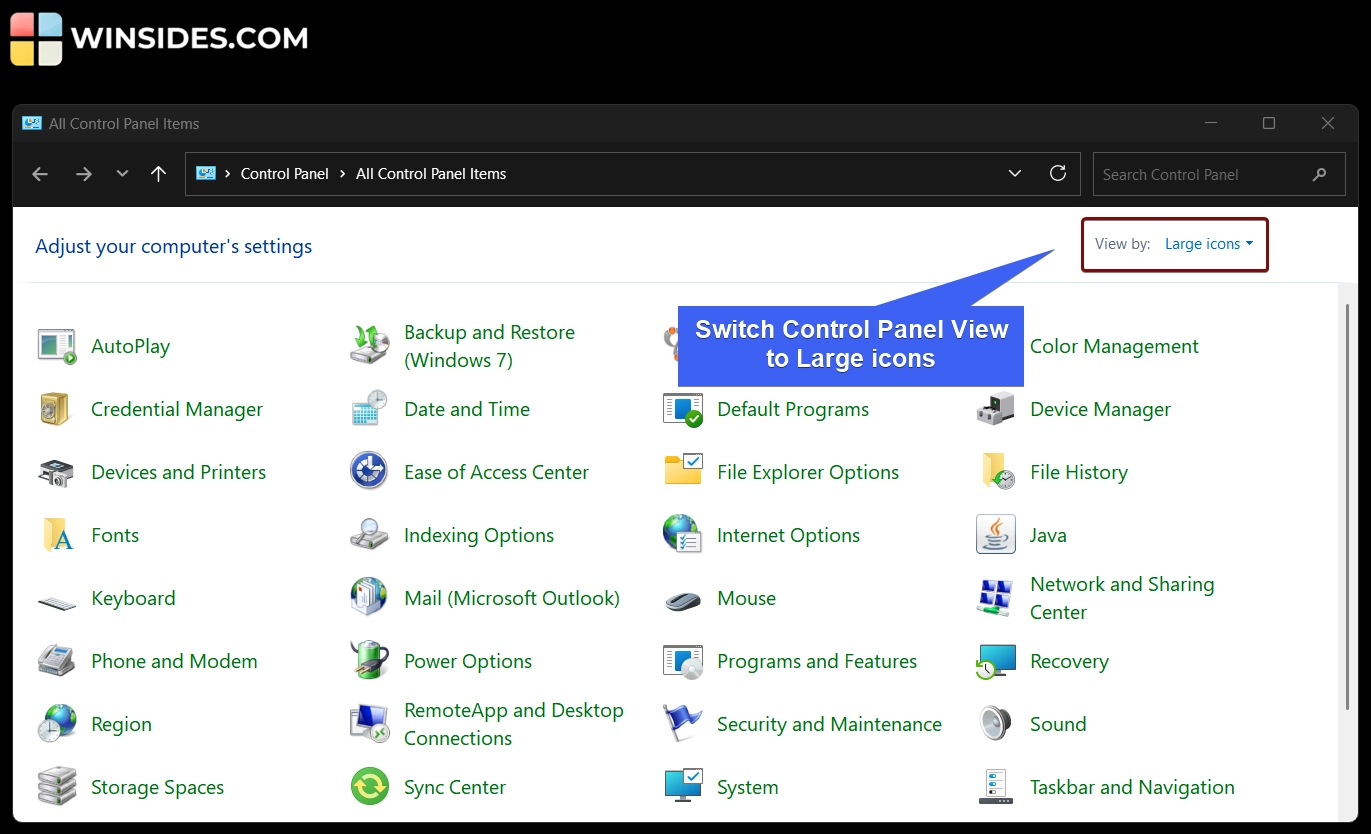
- Open the Control Panel, and make sure to switch its view to Large icons.
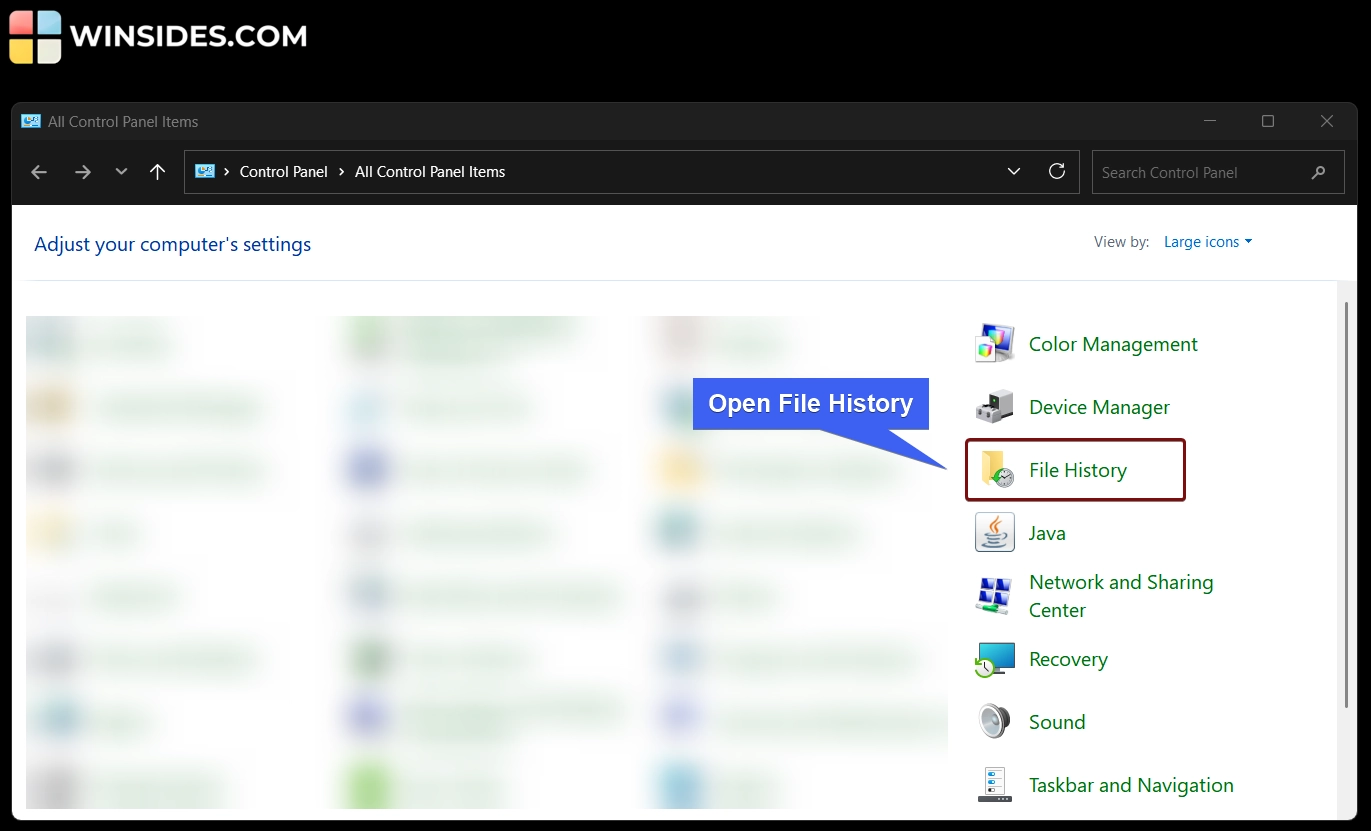
- Here, you can find the option File History. Click on that to open it.
- File History Settings will open now. File History saves copies of your files so you can get them back if they are lost or damaged.
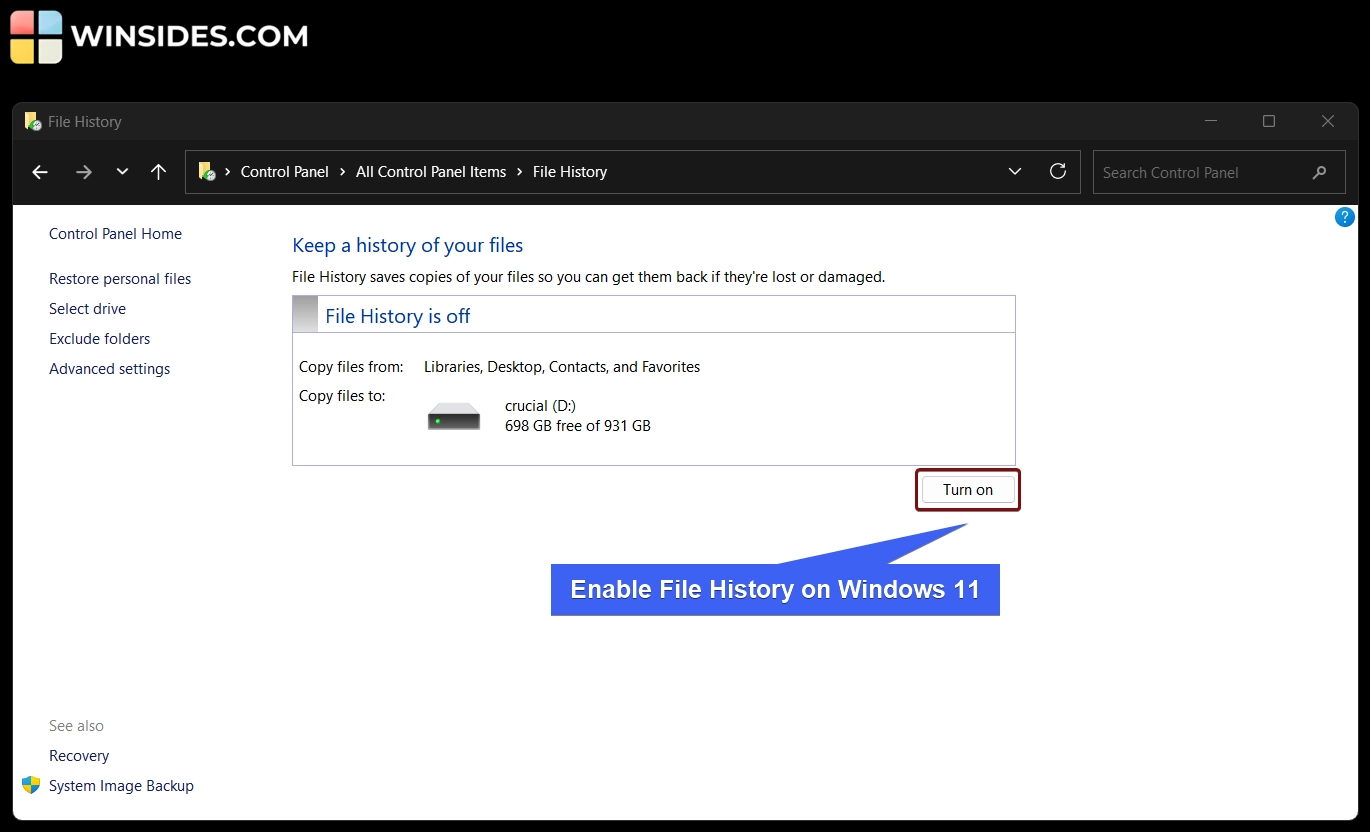
- You can see the message “File History is off“. Click on Turn on. This will turn on File History on Windows 11.
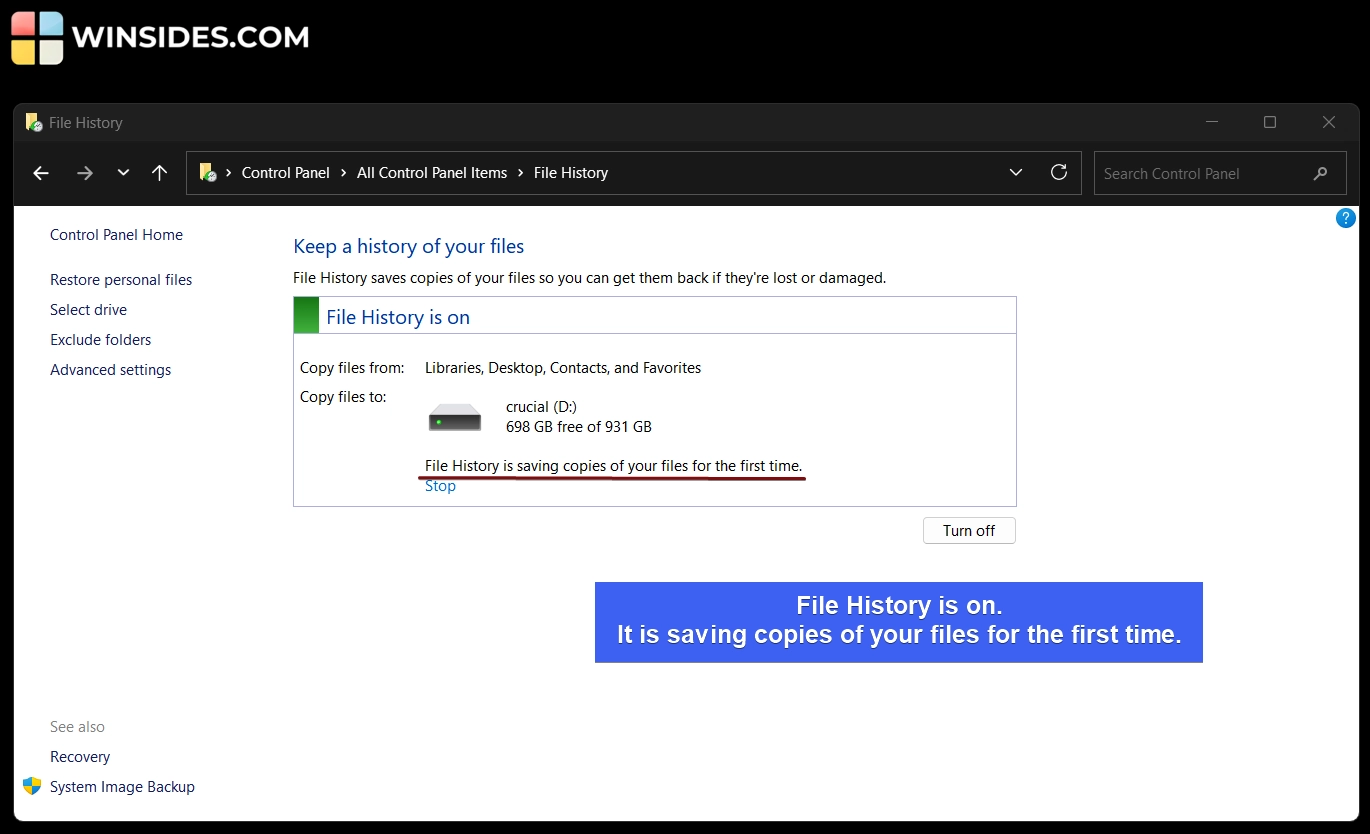
- Once File History is turned on for the first time, it will start saving copies of the mentioned files to the backup drive for the first time. However, you can click Stop to stop that process.
- Technically, you can’t set File History to back up to the same internal drive (like C:) where Windows is installed. In my case, my Windows 11 is installed on the C Drive. In the above-mentioned image, you can find the backup set to the D Drive named Crucial.
Note: Turning on File History can consume a significant amount of space on your drive. This is because File History doesn’t just back up files once rather saves multiple versions of your documents, pictures, and other personal files over time. If your backup interval is frequent or if you work with large files that change often, the drive can fill up quickly.
File History options in the Control Panel
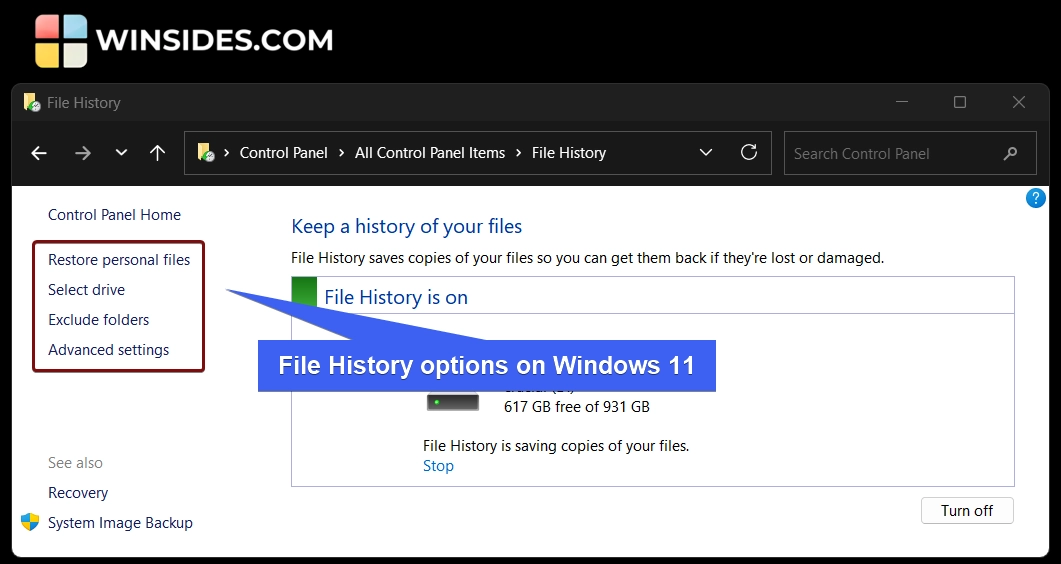
On the left pane, you can find several options like Restore Personal Files, Select Drive, Exclude Folders, and Advanced Settings. Let’s explore each option in detail here.
Restore Personal Files
This option lets you choose a version to restore. Click on the Restore option to restore the previous versions. You can choose from the last 5 versions.
How to Select a USB Drive for File History on Windows 11?
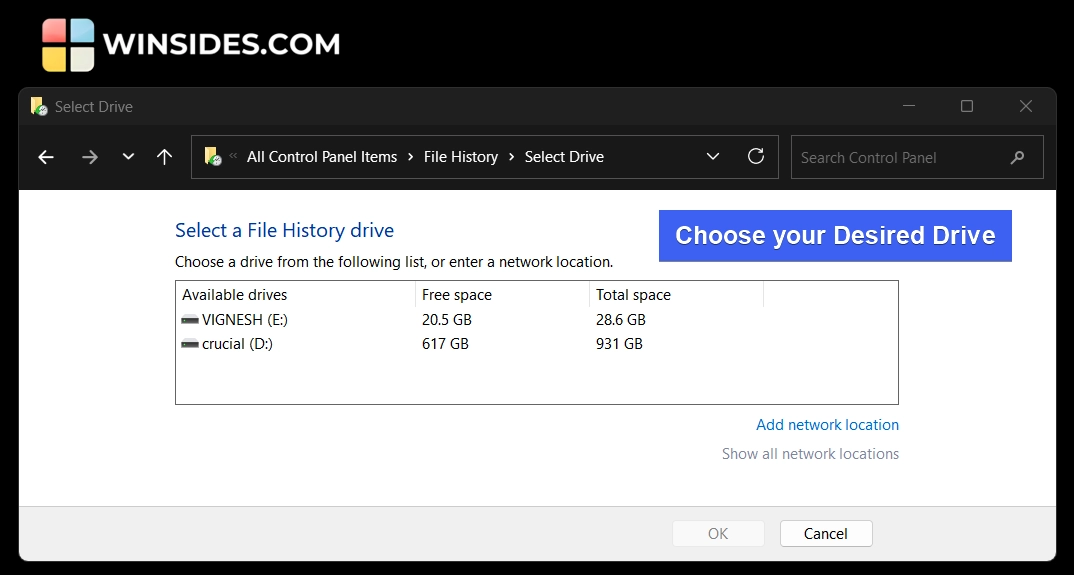
“Select the Drive” option in the File History lets you choose a drive from the list or enter a network location. If you want to take the backup to a USB drive, please connect the USB Drive to your system, and select the corresponding drive here.
Exclude Folders
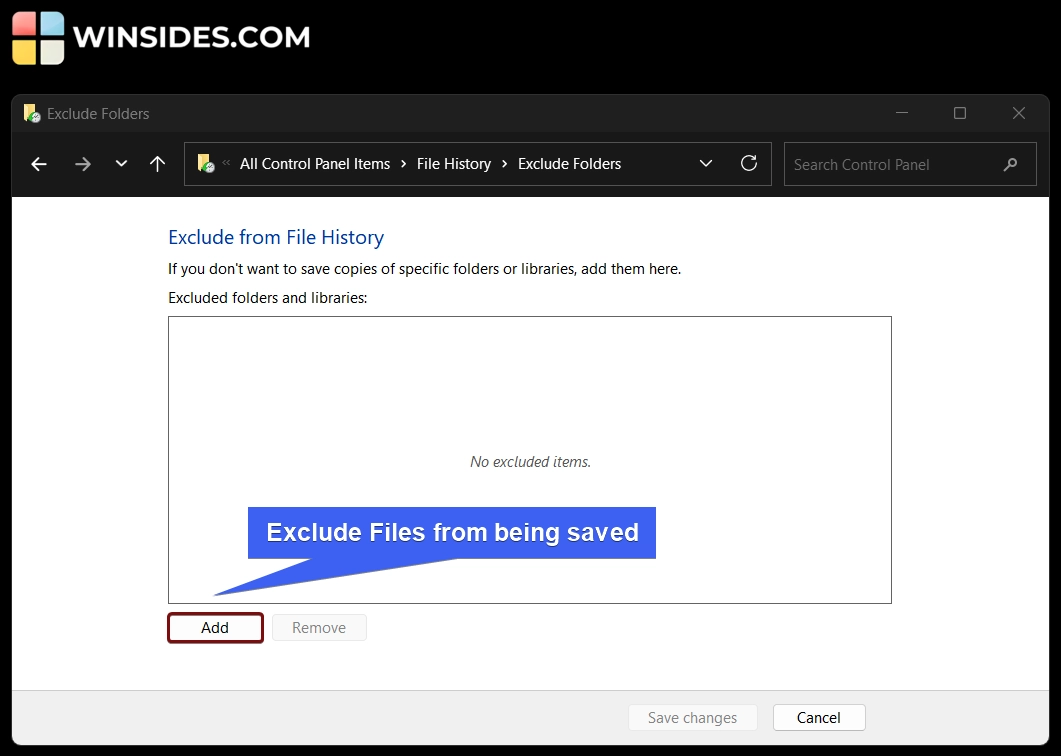
If you don’t want to save copies of specific folders or libraries, you can specify it here by clicking on the Add button.
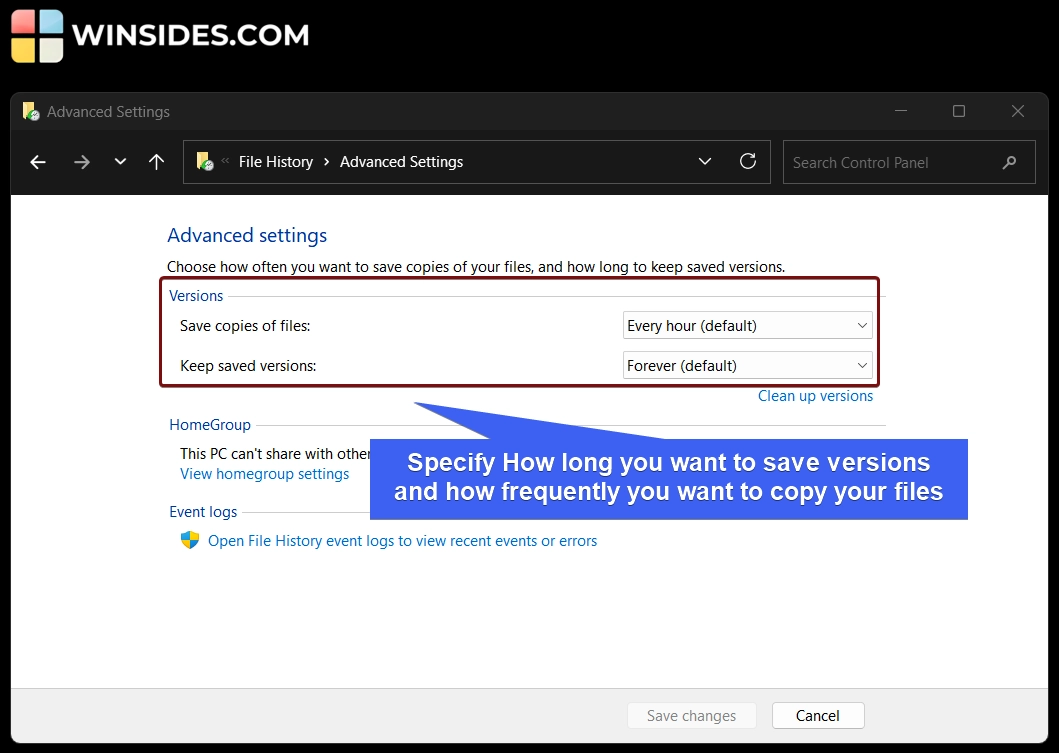
Advanced Settings
In Advanced File History Settings, you can configure various options.
- You can specify how often you want to save copies of your files, and how long to keep saved versions.
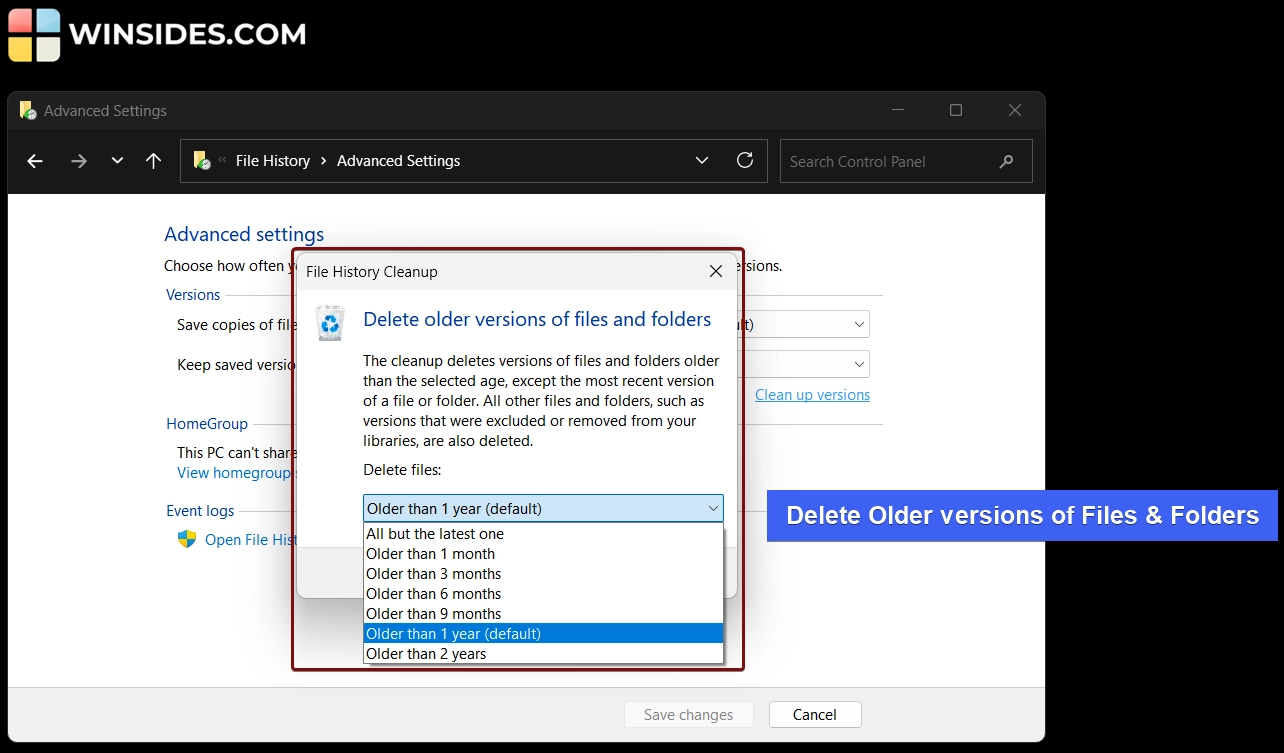
- You can also clean up versions by clicking on “Cleanup versions“. You can specify the time period accordingly.
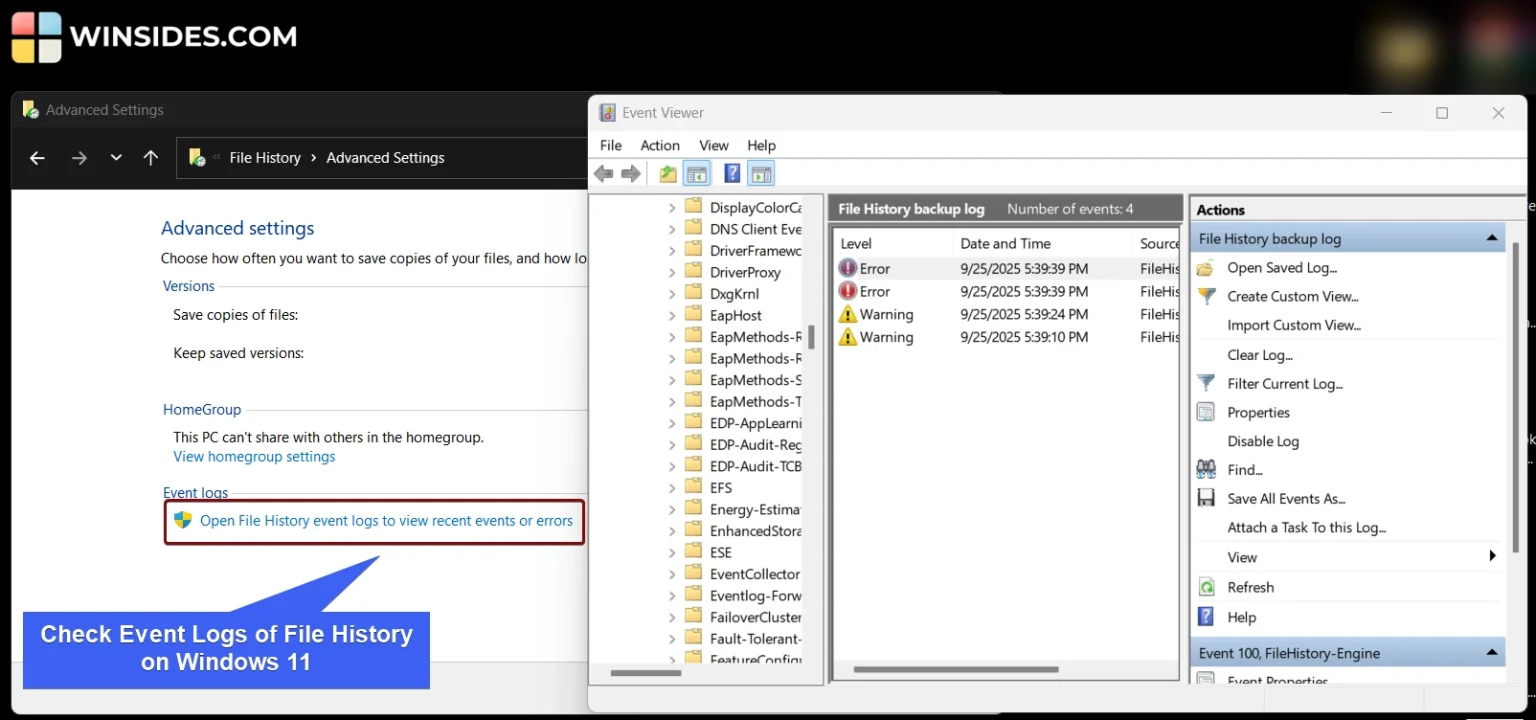
- Finally, you can view File History Event logs by clicking on “Open File History Event Logs to view Recent Event or Errors“.
Turn on File History on Windows 11 using Command Prompt & Windows PowerShell
In this section, let’s check out how to turn on File History on Windows 11 using Command Line Interfaces like CMD, PowerShell, and Windows Terminal. This method is more suited for Developers and IT Administrators. For explanation, we will use Windows PowerShell.
- Open Windows PowerShell on your Windows 11.
- In PowerShell, execute the following command.
Start-Service fhsvc; fhmanagew.exe -target D:; fhmanagew.exe -enable; fhmanagew.exe -backupnow
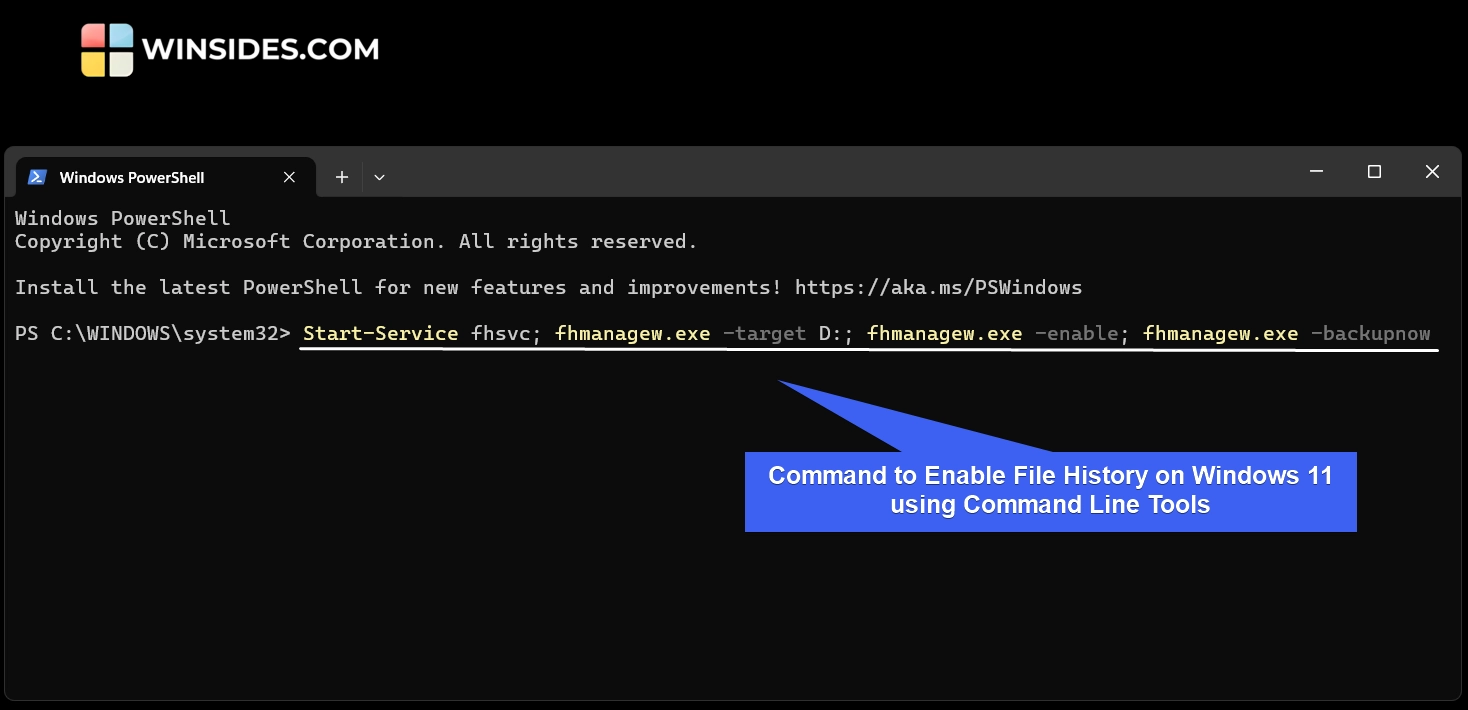
Important: Replace the target drive D: with your Internal Drive or External Drive Name. Otherwise, the system may throw errors like Error 80040602
- The above command will enable File History and start backing up to the specified target.
How to Open File History on Windows 11 using Command Line Tools?
- To open File History on Windows 11 using Command Line Tools like Windows PowerShell, kindly execute the following command in PowerShell.
control /name Microsoft.FileHistory - This command will open File History on your Windows 11.
Enable File History on Windows 11 using Group Policy Editor
This method is suitable for corporate environments. Group Policy Editor is not available in Windows Home Edition, as it is intended for Pro and Enterprise Environments. Here are the steps.
- Go to the Run Command using the keyboard shortcut WinKey + R.
- Open the Group Policy Editor using the following command in the Run.
gpedit.msc - In the Group Policy Editor, navigate to the following path.
Computer Configuration → Administrative Templates → Windows Components → File History - You can configure the following options. Turn on File History, Configure Target Drive, Configure Offline Cache Size, Configure Backup Schedule, and more. Finally, double-click on the policy and select Enabled, and click OK.
- Please make sure the target drive is connected and accessible.
Important: Modifying Group Policy settings can affect system behavior and user accounts. The steps outlined for enabling File History via gpedit.msc are intended for Windows 11 Pro, Enterprise, or Education editions. Users should proceed with caution, ensure they have administrative privileges, and consider creating a system restore point or backup before making changes. Incorrect configurations may prevent File History from functioning properly or impact other system features.
Take Away
File History on Windows 11 provides a reliable way to back up personal files and maintain version history. Microsoft has been slowly deprecating File History in favour of OneDrive and Windows Backup. However, File History remains a golden option for users who are looking to have a safe and personal backup.
I hope you enjoyed this article on How to Enable File History on Windows 11, and if you have any queries, kindly let me know in the comments. For more interesting articles, stay tuned to Winsides.com. Happy Computing! Peace out!
[story continues]
tags