When OpenAI dropped their Agents SDK a few weeks ago, devs everywhere got hyped—and for good reason! Finally, a straightforward way to build goal-driven AI agents that can actually reason and get work done 🤯.
But almost in the same breath, MCP exploded onto the scene, quickly becoming the next hot trend in this wild AI landscape. So, why not smash these two powerhouses together?! That's precisely what we're about to do right here 🔥.
In this guide, we're going to forge a formidable AI agent leveraging the OpenAI Agents SDK and plugging it directly into the real-world tools provided by an MCP server. Get ready to supercharge your AI!
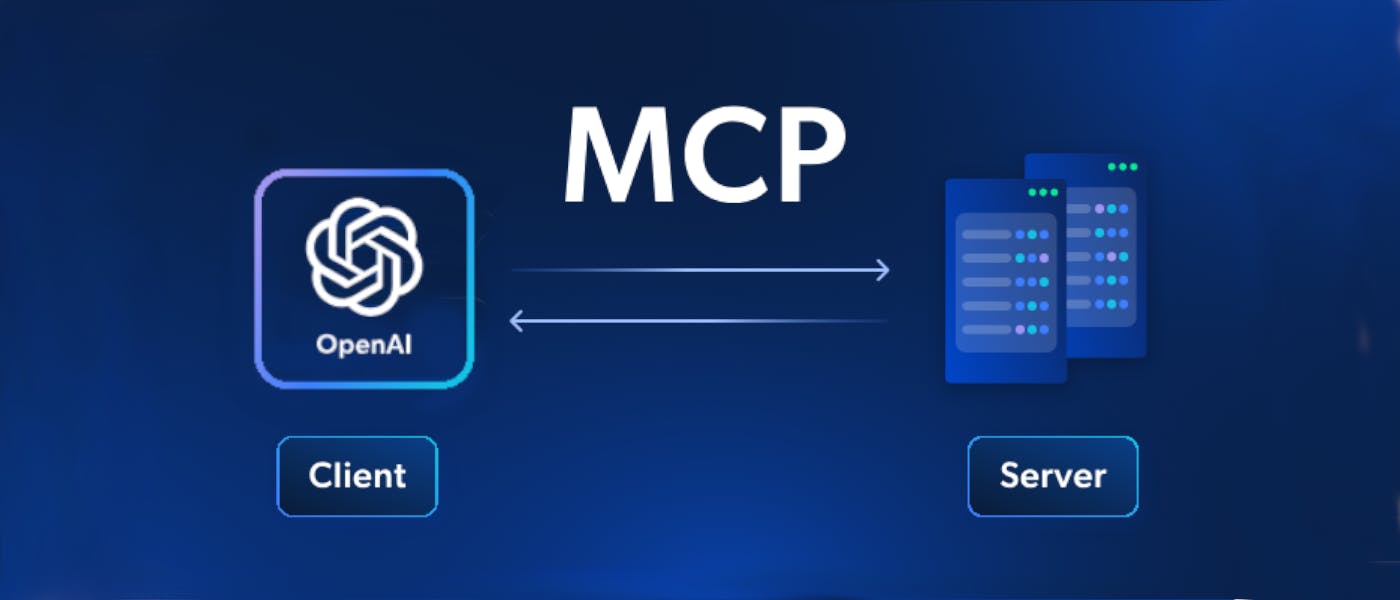
A Quick Intro to MCP + OpenAI Agents SDK Integration
OpenAI Agents SDK is one of the most popular Python toolkits for crafting intelligent AI agents, letting them reason and act. But here's the kicker: without external info, they're often stuck in a training data bubble. That's where MCP (Model Context Protocol) swoops in!
Think of MCP as the universal USB-C port for your AI, giving it a standardized way to plug into any external data source or tool–local files, APIs, databases, you name it. 🔌
Integrating MCP with the OpenAI Agents SDK means your agents get real-time, dynamic context, turning them from smart-but-isolated bots into powerhouse data explorers and action-takers! 🧠
Building an AI Agent with MCP Integration Using OpenAI Agents SDK
Alright, enough theory. You get it—MCP supercharges AI agents like they’re Iron Man in his iconic metal suit. 🦾
In this step-by-step section, we’re going to use the OpenAI Agents SDK—yep, the new Python SDK from OpenAI—for building an AI agent with MCP integration. Why OpenAI Agents SDK and not another library? Because it has native MCP support, which means your agent can go from smart to superpowered in seconds.
Now, small catch: OpenAI’s API isn’t free. 😅 So in this guide, we’ll run it using Gemini as the LLM engine instead (don’t worry—we’ll show how to swap in OpenAI or any other model too 🔁).
❓ But wait—what MCP server are we using? ❓
Great question! To get started fast, we’re plugging into Bright Data MCP Server—an MCP server built for web automation and data tasks. It lets your AI agent search, browse, take action, and extract real-time data from the Web—with built-in stealth to dodge CAPTCHAs and anti-bot traps.
Specifically, below are all the tools supported by the Bright Data MCP server 🛠️:
|
Tool |
Description |
|---|---|
|
|
Scrape SERP data (from Google, Bing, Yandex, and more) |
|
|
Scrape a URL and return content in clean Markdown |
|
|
Scrape a URL and return full HTML content |
|
|
View tool usage during the current session |
|
|
Get Amazon product info by URL |
|
|
Fetch Amazon reviews for a product |
|
|
Grab LinkedIn profile data |
|
|
Fetch LinkedIn company data |
|
|
Get ZoomInfo company profile |
|
|
Fetch Instagram profile details |
|
|
Get Instagram post data |
|
|
Grab Instagram reel data |
|
|
Fetch comments from an Instagram post |
|
|
Extract Facebook post info |
|
|
Get Facebook Marketplace listings |
|
|
Scrape Facebook business reviews |
|
|
Fetch data from X (formerly Twitter) posts |
|
|
Get Zillow property listings |
|
|
Fetch Booking.com hotel listings |
|
|
Extract YouTube video metadata |
|
|
Navigate to a new URL in a virtual browser |
|
|
Go back one page in the browser |
|
|
Go forward one page in the browser |
|
|
Click a page element (needs selector) |
|
|
Get all links and selectors on the page |
|
|
Type into a form or input |
|
|
Wait for an element to appear |
|
|
Capture a screenshot of the current page |
|
|
Get raw HTML from the page |
|
|
Extract text content from the page |
Ready to roll? See how to get your AI Agent talking to the MCP server for unlimited power! ⚡ ⚡
Step #1: Project Setup
To follow along with this tutorial section, make sure you’ve got the following prerequisites in place:
- Python 3.10+ installed locally 🐍
- Node.js installed locally 🟩
- An API key from a supported LLM provider for the OpenAI Agents SDK (we recommend Gemini for this one) 🔑
We’ll skip the boring setup fluff and assume you’ve already created a Python project with this structure:
/openai-agents-mcp
├── venv/
├── .env
└── agent.py
Now, activate your virtual environment (venv/) and install the required packages:
pip install openai-agents python-dotenv
Where:
openai-agentsis the OpenAI Agents Python SDK—your gateway to AI agent magic 🪄python-dotenvis for reading values from a.envfile 🔐
Next, open agent.py and wire up your imports. Time to read in those environment variables and prep for agent launch:
import asyncio
from dotenv import load_dotenv
import os
from agents import (
    Runner,
    Agent,
    OpenAIChatCompletionsModel,
    set_default_openai_client,
    set_tracing_disabled
)
from openai import AsyncOpenAI
from agents.mcp import MCPServerStdio

# Load environment variables from the .env file
load_dotenv()

async def run():
    # AI Agent logic goes here...
    pass

if __name__ == "__main__":
    asyncio.run(run())
💣 Boom! You're up and running with the basics.
Step #2: Get Started With the Bright Data MCP Server
So, you want your AI Agent to talk to an MCP server? 🥁 🥁 🥁
Well, guess what—you’ll need an MCP server running first (yes, Captain Obvious reporting for duty! 🫡)
As mentioned earlier, we’ll be using the Bright Data MCP Server for this part. First, grab your API key and initialize the server as per the official Bright Data MCP server docs.
Once you're ready, launch the server with this command:
npx -y @brightdata/mcp
If everything’s configured correctly, you should see output similar to this:
Checking for required zones...
Required zone "mcp_unlocker" already exists
Starting server...
Nice! 🏄
Now, set up the environment variables that the agent will use to connect to the Bright Data MCP server. Open your .env file and add these two lines:
BRIGHT_DATA_API_TOKEN="<YOUR_BRIGHT_DATA_API_TOKEN>"
BRIGHT_DATA_BROWSER_AUTH="<BRIGHT_DATA_BROWSER_AUTH>"
Replace the placeholders with the values you got as explained in the Bright Data MCP server docs.
Back in agent.py, read in those two envs like so:
BRIGHT_DATA_API_TOKEN = os.getenv("BRIGHT_DATA_API_TOKEN")
BRIGHT_DATA_BROWSER_AUTH = os.getenv("BRIGHT_DATA_BROWSER_AUTH")
We’ll use these values shortly when initializing the MCP connection from code. 🧪
And just like that—bam 💥—your MCP server is up, running, and ready to serve your AI agent like a loyal sidekick. Onward!
Step #3: Create Your AI Agent
As teased in the intro of this section, we’re going to use Gemini (yep, Google’s shiny LLM) with the OpenAI Agents SDK.
First off—can you even do that? And second—why not just use OpenAI directly? 🤔
Response: Yes, you can do that! 👍 Gemini exposes an OpenAI-compatible API, which means you can plug it right into the OpenAI Agents SDK like a drop-in replacement. The best part? It’s free—unlike OpenAI, which likes to charge you by the token. 💸
So, here’s why it makes sense to use Gemini instead of OpenAI directly! 💡
Enough chit-chat, let’s wire things up ⚡. First, grab your Gemini API key from Google AI Studio and pop it into your .env file:
GEMINI_API_KEY="<YOUR_GEMINI_API_KEY>"
Then, in agent.py, read that key like so:
GEMINI_API_KEY = os.getenv("GEMINI_API_KEY")
Now, build a function that ties everything together—the Gemini model, OpenAI SDK, and the MCP server (which we’ll configure in the code soon ⏱️):
async def create_mcp_ai_agent(mcp_server):
    # Initialize Gemini client using its OpenAI-compatible interface
    gemini_client = AsyncOpenAI(
        api_key=GEMINI_API_KEY,
        base_url="https://generativelanguage.googleapis.com/v1beta/openai/"
    )

    # Set the default OpenAI client to Gemini
    set_default_openai_client(gemini_client)
    # Disable tracing to avoid tracing errors being logged in the terminal
    set_tracing_disabled(True)

    # Create an agent configured to use the MCP server and Gemini model
    agent = Agent(
        name="Assistant",
        instructions="You are a helpful assistant",
        model=OpenAIChatCompletionsModel(
            model="gemini-2.0-flash",
            openai_client=gemini_client,
        ),
        mcp_servers=[mcp_server]
    )

    return agent
If you want to use a different supported model (like Claude, Mistral, or other models), just swap the base_url and model name accordingly.
➕ Extra: Want to use OpenAI instead? No problem. Just add your OPENAI_API_KEY and replace the above logic with:
async def create_mcp_ai_agent(mcp_server):
    # Create an agent configured to use the MCP server and Gemini model
    agent = Agent(
        name="Assistant",
        instructions="You are a helpful assistant",
        mcp_servers=[mcp_server]
    )

    return agent
Easy swap, same interface—that’s the beauty of the SDK… 😎
Oh, and if you’re wondering where the mcp_server argument comes from—we’ll initialize it in the next step (👀 spoiler alert). Keep reading!
Step #4: Initialize the MCP Server
Inside your run() async function, spin up the Bright Data MCP server using npx like this:
async with MCPServerStdio(
    name="Bright Data web data MCP server, via npx",
    params={
        "command": "npx",
        "args": ["-y", "@brightdata/mcp"],
        "env": {
            "API_TOKEN": BRIGHT_DATA_API_TOKEN,
            "BROWSER_AUTH": BRIGHT_DATA_BROWSER_AUTH,
        }
    },
    client_session_timeout_seconds=180   # To avoid timeout errors
) as server:
    # Create and initialize the AI agent with the running MCP server
    agent = await create_mcp_ai_agent(server)

    # AI agent loop logic...
⚙️ What’s happening here? This launches the MCP server using npx -y @brightdata/mcp, passing in your credentials via environment variables.
Note: Don’t forget to bump client_session_timeout_seconds to 180 seconds (default is 5) — because real-time scraping, CAPTCHA solving, and anti-bot ninja moves performed by the Bright Data MCP server takes time 🥷. You don’t want it timing out mid-mission.
✅ Sweet! The only thing left is to kick off the AI agent loop... Let’s wrap it up.
Step #5: Define the AI Agent Loop
Inside the MCP server async block, drop in a REPL (Read-Eval-Print) loop so users can type in their requests, send them through the MCP-powered agent, and get back the magic ✨:
while True:
    # Read the user's request
    request = input("Your request -> ")

    # Exit condition
    if request.lower() == "exit":
        print("Exiting the agent...")
        break

    # Run the request through the agent
    output = await Runner.run(agent, input=request)

    # Print the result to the user
    print(f"Output -> \n{output.final_output}\n\n")
This little Python snippet is your AI agent's command center. It continuously grabs your requests, feeds them to the agent, and then spits out the final, glorious result. Think of it as the no-frills console for your AI brain, ready to take orders until you tell it to “exit” 👋.
Did you just have that “whoa” moment? If not, let me spell it out for you: you just wired up a full AI agent loop using the OpenAI Agents SDK + Bright Data’s MCP server + Gemini!
Now you’re ready to look at the full code, all stitched together like a beautiful Frankenstein’s monster of AI automation. 🧌
Step #6: Put It All Together
This is your final Python script for OpenAI Agents SDK + MCP integration (powered by Gemini to save money 🤑):
import asyncio
from dotenv import load_dotenv
import os
from agents import (
    Runner,
    Agent,
    OpenAIChatCompletionsModel,
    set_default_openai_client,
    set_tracing_disabled
)
from openai import AsyncOpenAI
from agents.mcp import MCPServerStdio

# Load environment variables from the .env file
load_dotenv()

# Read the required secrets envs from environment variables
BRIGHT_DATA_API_TOKEN = os.getenv("BRIGHT_DATA_API_TOKEN")
BRIGHT_DATA_BROWSER_AUTH = os.getenv("BRIGHT_DATA_BROWSER_AUTH")
GEMINI_API_KEY = os.getenv("GEMINI_API_KEY")

async def create_mcp_ai_agent(mcp_server):
    # Initialize Gemini client using its OpenAI-compatible interface
    gemini_client = AsyncOpenAI(
        api_key=GEMINI_API_KEY,
        base_url="https://generativelanguage.googleapis.com/v1beta/openai/"
    )

    # Set the default OpenAI client to Gemini
    set_default_openai_client(gemini_client)
    # Disable tracing to avoid tracing errors being logged in the terminal
    set_tracing_disabled(True)

    # Create an agent configured to use the MCP server and Gemini model
    agent = Agent(
        name="Assistant",
        instructions="You are a helpful assistant",
        model=OpenAIChatCompletionsModel(
            model="gemini-2.0-flash",
            openai_client=gemini_client,
        ),
        mcp_servers=[mcp_server]
    )

    return agent

async def run():
    # Start the Bright Data MCP server via npx
    async with MCPServerStdio(
        name="Bright Data web data MCP server, via npx",
        params={
            "command": "npx",
            "args": ["-y", "@brightdata/mcp"],
            "env": {
                "API_TOKEN": BRIGHT_DATA_API_TOKEN,
                "BROWSER_AUTH": BRIGHT_DATA_BROWSER_AUTH,
            }
        },
        client_session_timeout_seconds=180  # To avoid timeout errors
    ) as server:
        # Create and initialize the AI agent with the running MCP server
        agent = await create_mcp_ai_agent(server)

        # Main REPL loop to process user requests
        while True:
            # Read the user's request
            request = input("Your request -> ")

            # Exit condition
            if request.lower() == "exit":
                print("Exiting the agent...")
                break

            # Run the request through the agent
            output = await Runner.run(agent, input=request)

            # Print the result to the user
            print(f"Output -> \n{output.final_output}\n\n")

if __name__ == "__main__":
    asyncio.run(run())
🎯 Just 81 lines of code. And what do you get? An AI agent that can surf the web, bypass anti-bots, grabs real-time data, and talks back—like it's no big deal. Even Superman might get jealous of this one. 🦸♂️
Thanks to new AI protocols and dev-first tools like OpenAI Agents SDK and Bright Data MCP, AI automation is now... almost too easy.
Step #7: Test the MCP-Powered AI Agent
Run your AI agent from the terminal with:
python agent.py
Or on Linux/macOS:
python3 agent.py
You’ll be greeted by a friendly prompt like:
Your request ->
For example, try asking the agent what MCP tools it has:
What tools are you linked to through MCP?
You'll get back something like:
As you can see, your AI agent is aware of all the Bright Data MCP tools it can connect to—and it’s ready to use them!
Alright, time to unleash the beast! Let's put those shiny MCP tools to the ultimate test: Command your AI agent to scrape some juicy data from the Amazon P5 page 🎮:
To achieve that, give it a prompt like:
From the Amazon product page "https://www.amazon.com/PlayStation%C2%AE5-console-slim-PlayStation-5/dp/B0CL61F39H/", extract the main info and return it in JSON format
Execute it and the result will be:
In particular, the output should be something like:
{
"title": "PlayStation®5 console (slim)",
"seller_name": "Amazon.com",
"brand": "Sony",
"description": "The PS5 console unleashes new gaming possibilities that you never anticipated. Experience lightning fast loading with an ultra-high speed SSD, deeper immersion with support for haptic feedback, adaptive triggers, and 3D Audio*, and an all-new generation of incredible PlayStation games. Lightning Speed - Harness the power of a custom CPU, GPU, and SSD with Integrated I/O that rewrite the rules of what a PlayStation console can do. Stunning Games - Marvel at incredible graphics and experience new PS5 features. Play a back catalog of supported PS4 games. Breathtaking Immersion - Discover a deeper gaming experience with support for haptic feedback, adaptive triggers, and 3D Audio technology. Vertical stand sold separately. *3D audio via built-in TV speakers or analog/USB stereo headphones. Set up and latest system software update required.",
"initial_price": 499,
"currency": "USD",
"availability": "In Stock",
"reviews_count": 6759,
"categories": [
"Video Games",
"PlayStation 5",
"Consoles"
],
"asin": "B0CL61F39H",
"buybox_seller": "Amazon.com",
"number_of_sellers": 1,
"root_bs_rank": 18,
"answered_questions": 0,
"domain": "https://www.amazon.com/",
"images_count": 5,
"url": "https://www.amazon.com/PlayStation%C2%AE5-console-slim-PlayStation-5/dp/B0CL61F39H?th=1&psc=1&language=en_US¤cy=USD",
"video_count": 6,
"image_url": "https://m.media-amazon.com/images/I/41ECK5cY-2L._SL1000_.jpg",
"item_weight": "10.6 pounds",
"rating": 4.7,
"product_dimensions": "14 x 17 x 7 inches; 10.6 Pounds",
"seller_id": "ATVPDKIKX0DER",
"date_first_available": "December 10, 2023",
"model_number": "CFI-2015",
"manufacturer": "Sony",
"department": "Video Games",
"plus_content": true,
"video": true,
"final_price": 499,
"delivery": [
"FREE delivery Monday, May 26",
"Or Prime members get FREE delivery Tomorrow, May 22. Order within 15 hrs 43 mins. Join Prime"
],
"features": [
"Model Number CFI-2000",
"Includes DualSense Wireless Controller, 1TB SSD, Disc Drive, 2 Horizontal Stand Feet, HDMI Cable, AC power cord, USB cable, printed materials, ASTRO’s PLAYROOM (Pre-installed game)",
"Vertical Stand sold separately"
],
"bought_past_month": 8000,
"is_available": true,
"root_bs_category": "Video Games",
"bs_category": "PlayStation Consoles",
"bs_rank": 15,
"badge": "Amazon's Choice",
"subcategory_rank": [
{
"subcategory_name": "PlayStation 5 Consoles",
"subcategory_rank": 1
}
],
"amazon_choice": true,
"product_details": [
{
"type": "ASIN",
"value": "B0CL61F39H"
},
{
"type": "Release date",
"value": "December 10, 2023"
},
{
"type": "Customer Reviews",
"value": "4.74.7 out of 5 stars6,759 ratings4.7 out of 5 stars"
},
{
"type": "Best Sellers Rank",
"value": "#18 in Video Games (See Top 100 in Video Games)#1 in PlayStation 5 Consoles"
},
{
"type": "Product Dimensions",
"value": "14 x 17 x 7 inches; 10.6 Pounds"
},
{
"type": "Type of item",
"value": "Video Game"
},
{
"type": "Item model number",
"value": "CFI-2015"
},
{
"type": "Item Weight",
"value": "10.6 pounds"
},
{
"type": "Manufacturer",
"value": "Sony"
},
{
"type": "Country of Origin",
"value": "China"
},
{
"type": "Batteries",
"value": "1 Lithium Ion batteries required. (included)"
},
{
"type": "Date First Available",
"value": "December 10, 2023"
}
],
"country_of_origin": "China",
"seller_url": "https://www.amazon.com/sp?ie=UTF8&seller=ATVPDKIKX0DER&asin=B0CL61F39H",
"customers_say": "Customers find the PlayStation 5 console runs well and performs mind-blowingly fast, with quick loading times and smooth game performance. The graphics quality receives positive feedback, with one customer highlighting its stunning 120Hz visuals, while the console is easy to set up with an intuitive user interface. Customers consider the price worth the investment and appreciate its pristine condition. The noise level receives mixed reviews, with some customers finding it super quiet while others report it being loud.",
"climate_pledge_friendly": false,
"sponsered": true,
"store_url": "https://www.amazon.com/stores/PlayStationPlayHasNoLimits/page/5AF5EF82-86EF-4699-B450-C232B3BD720E?lp_asin=B0CL61F39H&ref_=ast_bln&store_ref=bl_ast_dp_brandLogo_sto",
"ships_from": "Amazon.com",
"customers_say": {
"text": "Customers find the PlayStation 5 console runs well and performs mind-blowingly fast, with quick loading times and smooth game performance. The graphics quality receives positive feedback, with one customer highlighting its stunning 120Hz visuals, while the console is easy to set up with an intuitive user interface. Customers consider the price worth the investment and appreciate its pristine condition. The noise level receives mixed reviews, with some customers finding it super quiet while others report it being loud.",
"keywords": {
"positive": [
"Functionality",
"Gaming experience",
"Value for money",
"Graphics quality",
"Quality",
"Speed",
"Ease of setup"
],
"negative": null,
"mixed": [
"Noise level"
]
}
},
"max_quantity_available": 30,
"timestamp": "2025-05-21T10:46:13.487Z"
}
🤯 Wow! 🤯
One prompt, and you just scraped all the data from an Amazon product page. And not just any site—Amazon is notoriously tough to scrape thanks to aggressive CAPTCHAs and anti-bot defenses.
So, how did that work? Behind the scenes, the AI agent called on the web_data_amazon_product MCP tool—one of the prebuilt power tools exposed by the Bright Data MCP server. It handled the dirty work: solving CAPTCHAs, bypassing bot detection, and fetching the goods.
And it doesn’t stop there!
That scraped data? You can use it to ask the AI agent for further analysis by crafting more complex prompts. After all, AI agent can freely choose and chain together tools from its MCP-powered toolkit, so the possibilities are truly endless. ♾️
With a setup this powerful, the world is yours! (just don’t go full Tony Montana 😅)
Final Thoughts
Now you know how to supercharge any AI agent built with the OpenAI Agents SDK—whether it's running on GPT, Gemini, or whatever’s next—by plugging it into an MCP server.
In detail, we tapped into the powerful Bright Data MCP server, just one of the many services we've built to support real-world AI workflows at scale.
At Bright Data, our mission is simple: make AI accessible for everyone, everywhere. So until next time—stay curious, stay bold, and keep building the future of AI with creativity. 🌐