
Modern applications demand high availability and the ability to scale reads without compromising performance. One of the most common strategies to achieve this is Replication. In this setup, we configured a single database to act as the leader (master) and handle all write operations, while three replicas handle read operations.
In this article, we’ll walk through how to set up MySQL single-leader replication on your local machine using Docker. Once the replication is working, we’ll connect it to a Node.js application using Sequelize ORM, so that reads are routed to the replica and writes go to the master. By the end, you’ll have a working environment where you can see replication in real time
Prerequisites
- knowledge of database replication
- Background knowledge of docker and docker compose
- Background knowledge of Nodejs and how to run a NodeJS server
An Overview of what we are building

Setup
-
Setup our database servers on docker compose
in the root of our project directory, create a file named
docker-compose.ymlwith the following content to setup our mysql primary and replica databases.name: "learn-replica" volumes: mysqlMasterDatabase: mysqlSlaveDatabase: mysqlSlaveDatabaseII: mysqlSlaveDatabaseIII: networks: mysql-replication-network: services: mysql-master: image: mysql:latest container_name: mysql-master command: --server-id=1 --log-bin=ON environment: MYSQL_ROOT_PASSWORD: master MYSQL_DATABASE: replicaDb ports: - "3306:3306" volumes: - mysqlMasterDatabase:/var/lib/mysql networks: - mysql-replication-network mysql-slave: image: mysql:latest container_name: mysql-slave command: --server-id=2 --log-bin=ON environment: MYSQL_ROOT_PASSWORD: slave MYSQL_DATABASE: replicaDb MYSQL_ROOT_HOST: "%" ports: - "3307:3306" volumes: - mysqlSlaveDatabase:/var/lib/mysql depends_on: - mysql-master networks: - mysql-replication-network mysql-slaveII: image: mysql:latest container_name: mysql-slaveII command: --server-id=2 --log-bin=ON environment: MYSQL_ROOT_PASSWORD: slave MYSQL_DATABASE: replicaDb MYSQL_ROOT_HOST: "%" ports: - "3308:3306" volumes: - mysqlSlaveDatabaseII:/var/lib/mysql depends_on: - mysql-master networks: - mysql-replication-network mysql-slaveIII: image: mysql:latest container_name: mysql-slaveIII command: --server-id=3 --log-bin=ON environment: MYSQL_ROOT_PASSWORD: slave MYSQL_DATABASE: replicaDb MYSQL_ROOT_HOST: "%" ports: - "3309:3306" volumes: - mysqlSlaveDatabaseIII:/var/lib/mysql depends_on: - mysql-master networks: - mysql-replication-networkIn this setup, I’m creating a master database container called
mysql-masterand 3 replica containers calledmysql-slave,mysql-slaveIIandmysql-slaveIII. I won’t go too deep into thedocker-compose.ymlfile since it’s just a basic setup, but I do want to walk you through the command line instructions used in all four services because that’s where things get interesting.command: --server-id=1 --log-bin=ONThe
--server-idoption gives each MySQL server in your replication setup its own name tag. Each one has to be unique and without it, replication won’t work at all.Another cool option not included here is
binlog_format=ROW. This tells MySQL how to keep track of changes before passing them along to the replicas. By default, MySQL already uses row-based replication, but you can explicitly set it toROWto be sure or switch it toSTATEMENTif you’d rather log the actual SQL statements instead of row-by-row changes. -
Run our containers on docker
Now, in the terminal, we can run the following command to spin up our database containers:
docker-compose up -d -
Setting Up Our Master (Primary) Server
-
To configure our master server, we would have to first access the running instance on docker using the following command
docker exec -it mysql-master bashThis command opens an interactive Bash shell inside the running Docker container named
mysql-master, allowing us to run commands directly inside that container. -
Now that we’re inside the container, we can access the MySQL server and start running commands.
type:
mysql -uroot -pThis will log you into MySQL as the
rootuser. You’ll be prompted to enter the password you set in yourdocker-compose.ymlfile. -
Next, we need to create a special user that our replicas will use to connect to the master server and pull data. Inside the MySQL prompt, run the following commands:
CREATE USER 'repl_user'@'%' IDENTIFIED BY 'replication_pass';
GRANT REPLICATION SLAVE ON *.* TO 'repl_user'@'%';
FLUSH PRIVILEGES;
Here’s what’s happening:
-
CREATE USERmakes a new MySQL user calledrepl_userwith the passwordreplication_pass. -
GRANT REPLICATION SLAVEgives this user permission to act as a replication client. -
FLUSH PRIVILEGEStells MySQL to reload the user permissions so they take effect immediately.
-
-
Time to Configure the Replica (Secondary) Servers
a. First, let’s access the replica containers the same way we did with the master. Run this command in your terminal for each of the replica containers:
docker exec -it <replica_container_name> bash
mysql -uroot -p
<replica_container_name> should be replace with the name of the replica container you are trying to setup
b. Now it’s time to tell our replica where to get its data from. While inside the replica’s MySQL shell, run the following command to configure replication using the master’s details:
 CHANGE REPLICATION SOURCE TO
  SOURCE_HOST='mysql-master',
  SOURCE_USER='repl_user',
  SOURCE_PASSWORD='replication_pass',
  GET_SOURCE_PUBLIC_KEY=1;
With the replication settings in place, let’s fire up the replica and get it syncing with the master. Still inside the MySQL shell on the replica, run:
START REPLICA;
This starts the replication process. To make sure everything is working, check the replica’s status with:
SHOW REPLICA STATUS\G;
Look for Replica_IO_Running and Replica_SQL_Running — if both say Yes, congratulations! 🎉 Your replica is now successfully connected to the master and replicating data in real time.
Testing Our Replication Setup from the Node.js App
Now that our replication is successfully set up, we can configure our Node.js server to observe the real-time effect of data being replicated from the master server to the replica server whenever we write to it.
We start by installing the following dependencies:
npm i express mysql2 sequelize
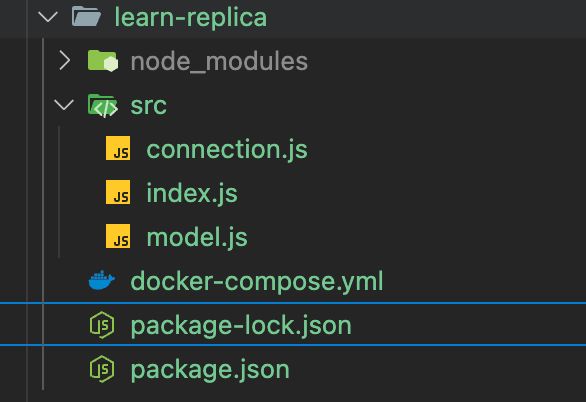
Now create a folder called src in the root directory and add the following files inside that folder connection.js, index.js and model.js. Our current directory should look like this
We can now set up our connections to our master and replica server in the connection.js file as shown below
const Sequelize = require("sequelize");

const sequelize = new Sequelize({
  dialect: "mysql",
  replication: {
    write: {
      host: "127.0.0.1",
      username: "root",
      password: "master",
      database: "replicaDb",
    },
    read: [
      {
        host: "127.0.0.1",
        username: "root",
        password: "slave",
        database: "replicaDb",
        port: 3307
      },
     {
        host: "127.0.0.1",
        username: "root",
        password: "slave",
        database: "replicaDb",
        port: 3308
      },
       {
        host: "127.0.0.1",
        username: "root",
        password: "slave",
        database: "replicaDb",
        port: 3309
      },
    ],
  },

});

async function connectdb() {
  try {
    await sequelize.authenticate();
  } catch (error) {
    console.error("❌ unable to connect to the follower database", error);
  }
}

connectdb();

module.exports = {
  sequelize,
};
We can now create a User table in the model.js file
const {DataTypes} = require("sequelize");
const { sequelize } = require("./connection");

const User = sequelize.define("User", {
  name: {
    type: DataTypes.STRING,
    allowNull: false,
  },
  email: {
    type: DataTypes.STRING,
    unique: true,
    allowNull: false,
  },
});

module.exports = User
and finally in our index.js file we can start our server and listen for connections on port 3000. from the code sample below, all inserts or updates will be routed by sequelize to the master server. while all read queries will be routed to the read replicas.
const express = require("express");
const { sequelize } = require("./connection");
const User = require("./model");

const app = express();

app.use(express.json());

async function main() {
  await sequelize.sync({ alter: true });

  app.get("/", (req, res) => {
    res.status(200).json({
      message: "first step to setting server up",
    });
  });

  app.post("/user", async (req, res) => {
    const { email, name } = req.body;

    let newUser = await User.build({
      name,
      email,
    });

    // This INSERT will go to the write (master) connection
    newUser = newUser.save({ returning: false });

    res.status(201).json({
      message: "User successfully created",
    });
  });

  app.get("/user", async (req, res) => {
    // This SELECT query will go to one of the read replicas
    const users = await User.findAll();

    res.status(200).json(users);
  });

  app.listen(3000, () => {
    console.log("server has connected");
  });
}

main();
When you make a POST request to the /users endpoint, take a moment to check both the master and replica servers to observe how data is replicated in real time. Right now, we are relying on Sequelize to automatically route requests, which works for development but isn’t robust enough for a production environment. In particular, if the master node goes down, Sequelize cannot automatically redirect requests to a newly elected leader.
In the next part of this series, we’ll explore strategies to handle these challenges.
[story continues]
tags