
Pixi’s Asset Pack has officially reached version 1.0, and after diving deep into it, I can confidently say that it shows a lot of promise for our projects. However, there are still some issues that need ironing out. In this post, I’ll walk you through how it works, the benefits it offers, and a few limitations we’ve encountered.
Why Use Pixi's Asset Pack?
Here are some key features that make Asset Pack a valuable addition to your development toolkit:
- Texture Sprite Packing: No more manual work with Texture Packer.
- Automated Compression & File Formats: Keeps a 100% source texture while automatically generating compressed Png and WebP versions.
- Mipmaps Generation: Ensures devices with lower resolutions use smaller textures, improving performance and reducing game size.
- Bundle Manifest Generation: No more hard-coded asset lists.
- Hash Versioning: Ensures you always load the latest files.
- Artist-Friendly Workflow: Artists only need to manage raw assets, while the tool handles export automation.
Current Issues
While Asset Pack is promising, there are a few issues we’ve encountered:
Spine Atlas Export: Spine atlas is not correctly exported (submitted aPRfor spine-runtime).- Bitmap Font Export: Bitmap fonts aren't exporting properly (submitted an issue).
- Sound Sprite Support: Currently unsupported (submitted an issue).
How to Set Up Asset Pack
Setting up Asset Pack is straightforward. Begin by installing it with this commend:
npm install --save-dev @assetpack/core
Next, create an .assetpack.js file with the following content:
import { pixiPipes } from '@assetpack/core/pixi';

export default {
	entry: './raw-assets',
	output: './public/assets',
	pipes: [
		...pixiPipes({
			resolutions: { high: 3, default: 2, low: 1 },
			manifest: {
				trimExtensions: true
			},
			texturePacker: { texturePacker: { removeFileExtension: true }},
		}),
	],
};
The pixiPipes function creates a default configuration that works in most cases. Here's a breakdown of what my preferred settings do:
resolutions: Specifies three resolutions (high, default, low). I will explain more about this later.manifest:trimExtensions: Removes texture file extensions in the manifest for easier reference in your code.texturePacker:texturePacker:removeFileExtension: Removes texture file extensions in the spritesheet Json when packing textures, again for easier reference.
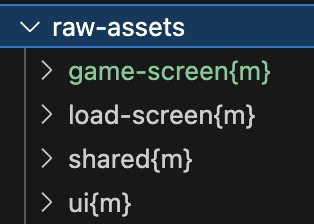
Next, create a folder called raw-assets in your project root. Each folder inside raw-assets will represent a bundle, and you need to specify it with a {m} tag. For our project, I created the following bundles:
game-screen{m}: Contains all game assets and starts loading after the loading screen is shown.load-screen{m}: Assets used in the loading screen. These are unloaded once the screen is hidden to save memory.shared{m}: Assets used by both the loading screen and the game.ui{m}: UI assets, separated for easier management (though they can be put in the game-screen folder).
Based on asset type, structure the folders like this:
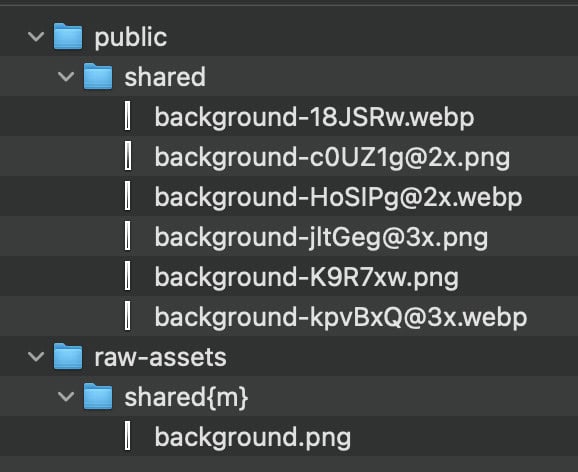
- Single Sprite: Place textures in any file path. Reference them by filename (without extension), e.g.,
background. If there are two files with the same name, reference them with the relative path.
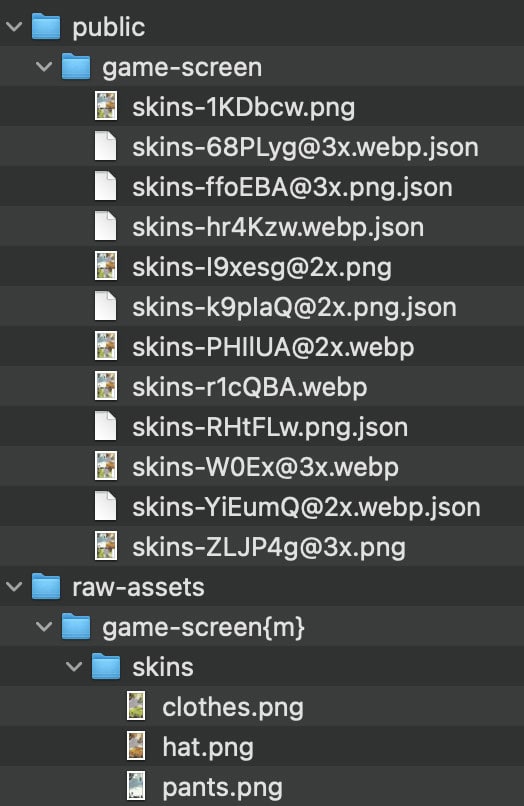
- Spritesheet (Texture Packer): Put textures in a folder with a
{tps}tag. Spritesheet Json files will be generated, and you can access the texture array by folder name, e.g.,skins.
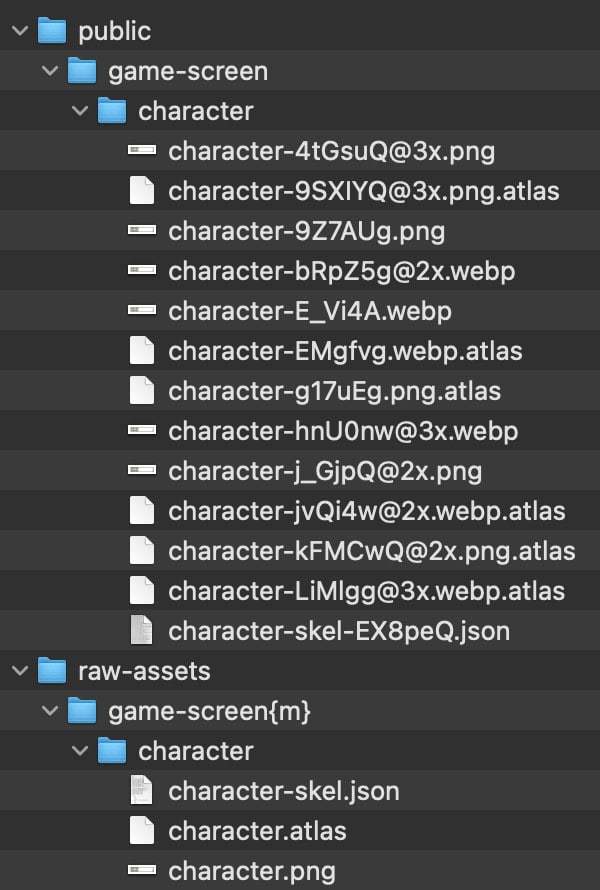
- Spine: Place the Atlas, Json, and texture files in a folder. Access the spine data and atlas with their filenames (without extension). If your Atlas and Json share the same filename, you’ll need to use extensions, e.g.,
character.jsonandcharacter.atlas.
Finally, run the CLI command:
npm assetpack
This packs everything into the public/assets folder and generates a manifest.json containing all file references. You can also set up a GitHub workflow to automate this process.
How to Use Packed Assets
Now, let’s look at the code to load the packed assets:
import { type AssetsManifest, Assets } from '@pixi/assets';
import type { Spritesheet } from '@pixi/spritesheet';
import * as utils from '@pixi/utils';
import { Sprite } from '@pixi/sprite';
import { Spine } from '@esotericsoftware/spine-pixi';

(async () => {
	const baseUrl = './public/assets';
	// const baseUrl = 'https://s3/my-bucket';

	const response = await fetch(baseUrl + '/manifest.json');
	const manifest = (await response.json()) as AssetsManifest;
	if (!manifest.bundles) {
		throw new Error('[Assets] Invalid assets manifest');
	}

	const resolution = Math.min(utils.isMobile.any ? window.devicePixelRatio : 3, 3);

	await Assets.init({
		basePath: baseUrl,
		manifest,
		texturePreference: { resolution: [resolution, 1], format: ['webp', 'png'] },
	});

	await Assets.loadBundle('shared');
	await Assets.loadBundle('load-screen');

	// load-screen assets loaded, show load screen

	await Assets.loadBundle('ui');
	await Assets.loadBundle('game-screen', onProgress); // onProgress to feed the progress bar

	// game assets loaded, wait for player to hide load screen

	Assets.unloadBundle('load-screen');

	const singleSprite = Sprite.from('background');

	const spritesheet = Assets.cache.get<Spritesheet>('skins');
	const spritesheetSprite = new Sprite(spritesheet.textures['hat']);

	const spine = Spine.from('character-skel', 'character');
})();
This code loads assets using the manifest and adjusts resolution preferences based on device pixel density. Here are the key steps:
- Files Location: Set
baseUrlas a local or server folder path. - Resolution Handling: Set the preferred resolution (3x, 2x, 1x) based on
devicePixelRatio. - Asset Loading: Use
Assets.loadBundle()to load asset bundles defined in the manifest. - Unload Bundles: Once the loading screen is no longer needed, unload its assets with
Assets.unloadBundle(). - Accessing Assets: Use
Sprite.from()for single sprites,Assets.cache.get()andnew Sprite()for spritesheets, andSpine.from()for Spine animations.
Conclusion
While Pixi's Asset Pack is still evolving, it offers a solid foundation for managing assets efficiently in Pixi-based projects. I believe it has the potential to become an essential tool for many developers. Has anyone else worked with it? I’d love to hear your thoughts and experiences!
[story continues]
tags