In the first part of this series, we explored the foundational principles of color correction and explained the importance of working with colors when editing images. In this second part, we dive into more advanced concepts, such as the differences between the RGB and LAB color models, as well as the process of extracting palettes from images and using them to create unique visual styles.
As we saw in the previous article, some colors and palettes displayed differently than we initially expected. This is due to the fact that we used the simplest tools — the RGB model and Euclidean distance calculation. For more advanced processes, however, we need something a little more sophisticated.
But first, a bit of theory.
The RGB Model
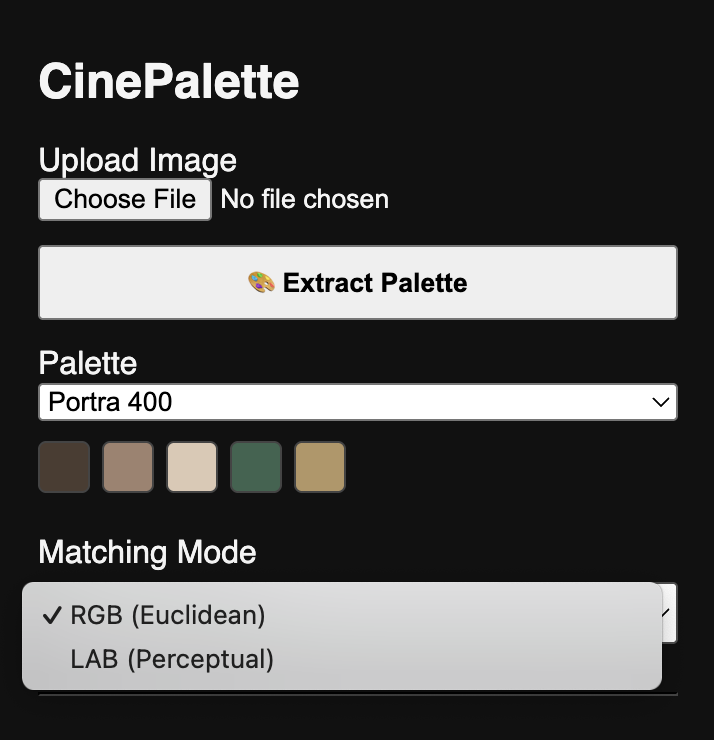
The two most popular color models — RGB and LAB — are fundamentally different in how they represent and process colors.
The RGB model uses the Red, Green, and Blue channels to represent colors. Each channel can have values ranging from 0 to 255, resulting in over 16 million possible colors. This model is ideal for working with images displayed on screens, as computer monitors, TVs, and smartphones all use this model.
RGB Key Features:
- It uses an additive process where colors are created by combining red, green, and blue light.
- It’s simpler to understand and process at the pixel level.
- It’s limited in its ability to represent all colors accurately, as it does not account for human perception of color.
The LAB Model
The LAB model represents color in three channels: L (lightness), A (a color spectrum from green to red), and B (a color spectrum from blue to yellow). This model is closer to how humans perceive color and accounts for both the color and the brightness of an image.
LAB Key Features:
-
The L channel controls the brightness, allowing lightness adjustments without changing the color.
-
The A and B channels describe color hues, allowing more precise control over a wide spectrum of colors.
-
The LAB model is especially useful in professional color grading since it’s more versatile and allows for precise color adjustments without affecting other image parameters.
In the LAB model, brightness is separated from color, making it possible to adjust the visual parameters of an image without impacting its color balance. This results in more accurate and natural color corrections.
Color Calculation Algorithm and Using LAB
To calculate and apply colors, our application utilizes the colorjs.io library, which efficiently works with colors in the LAB model. Integrating this library into the project allows us to perform accurate calculations that help achieve the desired results when processing images.
Here’s an example of the code used in our app to work with colors in the LAB model:
// Sample code for using colorjs.io in LAB model
const findClosestColor = (r, g, b) => {
  if (mode === "lab") {
    const color1 = new Color({ coords: [r / 255, g / 255, b / 255], space: "srgb" }).to("lab");
    let minDist = Infinity;
    let closest = [r, g, b];
    for (let i = 0; i < paletteLAB.length; i++) {
      const color2 = paletteLAB[i];
      const dist = color1.distance(color2);  // Calculating the distance between colors in LAB space
      if (dist < minDist) {
        minDist = dist;
        closest = palette[i];
      }
    }
    return closest;
  } else {
    // RGB calculations
    let minDist = Infinity;
    let closest = [r, g, b];
    for (let [pr, pg, pb] of palette) {
      const dist = Math.sqrt((r - pr) ** 2 + (g - pg) ** 2 + (b - pb) ** 2);
      if (dist < minDist) {
        minDist = dist;
        closest = [pr, pg, pb];
      }
    }
    return closest;
  }
};
This block of code handles the process of finding the closest color in a given palette by calculating the color distance between the target color and the colors in the palette. The calculation method is based on the selected mode, either RGB or LAB.
How This Works in Practice:
-
LAB Mode: The LAB color space is designed to align with human vision, separating brightness (L) from chromatic components (A and B). When matching colors in LAB, the algorithm ensures that the colors are compared in a perceptually accurate manner, meaning it prioritizes how we perceive color differences, not just the mathematical RGB difference.
-
RGB Mode: The RGB color space simply represents color by the intensity of red, green, and blue light. In this mode, the distance is calculated directly based on the color values, which can lead to less perceptual accuracy, as it doesn’t account for human color perception nuances.
In professional color grading and image processing, matching colors based on LAB is highly advantageous because it mimics how the human eye perceives colors, allowing for more natural and visually appealing results. Using this method, the application can achieve better consistency when applying color palettes to images, making it easier to match colors to desired styles.
Optimization Challenge: LAB Computation
Working with the LAB color model requires significantly more computational resources than working with RGB. This is because, in LAB, each color is represented not just by three channels (RGB), but also involves additional calculations to obtain the color coordinates and their distances.
To optimize this process, we introduced palette caching to avoid redundant calculations. Palettes created in LAB mode are stored in memory, and if the image has not changed, the system will not recalculate the palette. This helps to significantly speed up the process, especially when applying palettes to multiple images, by reusing the precomputed data without having to perform the costly calculations again.
// Optimization with palette caching
const extractPalette = () => {
  if (!image || image === lastExtractedImageRef.current) return;  // Check for changes

  const img = new Image();
  img.src = image;
  img.onload = () => {
    const canvas = document.createElement("canvas");
    const ctx = canvas.getContext("2d");
    canvas.width = img.width;
    canvas.height = img.height;
    ctx.drawImage(img, 0, 0);

    const imageData = ctx.getImageData(0, 0, canvas.width, canvas.height).data;
    const colorMap = new Map();

    // Creating a color map
    for (let i = 0; i < imageData.length; i += 4) {
      const key = `${imageData[i]},${imageData[i + 1]},${imageData[i + 2]}`;
      colorMap.set(key, (colorMap.get(key) || 0) + 1);
    }

    const sorted = Array.from(colorMap.entries()).sort((a, b) => b[1] - a[1]);
    const topRaw = sorted.map(([str]) => str.split(",").map(Number));
    const topColors = filterColors(topRaw).slice(0, 10);

    const randomId = Math.floor(10000 + Math.random() * 90000);
    const name = `Palette_${randomId}`;

    setPalettes(prev => ({ ...prev, [name]: topColors }));
    setSelectedPalette(name);
    lastExtractedImageRef.current = image;  // Saving cache
  };
};
This improvement helps speed up the application’s performance, especially when processing multiple similar images repeatedly.
Palette Extraction and Application
Palette extraction is the process of identifying the most characteristic and vibrant colors from an image, which can then be used to create filters or visual styles. We extract the top-10 colors (ensuring diversity) using an algorithm that takes into account both the frequency of color occurrence and its luminance, ensuring that the palette doesn’t include colors that are too similar to each other.
The main mechanism for extracting the palette is as follows:
const extractPalette = () => {
  // Check for image changes
  if (!image || image === lastExtractedImageRef.current) return;

  const img = new Image();
  img.src = image;
  img.onload = () => {
    const canvas = document.createElement("canvas");
    const ctx = canvas.getContext("2d");
    canvas.width = img.width;
    canvas.height = img.height;
    ctx.drawImage(img, 0, 0);

    const imageData = ctx.getImageData(0, 0, canvas.width, canvas.height).data;
    const colorMap = new Map();

    // Counting the frequency of occurrence of each color
    for (let i = 0; i < imageData.length; i += 4) {
      const key = `${imageData[i]},${imageData[i + 1]},${imageData[i + 2]}`;
      colorMap.set(key, (colorMap.get(key) || 0) + 1);
    }

    // Sorting by frequency and filtering similar colors
    const sorted = Array.from(colorMap.entries()).sort((a, b) => b[1] - a[1]);
    const topRaw = sorted.map(([str]) => str.split(",").map(Number));
    const topColors = filterColors(topRaw).slice(0, 10);  // Segmentation and filtering

    const randomId = Math.floor(10000 + Math.random() * 90000);
    const name = `Palette_${randomId}`;

    // Saving the palette
    setPalettes(prev => ({ ...prev, [name]: topColors }));
    setSelectedPalette(name);
    lastExtractedImageRef.current = image;
  };
};
This code is used to extract a palette from an image, where colors are filtered by brightness and difference. With this mechanism, you can quickly gather the most representative colors for further application.
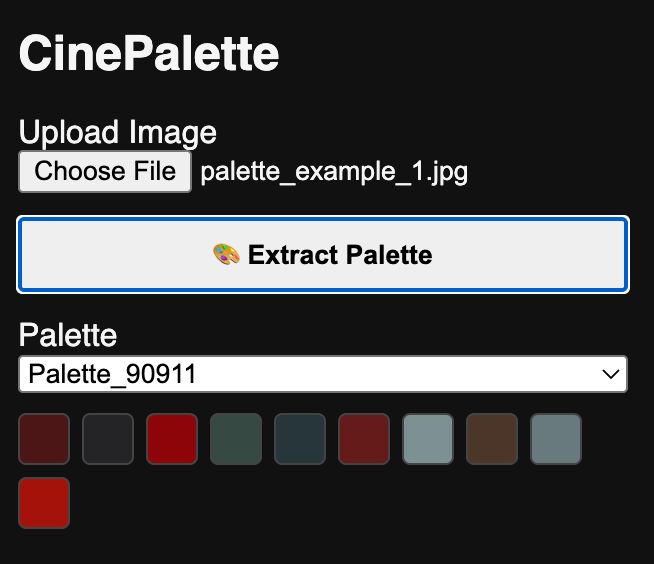
We added automatic name generation for extracted palettes to avoid cluttering the user interface with unnecessary buttons.
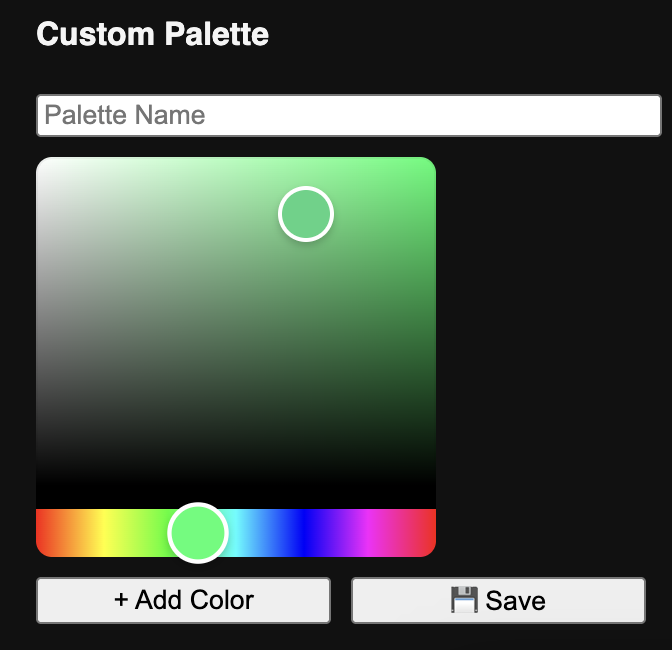
Custom Palettes
One of the tools in our application is the custom palette creation block. This feature allows users to create palettes suitable for various projects, providing full control over colors.
The process starts with selecting a color through the HexColorPicker interface. The user can choose a color from the image or an external source. Each selected color is automatically added to the user’s color list, from which a palette is created.
After selecting a few colors, the palette can be saved with a custom name. Later, it can be applied to the uploaded image to achieve a specific visual style.
Color Neutralization with Color Palettes
Color neutralization is an important aspect of color grading and plays a critical role in film post-production. It is the process where individual scenes or shots, taken under different lighting conditions, can be brought to a common color tone. This is usually done to ensure a unified visual style throughout the film and to make the scenes visually consistent, regardless of the shooting conditions.
Let’s explore how palettes are applied through two iconic examples of cinematic visual language.
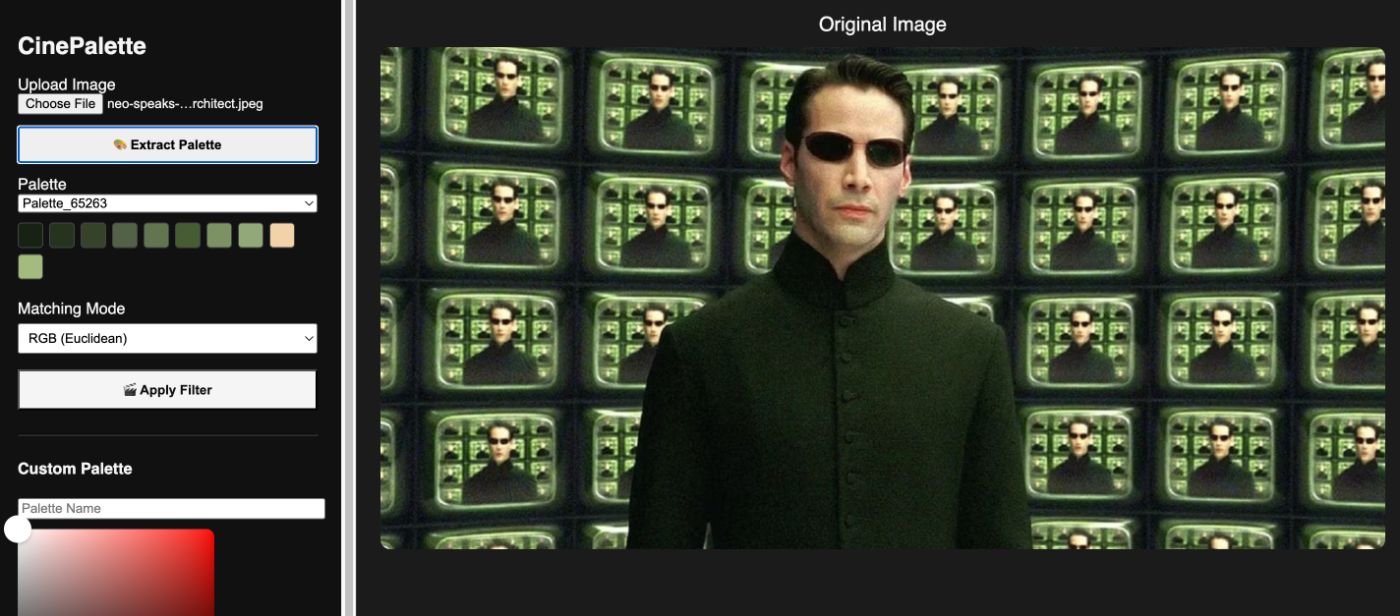
Palettes in the Movie “The Matrix”
The film “The Matrix” (1999), directed by the Wachowski siblings, became iconic due to its unique visual style, which includes a specific greenish color palette. This color style was designed to visualize the digital reality in which the main characters exist. The visual effects of the film were created to convey the feeling of virtuality, where cold and mechanical colors dominate.
Main Colors: Green, black, metallic.
Palette Application:
-
Extracting Green Tones: To create a Matrix-style palette, we can extract all shades of green, black, and gray from the image. By applying these tones, we can achieve the “digital reality” effect characteristic of the movie.
In our app, this can be done by filtering by brightness and distance, keeping only the green shades and ignoring others.
-
Applying to New Images: When we apply this palette, the image colors will change, replacing all pixels with those closest to the selected colors from the palette, thus creating the desired “coded” style.
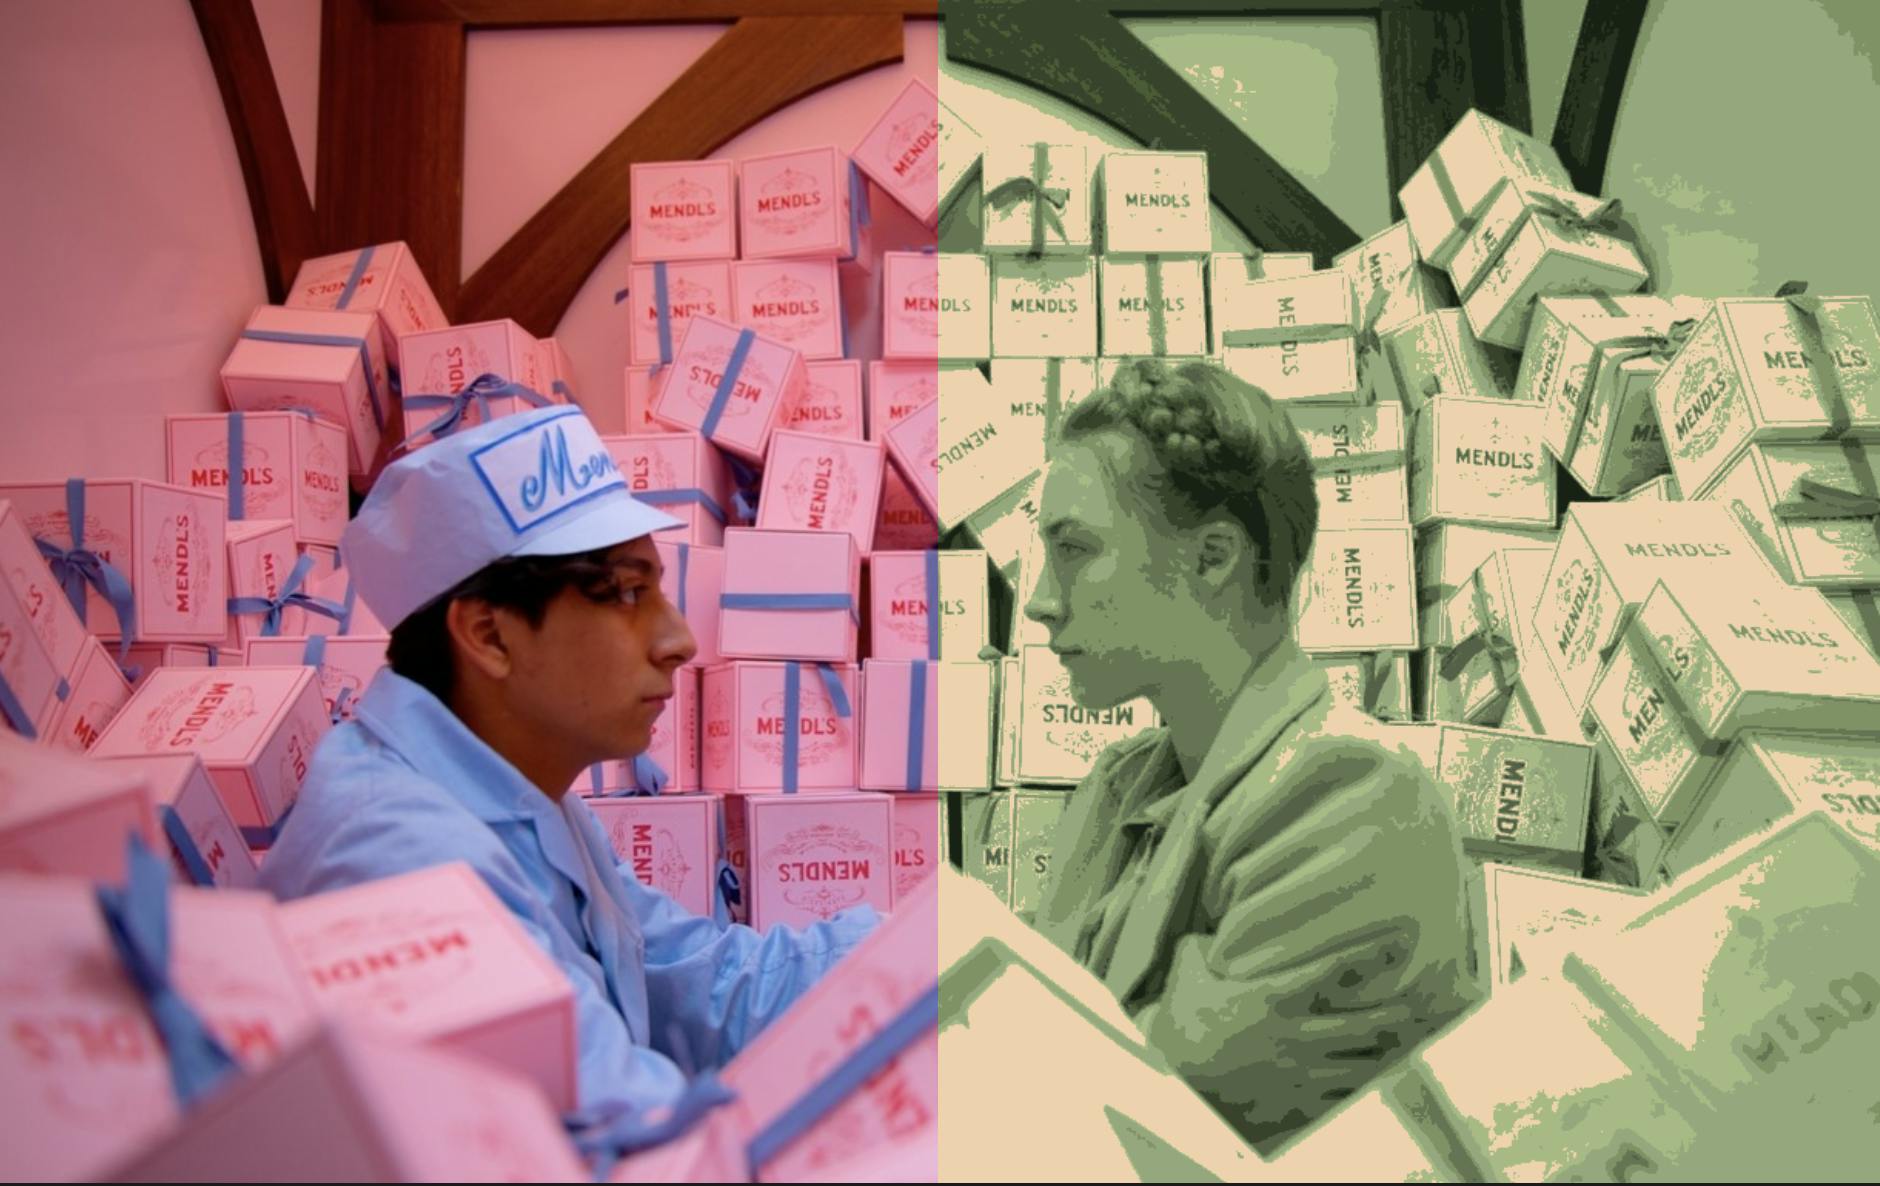
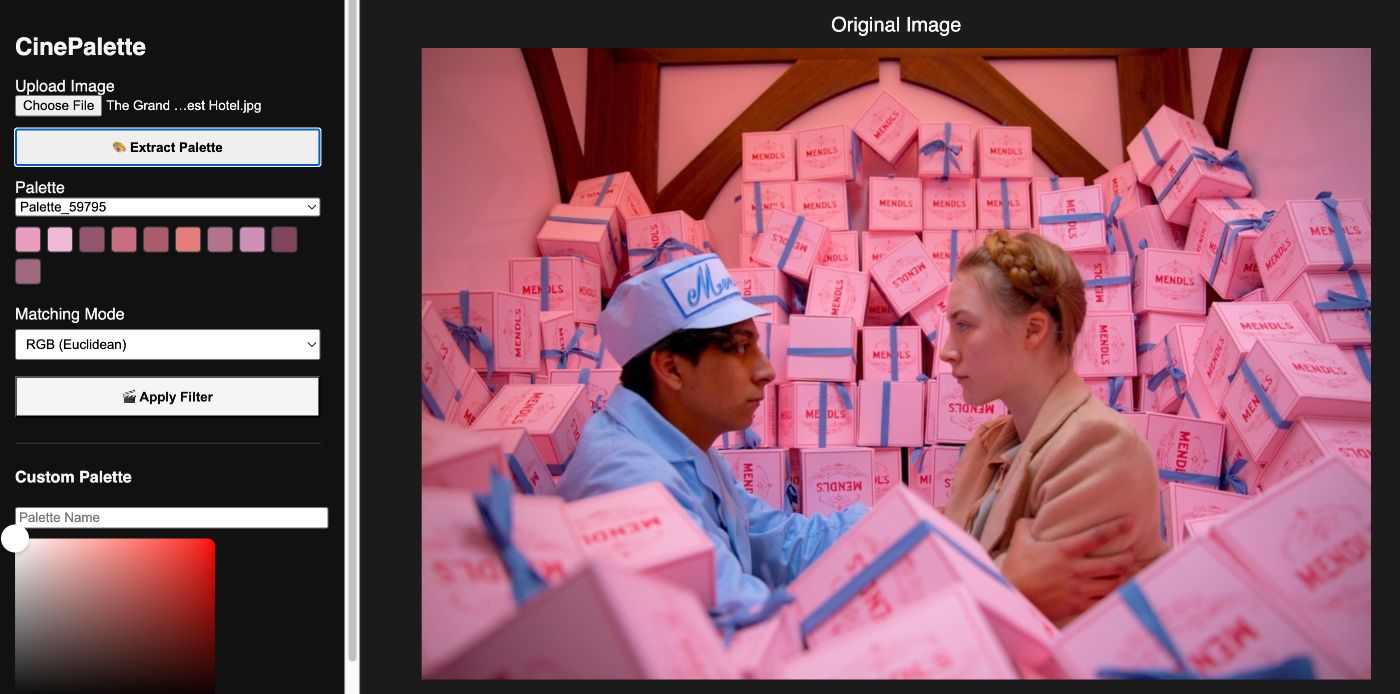
Palettes in Wes Anderson’s Works
Wes Anderson is known for his vivid, colorful, and symmetrical visual solutions. His works, such as “The Grand Budapest Hotel”, “Moonrise Kingdom”, and “The French Dispatch”, all have his signature style, which features rich pastel colors and carefully selected palettes. One key element of his films is the harmony and contrast in color design.
Main Colors: Pastel shades, bright contrasting colors, red, yellow, turquoise, green.
Palette Application:
-
Extracting Pastel Shades: In Wes Anderson’s films, pastel colors are often used. For example, light pink, blue, and orange tones. We can extract these colors and apply them to a new image to create an effect resembling vintage photography or to emphasize a stylized atmosphere.
In our app, we can extract the palette from an image by filtering colors by brightness and contrast, preserving only the soft pastel shades.
-
Applying to New Images: After the palette is extracted, it can be applied to any image, giving it the characteristic look reminiscent of Anderson’s works, with bright yet harmonious colors.
Now that we can extract palettes from references, it’s time for some experimentation!
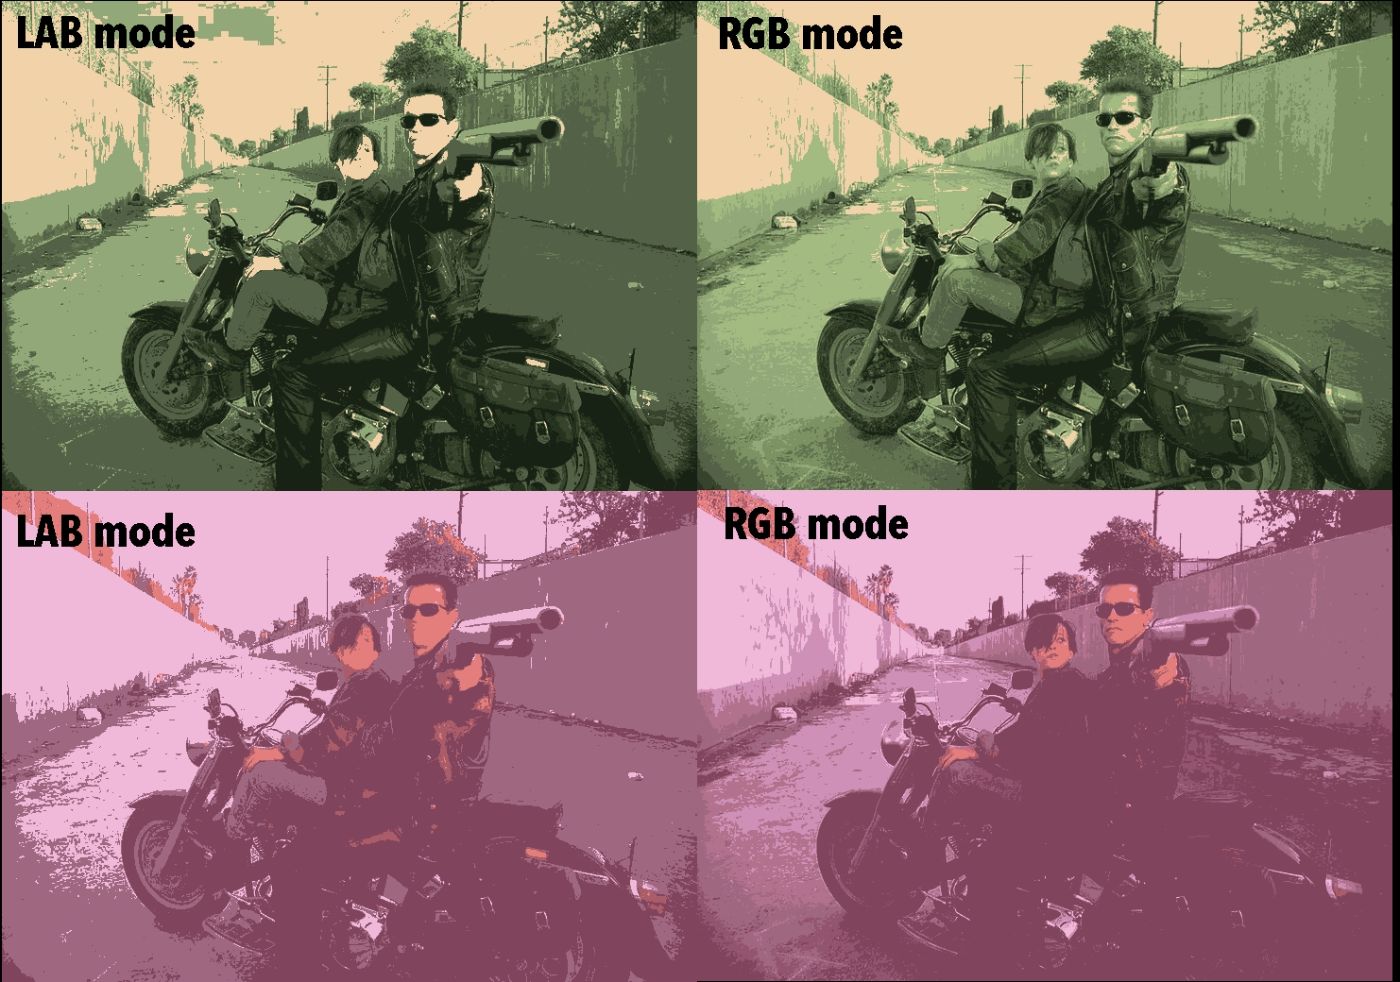
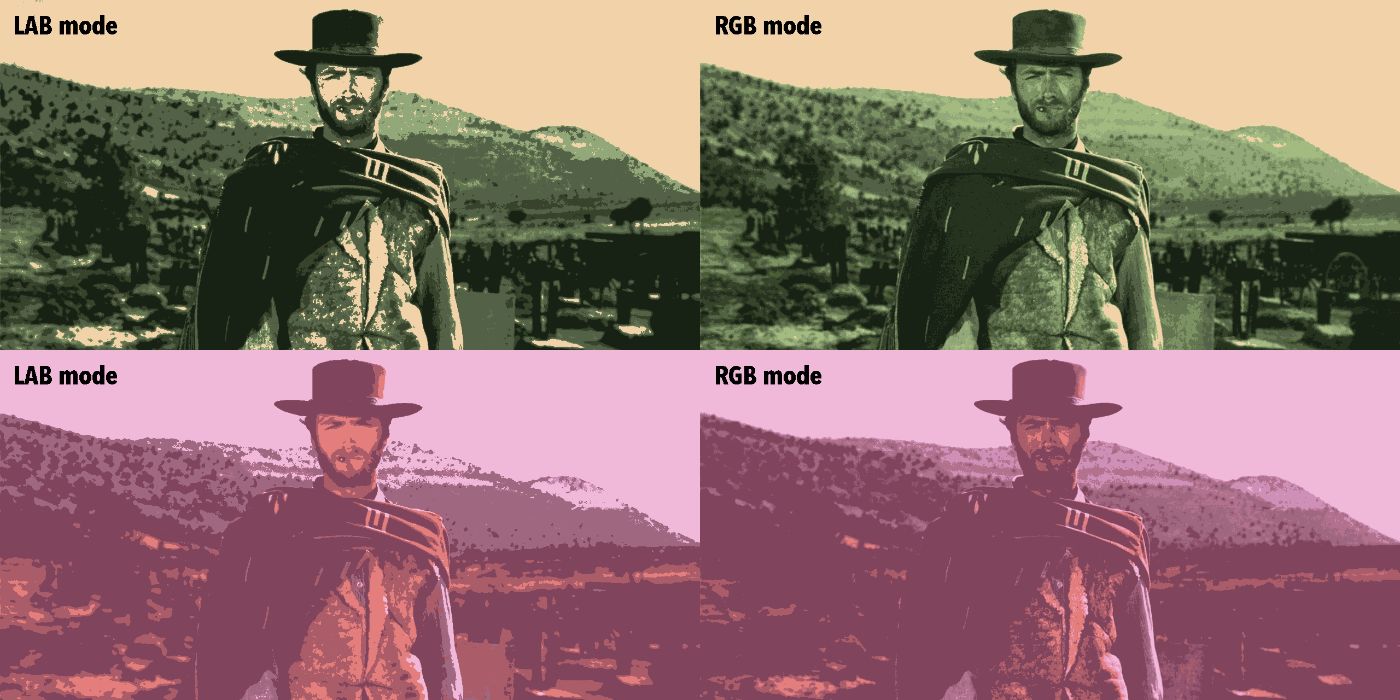
Since we are using palettes limited in the number of colors and running our application in the browser (which means using limited computational resources), we shouldn’t expect outstanding results. However, this is enough to demonstrate the core principles of how palettes work in color grading.
Here are examples of processed images in both RGB and LAB modes.
Extracting and applying palettes is a crucial aspect of creating visual styles, such as the “Matrix” style, Wes Anderson’s, or Denis Villeneuve’s. Our app provides a visual tool for working with colors that allows users to extract palettes, apply them, and create unique visual effects. With it, you can easily stylize images and create visual looks similar to those seen in popular films.
In the final part, we will focus on fine-tuning and optimizing colors.
[story continues]
tags