1. Introduction
The project is a simple example showcasing a quick way to set up an Arduino with a USB Host Shield as a USB CDC Host capable of communicating with the BleuIO Dongle.
When a BleuIO Dongle is connected to the USB port, the BleuIO Dongle will start advertising. It will then act as a terminal, taking input and sending data to the Arduino Virtual Com Port.
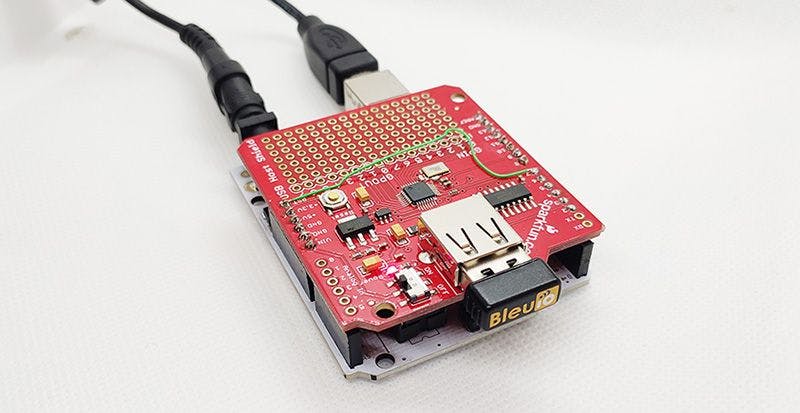
We have used an Arduino Uno Rev. 3 with SparkFun's USB Host Shield (DEV-09947) for this example.
2. About the Code
You can get project HERE
This project is based on the 'acm_terminal' example in the Host USB Shield Library 2.0
The largest possible max.packet size for the function Acm.RcvData() is 64 bytes, so to accommodate the amount of data we will receive, we are using three buffers to receive the data from the BleuIO Dongle.
If the buffers have received any data, we print it out to the serial terminal connected to the Virtual COM Port.
void loop()
{
    Usb.Task();

    if( Acm.isReady()) {
       uint8_t rcode;
       uint8_t rcode2;
       uint8_t rcode3;

       /* reading the keyboard */
       if(Serial.available()) {
         uint8_t data= Serial.read();
         /* sending to the BleuIO Dongle */
         rcode = Acm.SndData(1, &data);
         if (rcode)
            ErrorMessage<uint8_t>(PSTR("SndData"), rcode);
       }//if(Serial.available()...

        if(start_flag == 0x00)
        {
            rcode = Acm.SndData(strlen((char *)START_CMDS), (uint8_t *)START_CMDS);
            if (rcode)
            {
                ErrorMessage<uint8_t>(PSTR("SndData"), rcode);
            }

          start_flag = 0x01;
        }
        /* reading the BleuIO Dongle */
        uint8_t  buf[64];
        uint16_t rcvd = 64;
        uint8_t  buf2[64];
        uint16_t rcvd2 = 64;
        uint8_t  buf3[64];
        uint16_t rcvd3 = 64;
        uint8_t  dongle_input[3*64];
        uint16_t input_indx = 0;

        memset(dongle_input, 0, sizeof(dongle_input));

        rcode = Acm.RcvData(&rcvd, buf);
        delay(1);
        rcode2 = Acm.RcvData(&rcvd2, buf2);
        delay(1);
        rcode3 = Acm.RcvData(&rcvd3, buf3);
         if (rcode && rcode != hrNAK)
         {
            ErrorMessage<uint8_t>(PSTR("Ret"), rcode);
         }

         if (rcode2 && rcode2 != hrNAK)
         {
             ErrorMessage<uint8_t>(PSTR("Ret"), rcode2);
         }

         if (rcode3 && rcode3 != hrNAK)
         {
             ErrorMessage<uint8_t>(PSTR("Ret"), rcode3);
         }


            if( rcvd ) { //more than zero bytes received
              for(uint16_t i=0; i < rcvd; i++ ) {
                Serial.print((char)buf[i]); //printing on the screen
                dongle_input[input_indx] = buf[i];
                input_indx++;
              }
            }

            if( rcvd2 ) { //more than zero bytes received
              for(uint16_t i=0; i < rcvd2; i++ ) {
                Serial.print((char)buf2[i]); //printing on the screen
                dongle_input[input_indx] = buf2[i];
                input_indx++;
              }
            }

            if( rcvd3 ) { //more than zero bytes received
              for(uint16_t i=0; i < rcvd3; i++ ) {
                Serial.print((char)buf3[i]); //printing on the screen
                dongle_input[input_indx] = buf3[i];
                input_indx++;
              }
            }
            dongle_input[input_indx] = 0x00;

            // Example on a way for the Arduino to react to BleuIO events
            if(strlen((char *)dongle_input) != 0)
            {
              if(strstr((char *)dongle_input, "handle_evt_gap_connected") != NULL)
              {
                Serial.print("<<CONNECTION DETECTED!>>");
              }
              else if(strstr((char *)dongle_input, "handle_evt_gap_disconnected") != NULL)
              {
                Serial.print("<<CONNECTION LOST!>>");
              }
            }
    }//if( Usb.getUsbTaskState() == USB_STATE_RUNNING..
}
We also store the latest data from the dongle into the dongle_input buffer and run it through a simple "parser" to showcase an easy way of how you can react to events and have the Arduino do something.
In this example, we are explicitly looking for BLE connection or disconnect events. When found, we just print out "<<CONNECTION DETECTED!>>" or "<<CONNECTION LOST!>>" to the terminal.
3. Using the example project
3.1 What you will need
- A BleuIO dongle with firmware version 2.1.0 or later (https://www.bleuio.com/getting_started/docs/release_history/#release-v210)
- An Arduino Uno Rev. 3 (https://store.arduino.cc/products/arduino-uno-rev3)
- An USB Host Shield (https://www.sparkfun.com/products/9947)
- The Arduino IDE (https://www.arduino.cc/en/software)
3.2 Requirments for the SparkFun board
- With the SparkFun board, it seems like you MUST supply external power on Vin or the barrel jack. 5V from the USB cable did not work.
- You must also apply a jumper from pin D7 to RESET.
4. How to setup project
4.1 Downloading the project from GitHub
Get project HERE
https://github.com/smart-sensor-devices-ab/arduino_bleuio_example
Either clone the project, or download it as a zip file and unzip it, into your Arduino folder.
4.2 Downloading the USB Host Shield Library 2.0
Either download the Library from Here (https://felis.github.io/USB_Host_Shield_2.0/) and place the folder into your libraries folder inside your Arduino folder.
(For information on installing libraries, see: http://www.arduino.cc/en/Guide/Libraries)
Or download it through the Arduino IDE:
-
In Arduino IDE choose Sketch>Include Library>Manage Library
-
Search for USB Host Shield Library 2.0 and click 'Install'
5. Running the example
-
In Arduino IDE click the upload button to upload the project to your Arduino.
-
Open up the 'Arduino Uno Viritual COM Port' with a serial terminal emulation program like TeraTerm, Putty or CoolTerm.
Serial port Setup:
Baudrate: 115200
Data Bits: 8
Parity: None
Stop Bits: 1
Flow Control: None
-
Or inside the Arduino IDE open up Arduino Monitor and in the bottom right corner select 'Carriage Return' and '115200 baud'
-
You should see the word 'Start' and then see the dongle running two commands: setting response data and starting the advertising. You can now type commands to the dongle.